Table of Contents
- 6.1 General Security Issues
- 6.2 The MySQL Access Privilege System
- 6.3 MySQL User Account Management
- 6.3.1 User Names and Passwords
- 6.3.2 Adding User Accounts
- 6.3.3 Removing User Accounts
- 6.3.4 Reserved User Accounts
- 6.3.5 Setting Account Resource Limits
- 6.3.6 Assigning Account Passwords
- 6.3.7 Password Management
- 6.3.8 Password Expiration and Sandbox Mode
- 6.3.9 Pluggable Authentication
- 6.3.10 Proxy Users
- 6.3.11 User Account Locking
- 6.3.12 SQL-Based MySQL Account Activity Auditing
- 6.4 Using Encrypted Connections
- 6.4.1 Configuring MySQL to Use Encrypted Connections
- 6.4.2 Command Options for Encrypted Connections
- 6.4.3 Creating SSL and RSA Certificates and Keys
- 6.4.4 OpenSSL Versus yaSSL
- 6.4.5 Building MySQL with Support for Encrypted Connections
- 6.4.6 Encrypted Connection Protocols and Ciphers
- 6.4.7 Connecting to MySQL Remotely from Windows with SSH
- 6.5 Security Plugins
When thinking about security within a MySQL installation, you should consider a wide range of possible topics and how they affect the security of your MySQL server and related applications:
General factors that affect security. These include choosing good passwords, not granting unnecessary privileges to users, ensuring application security by preventing SQL injections and data corruption, and others. See Section 6.1, “General Security Issues”.
Security of the installation itself. The data files, log files, and the all the application files of your installation should be protected to ensure that they are not readable or writable by unauthorized parties. For more information, see Section 2.10, “Postinstallation Setup and Testing”.
Access control and security within the database system itself, including the users and databases granted with access to the databases, views and stored programs in use within the database. For more information, see Section 6.2, “The MySQL Access Privilege System”, and Section 6.3, “MySQL User Account Management”.
The features offered by security-related plugins. See Section 6.5, “Security Plugins”.
Network security of MySQL and your system. The security is related to the grants for individual users, but you may also wish to restrict MySQL so that it is available only locally on the MySQL server host, or to a limited set of other hosts.
Ensure that you have adequate and appropriate backups of your database files, configuration and log files. Also be sure that you have a recovery solution in place and test that you are able to successfully recover the information from your backups. See Chapter 7, Backup and Recovery.
This section describes general security issues to be aware of and what you can do to make your MySQL installation more secure against attack or misuse. For information specifically about the access control system that MySQL uses for setting up user accounts and checking database access, see Section 2.10, “Postinstallation Setup and Testing”.
For answers to some questions that are often asked about MySQL Server security issues, see Section A.9, “MySQL 5.7 FAQ: Security”.
Anyone using MySQL on a computer connected to the Internet should read this section to avoid the most common security mistakes.
In discussing security, it is necessary to consider fully protecting the entire server host (not just the MySQL server) against all types of applicable attacks: eavesdropping, altering, playback, and denial of service. We do not cover all aspects of availability and fault tolerance here.
MySQL uses security based on Access Control Lists (ACLs) for all connections, queries, and other operations that users can attempt to perform. There is also support for SSL-encrypted connections between MySQL clients and servers. Many of the concepts discussed here are not specific to MySQL at all; the same general ideas apply to almost all applications.
When running MySQL, follow these guidelines:
Do not ever give anyone (except MySQL
rootaccounts) access to theusertable in themysqldatabase! This is critical.Learn how the MySQL access privilege system works (see Section 6.2, “The MySQL Access Privilege System”). Use the
GRANTandREVOKEstatements to control access to MySQL. Do not grant more privileges than necessary. Never grant privileges to all hosts.Checklist:
Try
mysql -u root. If you are able to connect successfully to the server without being asked for a password, anyone can connect to your MySQL server as the MySQLrootuser with full privileges! Review the MySQL installation instructions, paying particular attention to the information about setting arootpassword. See Section 2.10.4, “Securing the Initial MySQL Accounts”.Use the
SHOW GRANTSstatement to check which accounts have access to what. Then use theREVOKEstatement to remove those privileges that are not necessary.
Do not store cleartext passwords in your database. If your computer becomes compromised, the intruder can take the full list of passwords and use them. Instead, use
SHA2()or some other one-way hashing function and store the hash value.To prevent password recovery using rainbow tables, do not use these functions on a plain password; instead, choose some string to be used as a salt, and use hash(hash(password)+salt) values.
Do not choose passwords from dictionaries. Special programs exist to break passwords. Even passwords like “xfish98” are very bad. Much better is “duag98” which contains the same word “fish” but typed one key to the left on a standard QWERTY keyboard. Another method is to use a password that is taken from the first characters of each word in a sentence (for example, “Four score and seven years ago” results in a password of “Fsasya”). The password is easy to remember and type, but difficult to guess for someone who does not know the sentence. In this case, you can additionally substitute digits for the number words to obtain the phrase “4 score and 7 years ago”, yielding the password “4sa7ya” which is even more difficult to guess.
Invest in a firewall. This protects you from at least 50% of all types of exploits in any software. Put MySQL behind the firewall or in a demilitarized zone (DMZ).
Checklist:
Try to scan your ports from the Internet using a tool such as
nmap. MySQL uses port 3306 by default. This port should not be accessible from untrusted hosts. As a simple way to check whether your MySQL port is open, try the following command from some remote machine, whereserver_hostis the host name or IP address of the host on which your MySQL server runs:shell>
telnetserver_host3306If telnet hangs or the connection is refused, the port is blocked, which is how you want it to be. If you get a connection and some garbage characters, the port is open, and should be closed on your firewall or router, unless you really have a good reason to keep it open.
Applications that access MySQL should not trust any data entered by users, and should be written using proper defensive programming techniques. See Section 6.1.7, “Client Programming Security Guidelines”.
Do not transmit plain (unencrypted) data over the Internet. This information is accessible to everyone who has the time and ability to intercept it and use it for their own purposes. Instead, use an encrypted protocol such as SSL or SSH. MySQL supports internal SSL connections. Another technique is to use SSH port-forwarding to create an encrypted (and compressed) tunnel for the communication.
Learn to use the tcpdump and strings utilities. In most cases, you can check whether MySQL data streams are unencrypted by issuing a command like the following:
shell>
tcpdump -l -i eth0 -w - src or dst port 3306 | stringsThis works under Linux and should work with small modifications under other systems.
WarningIf you do not see cleartext data, this does not always mean that the information actually is encrypted. If you need high security, consult with a security expert.
Passwords occur in several contexts within MySQL. The following sections provide guidelines that enable end users and administrators to keep these passwords secure and avoid exposing them. There is also a discussion of how MySQL uses password hashing internally and of a plugin that you can use to enforce stricter passwords.
MySQL users should use the following guidelines to keep passwords secure.
When you run a client program to connect to the MySQL server, it is inadvisable to specify your password in a way that exposes it to discovery by other users. The methods you can use to specify your password when you run client programs are listed here, along with an assessment of the risks of each method. In short, the safest methods are to have the client program prompt for the password or to specify the password in a properly protected option file.
Use the mysql_config_editor utility, which enables you to store authentication credentials in an encrypted login path file named
.mylogin.cnf. The file can be read later by MySQL client programs to obtain authentication credentials for connecting to MySQL Server. See Section 4.6.6, “mysql_config_editor — MySQL Configuration Utility”.Use a
-poryour_pass--password=option on the command line. For example:your_passshell>
mysql -u francis -pfrankdb_nameWarningThis is convenient but insecure. On some systems, your password becomes visible to system status programs such as ps that may be invoked by other users to display command lines. MySQL clients typically overwrite the command-line password argument with zeros during their initialization sequence. However, there is still a brief interval during which the value is visible. Also, on some systems this overwriting strategy is ineffective and the password remains visible to ps. (SystemV Unix systems and perhaps others are subject to this problem.)
If your operating environment is set up to display your current command in the title bar of your terminal window, the password remains visible as long as the command is running, even if the command has scrolled out of view in the window content area.
Use the
-por--passwordoption on the command line with no password value specified. In this case, the client program solicits the password interactively:shell>
mysql -u francis -pEnter password: ********db_nameThe
*characters indicate where you enter your password. The password is not displayed as you enter it.It is more secure to enter your password this way than to specify it on the command line because it is not visible to other users. However, this method of entering a password is suitable only for programs that you run interactively. If you want to invoke a client from a script that runs noninteractively, there is no opportunity to enter the password from the keyboard. On some systems, you may even find that the first line of your script is read and interpreted (incorrectly) as your password.
Store your password in an option file. For example, on Unix, you can list your password in the
[client]section of the.my.cnffile in your home directory:[client] password=your_pass
To keep the password safe, the file should not be accessible to anyone but yourself. To ensure this, set the file access mode to
400or600. For example:shell>
chmod 600 .my.cnfTo name from the command line a specific option file containing the password, use the
--defaults-file=option, wherefile_namefile_nameis the full path name to the file. For example:shell>
mysql --defaults-file=/home/francis/mysql-optsSection 4.2.6, “Using Option Files”, discusses option files in more detail.
Store your password in the
MYSQL_PWDenvironment variable. See Section 4.9, “MySQL Program Environment Variables”.This method of specifying your MySQL password must be considered extremely insecure and should not be used. Some versions of ps include an option to display the environment of running processes. On some systems, if you set
MYSQL_PWD, your password is exposed to any other user who runs ps. Even on systems without such a version of ps, it is unwise to assume that there are no other methods by which users can examine process environments.
On Unix, the mysql client writes a record of
executed statements to a history file (see
Section 4.5.1.3, “mysql Logging”). By default, this file is named
.mysql_history and is created in your home
directory. Passwords can be written as plain text in SQL
statements such as CREATE USER
and ALTER USER, so if you use
these statements, they are logged in the history file. To keep
this file safe, use a restrictive access mode, the same way as
described earlier for the .my.cnf file.
If your command interpreter is configured to maintain a history,
any file in which the commands are saved will contain MySQL
passwords entered on the command line. For example,
bash uses
~/.bash_history. Any such file should have
a restrictive access mode.
Database administrators should use the following guidelines to keep passwords secure.
MySQL stores passwords for user accounts in the
mysql.user table. Access to this table should
never be granted to any nonadministrative accounts.
Account passwords can be expired so that users must reset them. See Section 6.3.7, “Password Management”, and Section 6.3.8, “Password Expiration and Sandbox Mode”.
The validate_password plugin can be used to
enforce a policy on acceptable password. See
Section 6.5.3, “The Password Validation Plugin”.
A user who has access to modify the plugin directory (the value
of the plugin_dir system
variable) or the my.cnf file that specifies
the plugin directory location can replace plugins and modify the
capabilities provided by plugins, including authentication
plugins.
Files such as log files to which passwords might be written should be protected. See Section 6.1.2.3, “Passwords and Logging”.
Passwords can be written as plain text in SQL statements such as
CREATE USER,
GRANT, SET
PASSWORD, and statements that invoke the
PASSWORD() function. If such
statements are logged by the MySQL server as written, passwords
in them become visible to anyone with access to the logs.
Statement logging avoids writing passwords in cleartext for the following statements:
CREATE USER ... IDENTIFIED BY ... ALTER USER ... IDENTIFIED BY ... GRANT ... IDENTIFIED BY ... SET PASSWORD ... SLAVE START ... PASSWORD = ... CREATE SERVER ... OPTIONS(... PASSWORD ...) ALTER SERVER ... OPTIONS(... PASSWORD ...)
Passwords in those statements are rewritten to not appear
literally in statement text written to the general query log,
slow query log, and binary log. Rewriting does not apply to
other statements. In particular,
INSERT or
UPDATE statements for the
mysql.user table that refer to literal
passwords are logged as is, so you should avoid such statements.
(Direct modification of grant tables is discouraged, anyway.)
For the general query log, password rewriting can be suppressed
by starting the server with the
--log-raw option. For security
reasons, this option is not recommended for production use. For
diagnostic purposes, it may be useful to see the exact text of
statements as received by the server.
Contents of the audit log file produced by the audit log plugin are not encrypted. For security reasons, this file should be written to a directory accessible only to the MySQL server and users with a legitimate reason to view the log. See Section 6.5.5.3, “MySQL Enterprise Audit Security Considerations”.
Statements received by the server may be rewritten if a query
rewrite plugin is installed (see
Query Rewrite Plugins). In this case, the
--log-raw option affects
statement logging as follows:
An implication of password rewriting is that statements that
cannot be parsed (due, for example, to syntax errors) are not
written to the general query log because they cannot be known to
be password free. Use cases that require logging of all
statements including those with errors should use the
--log-raw option, bearing in mind
that this also bypasses password rewriting.
Password rewriting occurs only when plain text passwords are expected. For statements with syntax that expect a password hash value, no rewriting occurs. If a plain text password is supplied erroneously for such syntax, the password is logged as given, without rewriting. For example, the following statement is logged as shown because a password hash value is expected:
CREATE USER 'user1'@'localhost' IDENTIFIED BY PASSWORD 'not-so-secret';
To guard log files against unwarranted exposure, locate them in
a directory that restricts access to the server and the database
administrator. If the server logs to tables in the
mysql database, grant access to those tables
only to the database administrator.
Replication slaves store the password for the replication master
in the master info repository, which can be either a file or a
table (see Section 16.2.4, “Replication Relay and Status Logs”). Ensure that the
repository can be accessed only by the database administrator.
An alternative to storing the password in a file is to use the
START SLAVE statement to specify
credentials for connecting to the master.
Use a restricted access mode to protect database backups that include log tables or log files containing passwords.
The information in this section applies fully only before
MySQL 5.7.5, and only for accounts that use the
mysql_native_password or
mysql_old_password authentication plugins.
Support for pre-4.1 password hashes was removed in MySQL
5.7.5. This includes removal of the
mysql_old_password authentication plugin
and the OLD_PASSWORD()
function. Also, secure_auth
cannot be disabled, and
old_passwords cannot be set
to 1.
As of MySQL 5.7.5, only the information about 4.1 password
hashes and the mysql_native_password
authentication plugin remains relevant.
MySQL lists user accounts in the user table
of the mysql database. Each MySQL account can
be assigned a password, although the user
table does not store the cleartext version of the password, but
a hash value computed from it.
MySQL uses passwords in two phases of client/server communication:
When a client attempts to connect to the server, there is an initial authentication step in which the client must present a password that has a hash value matching the hash value stored in the
usertable for the account the client wants to use.After the client connects, it can (if it has sufficient privileges) set or change the password hash for accounts listed in the
usertable. The client can do this by using thePASSWORD()function to generate a password hash, or by using a password-generating statement (CREATE USER,GRANT, orSET PASSWORD).
In other words, the server checks hash
values during authentication when a client first attempts to
connect. The server generates hash values
if a connected client invokes the
PASSWORD() function or uses a
password-generating statement to set or change a password.
Password hashing methods in MySQL have the history described
following. These changes are illustrated by changes in the
result from the PASSWORD()
function that computes password hash values and in the structure
of the user table where passwords are stored.
The Original (Pre-4.1) Hashing Method
The original hashing method produced a 16-byte string. Such hashes look like this:
mysql> SELECT PASSWORD('mypass');
+--------------------+
| PASSWORD('mypass') |
+--------------------+
| 6f8c114b58f2ce9e |
+--------------------+
To store account passwords, the Password
column of the user table was at this point 16
bytes long.
The 4.1 Hashing Method
MySQL 4.1 introduced password hashing that provided better security and reduced the risk of passwords being intercepted. There were several aspects to this change:
Different format of password values produced by the
PASSWORD()functionWidening of the
PasswordcolumnControl over the default hashing method
Control over the permitted hashing methods for clients attempting to connect to the server
The changes in MySQL 4.1 took place in two stages:
MySQL 4.1.0 used a preliminary version of the 4.1 hashing method. This method was short lived and the following discussion says nothing more about it.
In MySQL 4.1.1, the hashing method was modified to produce a longer 41-byte hash value:
mysql>
SELECT PASSWORD('mypass');+-------------------------------------------+ | PASSWORD('mypass') | +-------------------------------------------+ | *6C8989366EAF75BB670AD8EA7A7FC1176A95CEF4 | +-------------------------------------------+The longer password hash format has better cryptographic properties, and client authentication based on long hashes is more secure than that based on the older short hashes.
To accommodate longer password hashes, the
Passwordcolumn in theusertable was changed at this point to be 41 bytes, its current length.A widened
Passwordcolumn can store password hashes in both the pre-4.1 and 4.1 formats. The format of any given hash value can be determined two ways:The length: 4.1 and pre-4.1 hashes are 41 and 16 bytes, respectively.
Password hashes in the 4.1 format always begin with a
*character, whereas passwords in the pre-4.1 format never do.
To permit explicit generation of pre-4.1 password hashes, two additional changes were made:
The
OLD_PASSWORD()function was added, which returns hash values in the 16-byte format.For compatibility purposes, the
old_passwordssystem variable was added, to enable DBAs and applications control over the hashing method. The defaultold_passwordsvalue of 0 causes hashing to use the 4.1 method (41-byte hash values), but settingold_passwords=1causes hashing to use the pre-4.1 method. In this case,PASSWORD()produces 16-byte values and is equivalent toOLD_PASSWORD()
To permit DBAs control over how clients are permitted to connect, the
secure_authsystem variable was added. Starting the server with this variable disabled or enabled permits or prohibits clients to connect using the older pre-4.1 password hashing method. Before MySQL 5.6.5,secure_authis disabled by default. As of 5.6.5,secure_authis enabled by default to promote a more secure default configuration DBAs can disable it at their discretion, but this is not recommended, and pre-4.1 password hashes are deprecated and should be avoided. (For account upgrade instructions, see Section 6.5.1.3, “Migrating Away from Pre-4.1 Password Hashing and the mysql_old_password Plugin”.)In addition, the mysql client supports a
--secure-authoption that is analogous tosecure_auth, but from the client side. It can be used to prevent connections to less secure accounts that use pre-4.1 password hashing. This option is disabled by default before MySQL 5.6.7, enabled thereafter.
Compatibility Issues Related to Hashing Methods
The widening of the Password column in MySQL
4.1 from 16 bytes to 41 bytes affects installation or upgrade
operations as follows:
If you perform a new installation of MySQL, the
Passwordcolumn is made 41 bytes long automatically.Upgrades from MySQL 4.1 or later to current versions of MySQL should not give rise to any issues in regard to the
Passwordcolumn because both versions use the same column length and password hashing method.For upgrades from a pre-4.1 release to 4.1 or later, you must upgrade the system tables after upgrading. (See Section 4.4.7, “mysql_upgrade — Check and Upgrade MySQL Tables”.)
The 4.1 hashing method is understood only by MySQL 4.1 (and higher) servers and clients, which can result in some compatibility problems. A 4.1 or higher client can connect to a pre-4.1 server, because the client understands both the pre-4.1 and 4.1 password hashing methods. However, a pre-4.1 client that attempts to connect to a 4.1 or higher server may run into difficulties. For example, a 4.0 mysql client may fail with the following error message:
shell> mysql -h localhost -u root
Client does not support authentication protocol requested
by server; consider upgrading MySQL client
This phenomenon also occurs for attempts to use the older PHP
mysql extension after upgrading to MySQL 4.1
or higher. (See Common Problems with MySQL and PHP.)
The following discussion describes the differences between the pre-4.1 and 4.1 hashing methods, and what you should do if you upgrade your server but need to maintain backward compatibility with pre-4.1 clients. (However, permitting connections by old clients is not recommended and should be avoided if possible.) This information is of particular importance to PHP programmers migrating MySQL databases from versions older than 4.1 to 4.1 or higher.
The differences between short and long password hashes are relevant both for how the server uses passwords during authentication and for how it generates password hashes for connected clients that perform password-changing operations.
The way in which the server uses password hashes during
authentication is affected by the width of the
Password column:
If the column is short, only short-hash authentication is used.
If the column is long, it can hold either short or long hashes, and the server can use either format:
Pre-4.1 clients can connect, but because they know only about the pre-4.1 hashing method, they can authenticate only using accounts that have short hashes.
4.1 and later clients can authenticate using accounts that have short or long hashes.
Even for short-hash accounts, the authentication process is actually a bit more secure for 4.1 and later clients than for older clients. In terms of security, the gradient from least to most secure is:
Pre-4.1 client authenticating with short password hash
4.1 or later client authenticating with short password hash
4.1 or later client authenticating with long password hash
The way in which the server generates password hashes for
connected clients is affected by the width of the
Password column and by the
old_passwords system variable.
A 4.1 or later server generates long hashes only if certain
conditions are met: The Password column must
be wide enough to hold long values and
old_passwords must not be set
to 1.
Those conditions apply as follows:
The
Passwordcolumn must be wide enough to hold long hashes (41 bytes). If the column has not been updated and still has the pre-4.1 width of 16 bytes, the server notices that long hashes cannot fit into it and generates only short hashes when a client performs password-changing operations using thePASSWORD()function or a password-generating statement. This is the behavior that occurs if you have upgraded from a version of MySQL older than 4.1 to 4.1 or later but have not yet run the mysql_upgrade program to widen thePasswordcolumn.If the
Passwordcolumn is wide, it can store either short or long password hashes. In this case, thePASSWORD()function and password-generating statements generate long hashes unless the server was started with theold_passwordssystem variable set to 1 to force the server to generate short password hashes instead.
The purpose of the
old_passwords system variable
is to permit backward compatibility with pre-4.1 clients under
circumstances where the server would otherwise generate long
password hashes. The option does not affect authentication (4.1
and later clients can still use accounts that have long password
hashes), but it does prevent creation of a long password hash in
the user table as the result of a
password-changing operation. Were that permitted to occur, the
account could no longer be used by pre-4.1 clients. With
old_passwords disabled, the
following undesirable scenario is possible:
An old pre-4.1 client connects to an account that has a short password hash.
The client changes its own password. With
old_passwordsdisabled, this results in the account having a long password hash.The next time the old client attempts to connect to the account, it cannot, because the account has a long password hash that requires the 4.1 hashing method during authentication. (Once an account has a long password hash in the user table, only 4.1 and later clients can authenticate for it because pre-4.1 clients do not understand long hashes.)
This scenario illustrates that, if you must support older
pre-4.1 clients, it is problematic to run a 4.1 or higher server
without old_passwords set to 1.
By running the server with
old_passwords=1,
password-changing operations do not generate long password
hashes and thus do not cause accounts to become inaccessible to
older clients. (Those clients cannot inadvertently lock
themselves out by changing their password and ending up with a
long password hash.)
The downside of old_passwords=1
is that any passwords created or changed use short hashes, even
for 4.1 or later clients. Thus, you lose the additional security
provided by long password hashes. To create an account that has
a long hash (for example, for use by 4.1 clients) or to change
an existing account to use a long password hash, an
administrator can set the session value of
old_passwords set to 0 while
leaving the global value set to 1:
mysql>SET @@session.old_passwords = 0;Query OK, 0 rows affected (0.00 sec) mysql>SELECT @@session.old_passwords, @@global.old_passwords;+-------------------------+------------------------+ | @@session.old_passwords | @@global.old_passwords | +-------------------------+------------------------+ | 0 | 1 | +-------------------------+------------------------+ 1 row in set (0.00 sec) mysql>CREATE USER 'newuser'@'localhost' IDENTIFIED BY 'newpass';Query OK, 0 rows affected (0.03 sec) mysql>SET PASSWORD FOR 'existinguser'@'localhost' = PASSWORD('existingpass');Query OK, 0 rows affected (0.00 sec)
The following scenarios are possible in MySQL 4.1 or later. The
factors are whether the Password column is
short or long, and, if long, whether the server is started with
old_passwords enabled or
disabled.
Scenario 1: Short
Password column in user table:
Only short hashes can be stored in the
Passwordcolumn.The server uses only short hashes during client authentication.
For connected clients, password hash-generating operations involving the
PASSWORD()function or password-generating statements use short hashes exclusively. Any change to an account's password results in that account having a short password hash.The value of
old_passwordsis irrelevant because with a shortPasswordcolumn, the server generates only short password hashes anyway.
This scenario occurs when a pre-4.1 MySQL installation has been
upgraded to 4.1 or later but mysql_upgrade
has not been run to upgrade the system tables in the
mysql database. (This is not a recommended
configuration because it does not permit use of more secure 4.1
password hashing.)
Scenario 2: Long
Password column; server started with
old_passwords=1:
Short or long hashes can be stored in the
Passwordcolumn.4.1 and later clients can authenticate for accounts that have short or long hashes.
Pre-4.1 clients can authenticate only for accounts that have short hashes.
For connected clients, password hash-generating operations involving the
PASSWORD()function or password-generating statements use short hashes exclusively. Any change to an account's password results in that account having a short password hash.
In this scenario, newly created accounts have short password
hashes because old_passwords=1
prevents generation of long hashes. Also, if you create an
account with a long hash before setting
old_passwords to 1, changing
the account's password while
old_passwords=1 results in the
account being given a short password, causing it to lose the
security benefits of a longer hash.
To create a new account that has a long password hash, or to
change the password of any existing account to use a long hash,
first set the session value of
old_passwords set to 0 while
leaving the global value set to 1, as described previously.
In this scenario, the server has an up to date
Password column, but is running with the
default password hashing method set to generate pre-4.1 hash
values. This is not a recommended configuration but may be
useful during a transitional period in which pre-4.1 clients and
passwords are upgraded to 4.1 or later. When that has been done,
it is preferable to run the server with
old_passwords=0 and
secure_auth=1.
Scenario 3: Long
Password column; server started with
old_passwords=0:
Short or long hashes can be stored in the
Passwordcolumn.4.1 and later clients can authenticate using accounts that have short or long hashes.
Pre-4.1 clients can authenticate only using accounts that have short hashes.
For connected clients, password hash-generating operations involving the
PASSWORD()function or password-generating statements use long hashes exclusively. A change to an account's password results in that account having a long password hash.
As indicated earlier, a danger in this scenario is that it is
possible for accounts that have a short password hash to become
inaccessible to pre-4.1 clients. A change to such an account's
password made using the
PASSWORD() function or a
password-generating statement results in the account being given
a long password hash. From that point on, no pre-4.1 client can
connect to the server using that account. The client must
upgrade to 4.1 or later.
If this is a problem, you can change a password in a special
way. For example, normally you use SET
PASSWORD as follows to change an account password:
SET PASSWORD FOR 'some_user'@'some_host' = PASSWORD('password');
To change the password but create a short hash, use the
OLD_PASSWORD() function instead:
SET PASSWORD FOR 'some_user'@'some_host' = OLD_PASSWORD('password');
OLD_PASSWORD() is useful for
situations in which you explicitly want to generate a short
hash.
The disadvantages for each of the preceding scenarios may be summarized as follows:
In scenario 1, you cannot take advantage of longer hashes that provide more secure authentication.
In scenario 2, old_passwords=1
prevents accounts with short hashes from becoming inaccessible,
but password-changing operations cause accounts with long hashes
to revert to short hashes unless you take care to change the
session value of old_passwords
to 0 first.
In scenario 3, accounts with short hashes become inaccessible to
pre-4.1 clients if you change their passwords without explicitly
using OLD_PASSWORD().
The best way to avoid compatibility problems related to short password hashes is to not use them:
Upgrade all client programs to MySQL 4.1 or later.
Run the server with
old_passwords=0.Reset the password for any account with a short password hash to use a long password hash.
For additional security, run the server with
secure_auth=1.
When you connect to a MySQL server, you should use a password. The password is not transmitted in clear text over the connection. Password handling during the client connection sequence was upgraded in MySQL 4.1.1 to be very secure. If you are still using pre-4.1.1-style passwords, the encryption algorithm is not as strong as the newer algorithm. With some effort, a clever attacker who can sniff the traffic between the client and the server can crack the password. (See Section 6.1.2.4, “Password Hashing in MySQL”, for a discussion of the different password handling methods.)
All other information is transferred as text, and can be read by anyone who is able to watch the connection. If the connection between the client and the server goes through an untrusted network, and you are concerned about this, you can use the compressed protocol to make traffic much more difficult to decipher. You can also use MySQL's internal SSL support to make the connection even more secure. See Section 6.4, “Using Encrypted Connections”. Alternatively, use SSH to get an encrypted TCP/IP connection between a MySQL server and a MySQL client. You can find an Open Source SSH client at http://www.openssh.org/, and a comparison of both Open Source and Commercial SSH clients at http://en.wikipedia.org/wiki/Comparison_of_SSH_clients.
To make a MySQL system secure, you should strongly consider the following suggestions:
Require all MySQL accounts to have a password. A client program does not necessarily know the identity of the person running it. It is common for client/server applications that the user can specify any user name to the client program. For example, anyone can use the mysql program to connect as any other person simply by invoking it as
mysql -uifother_userdb_nameother_userhas no password. If all accounts have a password, connecting using another user's account becomes much more difficult.For a discussion of methods for setting passwords, see Section 6.3.6, “Assigning Account Passwords”.
Make sure that the only Unix user account with read or write privileges in the database directories is the account that is used for running mysqld.
Never run the MySQL server as the Unix
rootuser. This is extremely dangerous, because any user with theFILEprivilege is able to cause the server to create files asroot(for example,~root/.bashrc). To prevent this, mysqld refuses to run asrootunless that is specified explicitly using the--user=rootoption.mysqld can (and should) be run as an ordinary, unprivileged user instead. You can create a separate Unix account named
mysqlto make everything even more secure. Use this account only for administering MySQL. To start mysqld as a different Unix user, add auseroption that specifies the user name in the[mysqld]group of themy.cnfoption file where you specify server options. For example:[mysqld] user=mysql
This causes the server to start as the designated user whether you start it manually or by using mysqld_safe or mysql.server. For more details, see Section 6.1.5, “How to Run MySQL as a Normal User”.
Running mysqld as a Unix user other than
rootdoes not mean that you need to change therootuser name in theusertable. User names for MySQL accounts have nothing to do with user names for Unix accounts.Do not grant the
FILEprivilege to nonadministrative users. Any user that has this privilege can write a file anywhere in the file system with the privileges of the mysqld daemon. This includes the server's data directory containing the files that implement the privilege tables. To makeFILE-privilege operations a bit safer, files generated withSELECT ... INTO OUTFILEdo not overwrite existing files and are writable by everyone.The
FILEprivilege may also be used to read any file that is world-readable or accessible to the Unix user that the server runs as. With this privilege, you can read any file into a database table. This could be abused, for example, by usingLOAD DATAto load/etc/passwdinto a table, which then can be displayed withSELECT.To limit the location in which files can be read and written, set the
secure_file_privsystem to a specific directory. See Section 5.1.5, “Server System Variables”.Do not grant the
PROCESSorSUPERprivilege to nonadministrative users. The output of mysqladmin processlist andSHOW PROCESSLISTshows the text of any statements currently being executed, so any user who is permitted to see the server process list might be able to see statements issued by other users such asUPDATE user SET password=PASSWORD('not_secure').mysqld reserves an extra connection for users who have the
SUPERprivilege, so that a MySQLrootuser can log in and check server activity even if all normal connections are in use.The
SUPERprivilege can be used to terminate client connections, change server operation by changing the value of system variables, and control replication servers.Do not permit the use of symlinks to tables. (This capability can be disabled with the
--skip-symbolic-linksoption.) This is especially important if you run mysqld asroot, because anyone that has write access to the server's data directory then could delete any file in the system! See Section 8.12.3.2, “Using Symbolic Links for MyISAM Tables on Unix”.Stored programs and views should be written using the security guidelines discussed in Section 23.6, “Access Control for Stored Programs and Views”.
If you do not trust your DNS, you should use IP addresses rather than host names in the grant tables. In any case, you should be very careful about creating grant table entries using host name values that contain wildcards.
If you want to restrict the number of connections permitted to a single account, you can do so by setting the
max_user_connectionsvariable in mysqld. TheCREATE USERandALTER USERstatements also support resource control options for limiting the extent of server use permitted to an account. See Section 13.7.1.2, “CREATE USER Syntax”, and Section 13.7.1.1, “ALTER USER Syntax”.If the plugin directory is writable by the server, it may be possible for a user to write executable code to a file in the directory using
SELECT ... INTO DUMPFILE. This can be prevented by makingplugin_dirread only to the server or by setting--secure-file-privto a directory whereSELECTwrites can be made safely.
The following table shows mysqld options and system variables that affect security. For descriptions of each of these, see Section 5.1.4, “Server Command Options”, and Section 5.1.5, “Server System Variables”.
Table 6.1 Security Option and Variable Summary
| Name | Cmd-Line | Option File | System Var | Status Var | Var Scope | Dynamic |
|---|---|---|---|---|---|---|
| allow-suspicious-udfs | Yes | Yes | ||||
| automatic_sp_privileges | Yes | Global | Yes | |||
| chroot | Yes | Yes | ||||
| des-key-file | Yes | Yes | ||||
| local_infile | Yes | Global | Yes | |||
| old_passwords | Yes | Both | Yes | |||
| safe-user-create | Yes | Yes | ||||
| secure-auth | Yes | Yes | Global | Yes | ||
| - Variable: secure_auth | Yes | Global | Yes | |||
| secure-file-priv | Yes | Yes | Global | No | ||
| - Variable: secure_file_priv | Yes | Global | No | |||
| skip-grant-tables | Yes | Yes | ||||
| skip-name-resolve | Yes | Yes | Global | No | ||
| - Variable: skip_name_resolve | Yes | Global | No | |||
| skip-networking | Yes | Yes | Global | No | ||
| - Variable: skip_networking | Yes | Global | No | |||
| skip-show-database | Yes | Yes | Global | No | ||
| - Variable: skip_show_database | Yes | Global | No |
On Windows, you can run the server as a Windows service using a normal user account.
On Linux, for installations performed using a MySQL repository,
RPM packages, or Debian packages, the MySQL server
mysqld should be started by the local
mysql operating system user. Starting by
another operating system user is not supported by the init scripts
that are included as part of the installation.
On Unix (or Linux for installations performed using
tar or tar.gz packages)
, the MySQL server mysqld can be started and
run by any user. However, you should avoid running the server as
the Unix root user for security reasons. To
change mysqld to run as a normal unprivileged
Unix user user_name, you must do the
following:
Stop the server if it is running (use mysqladmin shutdown).
Change the database directories and files so that
user_namehas privileges to read and write files in them (you might need to do this as the Unixrootuser):shell>
chown -Ruser_name/path/to/mysql/datadirIf you do not do this, the server will not be able to access databases or tables when it runs as
user_name.If directories or files within the MySQL data directory are symbolic links,
chown -Rmight not follow symbolic links for you. If it does not, you will also need to follow those links and change the directories and files they point to.Start the server as user
user_name. Another alternative is to start mysqld as the Unixrootuser and use the--user=option. mysqld starts up, then switches to run as the Unix useruser_nameuser_namebefore accepting any connections.To start the server as the given user automatically at system startup time, specify the user name by adding a
useroption to the[mysqld]group of the/etc/my.cnfoption file or themy.cnfoption file in the server's data directory. For example:[mysqld] user=
user_name
If your Unix machine itself is not secured, you should assign
passwords to the MySQL root account in the
grant tables. Otherwise, any user with a login account on that
machine can run the mysql client with a
--user=root option and perform any
operation. (It is a good idea to assign passwords to MySQL
accounts in any case, but especially so when other login accounts
exist on the server host.) See
Section 2.10.4, “Securing the Initial MySQL Accounts”.
The LOAD DATA statement can load a
file located on the server host, or, if the
LOCAL keyword is specified, on the client host.
There are two potential security issues with the
LOCAL version of LOAD
DATA:
The transfer of the file from the client host to the server host is initiated by the MySQL server. In theory, a patched server could be built that would tell the client program to transfer a file of the server's choosing rather than the file named by the client in the
LOAD DATAstatement. Such a server could access any file on the client host to which the client user has read access. (A patched server could in fact reply with a file-transfer request to any statement, not justLOAD DATA LOCAL, so a more fundamental issue is that clients should not connect to untrusted servers.)In a Web environment where the clients are connecting from a Web server, a user could use
LOAD DATA LOCALto read any files that the Web server process has read access to (assuming that a user could run any statement against the SQL server). In this environment, the client with respect to the MySQL server actually is the Web server, not a remote program being run by users who connect to the Web server.
To avoid LOAD DATA issues, clients
should avoid using LOCAL. To avoid connecting
to untrusted servers, clients can establish a secure connection
and verify the server identity by connecting using the
--ssl-mode=VERIFY_IDENTITY option
and the appropriate CA certificate.
To enable adminstrators and applications to manage the local data
loading capability, LOCAL configuration works
like this:
On the server side:
The
local_infilesystem variable controls server-sideLOCALcapability. Depending on thelocal_infilesetting, the server refuses or permits local data loading by clients that haveLOCALenabled on the client side. By default,local_infileis enabled.To explicitly cause the server to refuse or permit
LOAD DATA LOCALstatements (regardless of how client programs and libraries are configured at build time or runtime), start mysqld withlocal_infiledisabled or enabled, respectively.local_infilecan also be set at runtime.
On the client side:
The
ENABLED_LOCAL_INFILECMake option controls the compiled-in defaultLOCALcapability for the MySQL client library. Clients that make no explicit arrangements therefore haveLOCALcapability disabled or enabled according to theENABLED_LOCAL_INFILEsetting specified at MySQL build time.By default, the client library in MySQL binary distributions is compiled with
ENABLED_LOCAL_INFILEenabled. If you compile MySQL from source, configure it withENABLED_LOCAL_INFILEdisabled or enabled based on whether clients that make no explicit arrangements should haveLOCALcapability disabled or enabled, respectively.Client programs that use the C API can control load data loading explicitly by invoking
mysql_options()to disable or enable theMYSQL_OPT_LOCAL_INFILEoption. See Section 27.8.7.50, “mysql_options()”.For the mysql client, local data loading is disabled by default. To disable or enable it explicitly, use the
--local-infile=0or--local-infile[=1]option.For the mysqlimport client, local data loading is disabled by default. To disable or enable it explicitly, use the
--local=0or--local[=1]option.If you use
LOAD DATA LOCALin Perl scripts or other programs that read the[client]group from option files, you can add anlocal-infileoption setting to that group. To prevent problems for programs that do not understand this option, specify it using theloose-prefix:[client] loose-local-infile=0
or:
[client] loose-local-infile=1
In all cases, successful use of a
LOCALload operation by a client also requires that the server permits it.
If LOCAL capability is disabled, on either the
server or client side, a client that attempts to issue a
LOAD DATA
LOCAL statement receives the following error message:
ERROR 1148: The used command is not allowed with this MySQL version
Applications that access MySQL should not trust any data entered
by users, who can try to trick your code by entering special or
escaped character sequences in Web forms, URLs, or whatever
application you have built. Be sure that your application remains
secure if a user enters something like ; DROP DATABASE
mysql;. This is an extreme example, but large security
leaks and data loss might occur as a result of hackers using
similar techniques, if you do not prepare for them.
A common mistake is to protect only string data values. Remember
to check numeric data as well. If an application generates a query
such as SELECT * FROM table WHERE ID=234 when a
user enters the value 234, the user can enter
the value 234 OR 1=1 to cause the application
to generate the query SELECT * FROM table WHERE ID=234 OR
1=1. As a result, the server retrieves every row in the
table. This exposes every row and causes excessive server load.
The simplest way to protect from this type of attack is to use
single quotation marks around the numeric constants:
SELECT * FROM table WHERE ID='234'. If the user
enters extra information, it all becomes part of the string. In a
numeric context, MySQL automatically converts this string to a
number and strips any trailing nonnumeric characters from it.
Sometimes people think that if a database contains only publicly available data, it need not be protected. This is incorrect. Even if it is permissible to display any row in the database, you should still protect against denial of service attacks (for example, those that are based on the technique in the preceding paragraph that causes the server to waste resources). Otherwise, your server becomes unresponsive to legitimate users.
Checklist:
Enable strict SQL mode to tell the server to be more restrictive of what data values it accepts. See Section 5.1.8, “Server SQL Modes”.
Try to enter single and double quotation marks (
'and") in all of your Web forms. If you get any kind of MySQL error, investigate the problem right away.Try to modify dynamic URLs by adding
%22("),%23(#), and%27(') to them.Try to modify data types in dynamic URLs from numeric to character types using the characters shown in the previous examples. Your application should be safe against these and similar attacks.
Try to enter characters, spaces, and special symbols rather than numbers in numeric fields. Your application should remove them before passing them to MySQL or else generate an error. Passing unchecked values to MySQL is very dangerous!
Check the size of data before passing it to MySQL.
Have your application connect to the database using a user name different from the one you use for administrative purposes. Do not give your applications any access privileges they do not need.
Many application programming interfaces provide a means of escaping special characters in data values. Properly used, this prevents application users from entering values that cause the application to generate statements that have a different effect than you intend:
MySQL C API: Use the
mysql_real_escape_string_quote()API call.MySQL++: Use the
escapeandquotemodifiers for query streams.PHP: Use either the
mysqliorpdo_mysqlextensions, and not the olderext/mysqlextension. The preferred API's support the improved MySQL authentication protocol and passwords, as well as prepared statements with placeholders. See also Choosing an API.If the older
ext/mysqlextension must be used, then for escaping use themysql_real_escape_string_quote()function and notmysql_escape_string()oraddslashes()because onlymysql_real_escape_string_quote()is character set-aware; the other functions can be “bypassed” when using (invalid) multibyte character sets.Perl DBI: Use placeholders or the
quote()method.Ruby DBI: Use placeholders or the
quote()method.Java JDBC: Use a
PreparedStatementobject and placeholders.
Other programming interfaces might have similar capabilities.
The primary function of the MySQL privilege system is to
authenticate a user who connects from a given host and to associate
that user with privileges on a database such as
SELECT,
INSERT,
UPDATE, and
DELETE. Additional functionality
includes the ability to have anonymous users and to grant privileges
for MySQL-specific functions such as
LOAD DATA
INFILE and administrative operations.
There are some things that you cannot do with the MySQL privilege system:
You cannot explicitly specify that a given user should be denied access. That is, you cannot explicitly match a user and then refuse the connection.
You cannot specify that a user has privileges to create or drop tables in a database but not to create or drop the database itself.
A password applies globally to an account. You cannot associate a password with a specific object such as a database, table, or routine.
The user interface to the MySQL privilege system consists of SQL
statements such as CREATE USER,
GRANT, and
REVOKE. See
Section 13.7.1, “Account Management Statements”.
Internally, the server stores privilege information in the grant
tables of the mysql database (that is, in the
database named mysql). The MySQL server reads the
contents of these tables into memory when it starts and bases
access-control decisions on the in-memory copies of the grant
tables.
The MySQL privilege system ensures that all users may perform only the operations permitted to them. As a user, when you connect to a MySQL server, your identity is determined by the host from which you connect and the user name you specify. When you issue requests after connecting, the system grants privileges according to your identity and what you want to do.
MySQL considers both your host name and user name in identifying you
because there is no reason to assume that a given user name belongs
to the same person on all hosts. For example, the user
joe who connects from
office.example.com need not be the same person as
the user joe who connects from
home.example.com. MySQL handles this by enabling
you to distinguish users on different hosts that happen to have the
same name: You can grant one set of privileges for connections by
joe from office.example.com,
and a different set of privileges for connections by
joe from home.example.com. To
see what privileges a given account has, use the
SHOW GRANTS statement. For example:
SHOW GRANTS FOR 'joe'@'office.example.com'; SHOW GRANTS FOR 'joe'@'home.example.com';
MySQL access control involves two stages when you run a client program that connects to the server:
Stage 1: The server accepts or rejects the connection based on your identity and whether you can verify your identity by supplying the correct password.
Stage 2: Assuming that you can
connect, the server checks each statement you issue to determine
whether you have sufficient privileges to perform it. For example,
if you try to select rows from a table in a database or drop a table
from the database, the server verifies that you have the
SELECT privilege for the table or the
DROP privilege for the database.
For a more detailed description of what happens during each stage, see Section 6.2.4, “Access Control, Stage 1: Connection Verification”, and Section 6.2.5, “Access Control, Stage 2: Request Verification”.
If your privileges are changed (either by yourself or someone else) while you are connected, those changes do not necessarily take effect immediately for the next statement that you issue. For details about the conditions under which the server reloads the grant tables, see Section 6.2.6, “When Privilege Changes Take Effect”.
For general security-related advice, see Section 6.1, “General Security Issues”. For help in diagnosing privilege-related problems, see Section 6.2.7, “Troubleshooting Problems Connecting to MySQL”.
The privileges granted to a MySQL account determine which operations the account can perform. MySQL privileges differ in the contexts in which they apply and at different levels of operation:
Administrative privileges enable users to manage operation of the MySQL server. These privileges are global because they are not specific to a particular database.
Database privileges apply to a database and to all objects within it. These privileges can be granted for specific databases, or globally so that they apply to all databases.
Privileges for database objects such as tables, indexes, views, and stored routines can be granted for specific objects within a database, for all objects of a given type within a database (for example, all tables in a database), or globally for all objects of a given type in all databases).
Information about account privileges is stored in the
user, db,
tables_priv, columns_priv,
and procs_priv tables in the
mysql system database (see
Section 6.2.2, “Grant Tables”). The MySQL server reads the
contents of these tables into memory when it starts and reloads
them under the circumstances indicated in
Section 6.2.6, “When Privilege Changes Take Effect”. Access-control decisions are
based on the in-memory copies of the grant tables.
Some MySQL releases introduce changes to the structure of the grant tables to add new privileges or features. To make sure that you can take advantage of any new capabilities, update your grant tables to have the current structure whenever you upgrade MySQL. See Section 4.4.7, “mysql_upgrade — Check and Upgrade MySQL Tables”.
The following table shows the privilege names used in
GRANT and
REVOKE statements, along with the
column name associated with each privilege in the grant tables and
the context in which the privilege applies.
Table 6.2 Permissible Privileges for GRANT and REVOKE
| Privilege | Column | Context |
|---|---|---|
ALL [PRIVILEGES] |
Synonym for “all privileges” | Server administration |
ALTER |
Alter_priv |
Tables |
ALTER ROUTINE |
Alter_routine_priv |
Stored routines |
CREATE |
Create_priv |
Databases, tables, or indexes |
CREATE ROUTINE |
Create_routine_priv |
Stored routines |
CREATE TABLESPACE |
Create_tablespace_priv |
Server administration |
CREATE TEMPORARY TABLES |
Create_tmp_table_priv |
Tables |
CREATE USER |
Create_user_priv |
Server administration |
CREATE VIEW |
Create_view_priv |
Views |
DELETE |
Delete_priv |
Tables |
DROP |
Drop_priv |
Databases, tables, or views |
EVENT |
Event_priv |
Databases |
EXECUTE |
Execute_priv |
Stored routines |
FILE |
File_priv |
File access on server host |
GRANT OPTION |
Grant_priv |
Databases, tables, or stored routines |
INDEX |
Index_priv |
Tables |
INSERT |
Insert_priv |
Tables or columns |
LOCK TABLES |
Lock_tables_priv |
Databases |
PROCESS |
Process_priv |
Server administration |
PROXY |
See proxies_priv table |
Server administration |
REFERENCES |
References_priv |
Databases or tables |
RELOAD |
Reload_priv |
Server administration |
REPLICATION CLIENT |
Repl_client_priv |
Server administration |
REPLICATION SLAVE |
Repl_slave_priv |
Server administration |
SELECT |
Select_priv |
Tables or columns |
SHOW DATABASES |
Show_db_priv |
Server administration |
SHOW VIEW |
Show_view_priv |
Views |
SHUTDOWN |
Shutdown_priv |
Server administration |
SUPER |
Super_priv |
Server administration |
TRIGGER |
Trigger_priv |
Tables |
UPDATE |
Update_priv |
Tables or columns |
USAGE |
Synonym for “no privileges” | Server administration |
The following list provides general descriptions of the privileges available in MySQL. Particular SQL statements might have more specific privilege requirements than indicated here. If so, the description for the statement in question provides the details.
The
ALLorALL PRIVILEGESprivilege specifier is shorthand. It stands for “all privileges available at a given privilege level” (exceptGRANT OPTION). For example, grantingALLat the global or table level grants all global privileges or all table-level privileges.The
ALTERprivilege enables use of theALTER TABLEstatement to change the structure of tables.ALTER TABLEalso requires theCREATEandINSERTprivileges. Renaming a table requiresALTERandDROPon the old table,CREATE, andINSERTon the new table.The
ALTER ROUTINEprivilege is needed to alter or drop stored routines (procedures and functions).The
CREATEprivilege enables creation of new databases and tables.The
CREATE ROUTINEprivilege is needed to create stored routines (procedures and functions).The
CREATE TABLESPACEprivilege is needed to create, alter, or drop tablespaces and log file groups.The
CREATE TEMPORARY TABLESprivilege enables the creation of temporary tables using theCREATE TEMPORARY TABLEstatement.After a session has created a temporary table, the server performs no further privilege checks on the table. The creating session can perform any operation on the table, such as
DROP TABLE,INSERT,UPDATE, orSELECT. For more information, see Section 13.1.18.3, “CREATE TEMPORARY TABLE Syntax”.The
CREATE USERprivilege enables use of theALTER USER,CREATE USER,DROP USER,RENAME USER, andREVOKE ALL PRIVILEGESstatements.The
CREATE VIEWprivilege enables use of theCREATE VIEWstatement.The
DELETEprivilege enables rows to be deleted from tables in a database.The
DROPprivilege enables you to drop (remove) existing databases, tables, and views. TheDROPprivilege is required in order to use the statementALTER TABLE ... DROP PARTITIONon a partitioned table. TheDROPprivilege is also required forTRUNCATE TABLE. If you grant theDROPprivilege for themysqldatabase to a user, that user can drop the database in which the MySQL access privileges are stored.The
EVENTprivilege is required to create, alter, drop, or see events for the Event Scheduler.The
EXECUTEprivilege is required to execute stored routines (procedures and functions).The
FILEprivilege gives you permission to read and write files on the server host using theLOAD DATA INFILEandSELECT ... INTO OUTFILEstatements and theLOAD_FILE()function. A user who has theFILEprivilege can read any file on the server host that is either world-readable or readable by the MySQL server. (This implies the user can read any file in any database directory, because the server can access any of those files.) TheFILEprivilege also enables the user to create new files in any directory where the MySQL server has write access. This includes the server's data directory containing the files that implement the privilege tables. As a security measure, the server will not overwrite existing files. As of MySQL 5.7.17, theFILEprivilege is required to use theDATA DIRECTORYorINDEX DIRECTORYtable option for theCREATE TABLEstatement.To limit the location in which files can be read and written, set the
secure_file_privsystem to a specific directory. See Section 5.1.5, “Server System Variables”.The
GRANT OPTIONprivilege enables you to give to other users or remove from other users those privileges that you yourself possess.The
INDEXprivilege enables you to create or drop (remove) indexes.INDEXapplies to existing tables. If you have theCREATEprivilege for a table, you can include index definitions in theCREATE TABLEstatement.The
INSERTprivilege enables rows to be inserted into tables in a database.INSERTis also required for theANALYZE TABLE,OPTIMIZE TABLE, andREPAIR TABLEtable-maintenance statements.The
LOCK TABLESprivilege enables the use of explicitLOCK TABLESstatements to lock tables for which you have theSELECTprivilege. This includes the use of write locks, which prevents other sessions from reading the locked table.The
PROCESSprivilege pertains to display of information about the threads executing within the server (that is, information about the statements being executed by sessions). The privilege enables use ofSHOW PROCESSLISTor mysqladmin processlist to see threads belonging to other accounts; you can always see your own threads. ThePROCESSprivilege also enables use ofSHOW ENGINE.The
PROXYprivilege enables a user to impersonate or become known as another user. See Section 6.3.10, “Proxy Users”.The creation of a foreign key constraint requires the
REFERENCESprivilege for the parent table.The
RELOADprivilege enables use of theFLUSHstatement. It also enables mysqladmin commands that are equivalent toFLUSHoperations:flush-hosts,flush-logs,flush-privileges,flush-status,flush-tables,flush-threads,refresh, andreload.The
reloadcommand tells the server to reload the grant tables into memory.flush-privilegesis a synonym forreload. Therefreshcommand closes and reopens the log files and flushes all tables. The otherflush-commands perform functions similar toxxxrefresh, but are more specific and may be preferable in some instances. For example, if you want to flush just the log files,flush-logsis a better choice thanrefresh.The
REPLICATION CLIENTprivilege enables the use of theSHOW MASTER STATUS,SHOW SLAVE STATUS, andSHOW BINARY LOGSstatements.The
REPLICATION SLAVEprivilege should be granted to accounts that are used by slave servers to connect to the current server as their master. Without this privilege, the slave cannot request updates that have been made to databases on the master server.The
SELECTprivilege enables you to select rows from tables in a database.SELECTstatements require theSELECTprivilege only if they actually retrieve rows from a table. SomeSELECTstatements do not access tables and can be executed without permission for any database. For example, you can useSELECTas a simple calculator to evaluate expressions that make no reference to tables:SELECT 1+1; SELECT PI()*2;
The
SELECTprivilege is also needed for other statements that read column values. For example,SELECTis needed for columns referenced on the right hand side ofcol_name=exprassignment inUPDATEstatements or for columns named in theWHEREclause ofDELETEorUPDATEstatements.The
SELECTprivilege is also needed for tables or views being used withEXPLAIN, including any underlying tables of views.The
SHOW DATABASESprivilege enables the account to see database names by issuing theSHOW DATABASEstatement. Accounts that do not have this privilege see only databases for which they have some privileges, and cannot use the statement at all if the server was started with the--skip-show-databaseoption. Note that any global privilege is a privilege for the database.The
SHOW VIEWprivilege enables use of theSHOW CREATE VIEWstatement. This privilege is also needed for views being used withEXPLAIN.The
SHUTDOWNprivilege enables use of theSHUTDOWNstatement, the mysqladmin shutdown command, and themysql_shutdown()C API function.The
SUPERprivilege enables these operations and server behaviors:Enables configuration changes by modifying global system variables. For some system variables, setting the session value also requires the
SUPERprivilege; if so, it is indicated in the variable description. Examples includebinlog_format,sql_log_bin, andsql_log_off.Enables changes to global transaction characteristics (see Section 13.3.6, “SET TRANSACTION Syntax”).
Enables starting and stopping replication on slave servers, including Group Replication.
Enables use of the
CHANGE MASTER TOandCHANGE REPLICATION FILTERstatements.Enables binary log control by means of the
PURGE BINARY LOGSandBINLOGstatements.Enables setting the effective authorization ID when executing a view or stored program. A user with this privilege can specify any account in the
DEFINERattribute of a view or stored program.Enables use of the
CREATE SERVER,ALTER SERVER, andDROP SERVERstatements.Enables use of the mysqladmin debug command.
Enables
InnoDBkey rotation.Enables reading the DES key file by the
DES_ENCRYPT()function.Enables execution of Version Tokens user-defined functions.
Enables control over client connections not permitted to non-
SUPERaccounts:Enables use of the
KILLstatement or mysqladmin kill command to kill threads belonging to other accounts. (You can always kill your own threads.)The server accepts one connection from a
SUPERclient even if the connection limit controlled by themax_connectionssystem variable is reached.Updates can be performed even when the
read_onlysystem variable is enabled. This applies to table updates and use of account-management statements such asGRANTandREVOKE.The server does not execute
init_connectsystem variable content whenSUPERclients connect.A server in offline mode (
offline_modeenabled) does not terminateSUPERclient connections at the next client request, and accepts new connections fromSUPERclients.
You may also need the
SUPERprivilege to create or alter stored functions if binary logging is enabled, as described in Section 23.7, “Binary Logging of Stored Programs”.The
TRIGGERprivilege enables trigger operations. You must have this privilege for a table to create, drop, execute, or display triggers for that table.When a trigger is activated (by a user who has privileges to execute
INSERT,UPDATE, orDELETEstatements for the table associated with the trigger), trigger execution requires that the user who defined the trigger still have theTRIGGERprivilege.The
UPDATEprivilege enables rows to be updated in tables in a database.The
USAGEprivilege specifier stands for “no privileges.” It is used at the global level withGRANTto modify account attributes such as resource limits or SSL characteristics without naming specific account privileges.SHOW GRANTSdisplaysUSAGEto indicate that an account has no privileges at a privilege level.
It is a good idea to grant to an account only those privileges
that it needs. You should exercise particular caution in granting
the FILE and administrative
privileges:
The
FILEprivilege can be abused to read into a database table any files that the MySQL server can read on the server host. This includes all world-readable files and files in the server's data directory. The table can then be accessed usingSELECTto transfer its contents to the client host.The
GRANT OPTIONprivilege enables users to give their privileges to other users. Two users that have different privileges and with theGRANT OPTIONprivilege are able to combine privileges.The
ALTERprivilege may be used to subvert the privilege system by renaming tables.The
SHUTDOWNprivilege can be abused to deny service to other users entirely by terminating the server.The
PROCESSprivilege can be used to view the plain text of currently executing statements, including statements that set or change passwords.The
SUPERprivilege can be used to terminate other sessions or change how the server operates.Privileges granted for the
mysqldatabase itself can be used to change passwords and other access privilege information. Passwords are stored encrypted, so a malicious user cannot simply read them to know the plain text password. However, a user with write access to theusertableauthentication_stringcolumn can change an account's password, and then connect to the MySQL server using that account.
The mysql system database includes several
grant tables that contain information about user accounts and the
privileges held by them. This section describes those tables. For
information about other tables in the system database, see
Section 5.3, “The mysql System Database”.
To manipulate the contents of grant tables, modify them indirectly
by using account-management statements such as
CREATE USER,
GRANT, and
REVOKE to set up accounts and
control the privileges available to each one. See
Section 13.7.1, “Account Management Statements”. The discussion here
describes the underlying structure of the grant tables and how the
server uses their contents when interacting with clients.
Direct modification of grant tables using statements such as
INSERT,
UPDATE, or
DELETE is discouraged and done at
your own risk. The server is free to ignore rows that become
malformed as a result of such modifications.
As of MySQL 5.7.18, for any operation that modifies a grant table, the server checks whether the table has the expected structure and produces an error if not. mysql_upgrade must be run to update the tables to the expected structure.
These mysql database tables contain grant
information:
Each grant table contains scope columns and privilege columns:
Scope columns determine the scope of each row in the tables; that is, the context in which the row applies. For example, a
usertable row withHostandUservalues of'h1.example.net'and'bob'applies to authenticating connections made to the server from the hosth1.example.netby a client that specifies a user name ofbob. Similarly, adbtable row withHost,User, andDbcolumn values of'h1.example.net','bob'and'reports'applies whenbobconnects from the hosth1.example.netto access thereportsdatabase. Thetables_privandcolumns_privtables contain scope columns indicating tables or table/column combinations to which each row applies. Theprocs_privscope columns indicate the stored routine to which each row applies.Privilege columns indicate which privileges a table row grants; that is, which operations it permits to be performed. The server combines the information in the various grant tables to form a complete description of a user's privileges. Section 6.2.5, “Access Control, Stage 2: Request Verification”, describes the rules for this.
The server uses the grant tables in the following manner:
The
usertable scope columns determine whether to reject or permit incoming connections. For permitted connections, any privileges granted in theusertable indicate the user's global privileges. Any privileges granted in this table apply to all databases on the server.CautionBecause any global privilege is considered a privilege for all databases, any global privilege enables a user to see all database names with
SHOW DATABASESor by examining theSCHEMATAtable ofINFORMATION_SCHEMA.The
dbtable scope columns determine which users can access which databases from which hosts. The privilege columns determine the permitted operations. A privilege granted at the database level applies to the database and to all objects in the database, such as tables and stored programs.The
tables_privandcolumns_privtables are similar to thedbtable, but are more fine-grained: They apply at the table and column levels rather than at the database level. A privilege granted at the table level applies to the table and to all its columns. A privilege granted at the column level applies only to a specific column.The
procs_privtable applies to stored routines (procedures and functions). A privilege granted at the routine level applies only to a single procedure or function.The
proxies_privtable indicates which users can act as proxies for other users and whether a user can grant thePROXYprivilege to other users.
The server uses the user and
db tables in the mysql
database at both the first and second stages of access control
(see Section 6.2, “The MySQL Access Privilege System”). The columns in the
user and db tables are shown
here.
Table 6.3 user and db Table Columns
| Table Name | user |
db |
|---|---|---|
| Scope columns | Host |
Host |
User |
Db |
|
User |
||
| Privilege columns | Select_priv |
Select_priv |
Insert_priv |
Insert_priv |
|
Update_priv |
Update_priv |
|
Delete_priv |
Delete_priv |
|
Index_priv |
Index_priv |
|
Alter_priv |
Alter_priv |
|
Create_priv |
Create_priv |
|
Drop_priv |
Drop_priv |
|
Grant_priv |
Grant_priv |
|
Create_view_priv |
Create_view_priv |
|
Show_view_priv |
Show_view_priv |
|
Create_routine_priv |
Create_routine_priv |
|
Alter_routine_priv |
Alter_routine_priv |
|
Execute_priv |
Execute_priv |
|
Trigger_priv |
Trigger_priv |
|
Event_priv |
Event_priv |
|
Create_tmp_table_priv |
Create_tmp_table_priv |
|
Lock_tables_priv |
Lock_tables_priv |
|
References_priv |
References_priv |
|
Reload_priv |
||
Shutdown_priv |
||
Process_priv |
||
File_priv |
||
Show_db_priv |
||
Super_priv |
||
Repl_slave_priv |
||
Repl_client_priv |
||
Create_user_priv |
||
Create_tablespace_priv |
||
| Security columns | ssl_type |
|
ssl_cipher |
||
x509_issuer |
||
x509_subject |
||
plugin |
||
authentication_string |
||
password_expired |
||
password_last_changed |
||
password_lifetime |
||
account_locked |
||
| Resource control columns | max_questions |
|
max_updates |
||
max_connections |
||
max_user_connections |
The user table plugin and
authentication_string columns store
authentication plugin and credential information.
The server uses the plugin named in the plugin
column of an account row to authenticate connection attempts for
the account.
The plugin column must be nonempty. At startup,
and at runtime when FLUSH
PRIVILEGES is executed, the server checks
user table rows. For any row with an empty
plugin column, the server writes a warning to
the error log of this form:
[Warning] User entry 'user_name'@'host_name' has an empty plugin value. The user will be ignored and no one can login with this user anymore.
To address this problem, see Section 6.5.1.3, “Migrating Away from Pre-4.1 Password Hashing and the mysql_old_password Plugin”.
The password_expired column permits DBAs to
expire account passwords and require users to reset their
password. The default password_expired value is
'N', but can be set to 'Y'
with the ALTER USER statement.
After an account's password has been expired, all operations
performed by the account in subsequent connections to the server
result in an error until the user issues an
ALTER USER statement to establish a
new account password.
It is possible after password expiration to “reset” a password by setting it to its current value. As a matter of good policy, it is preferable to choose a different password.
password_last_changed is a
TIMESTAMP column indicating when the password
was last changed. The value is non-NULL only
for accounts that use MySQL built-in authentication methods
(accounts that use an authentication plugin of
mysql_native_password or
sha256_password). The value is
NULL for other accounts, such as those
authenticated using an external authentication system.
password_last_changed is updated by the
CREATE USER,
ALTER USER, and
SET PASSWORD statements, and by
GRANT statements that create an
account or change an account password.
password_lifetime indicates the account
password lifetime, in days. If the password is past its lifetime
(assessed using the password_last_changed
column), the server considers the password expired when clients
connect using the account. A value of N
greater than zero means that the password must be changed every
N days. A value of 0 disables automatic
password expiration. If the value is NULL (the
default), the global expiration policy applies, as defined by the
default_password_lifetime system
variable.
account_locked indicates whether the account is
locked (see Section 6.3.11, “User Account Locking”).
During the second stage of access control, the server performs
request verification to ensure that each client has sufficient
privileges for each request that it issues. In addition to the
user and db grant tables,
the server may also consult the tables_priv and
columns_priv tables for requests that involve
tables. The latter tables provide finer privilege control at the
table and column levels. They have the columns shown in the
following table.
Table 6.4 tables_priv and columns_priv Table Columns
| Table Name | tables_priv |
columns_priv |
|---|---|---|
| Scope columns | Host |
Host |
Db |
Db |
|
User |
User |
|
Table_name |
Table_name |
|
Column_name |
||
| Privilege columns | Table_priv |
Column_priv |
Column_priv |
||
| Other columns | Timestamp |
Timestamp |
Grantor |
The Timestamp and Grantor
columns are set to the current timestamp and the
CURRENT_USER value, respectively,
but are otherwise unused.
For verification of requests that involve stored routines, the
server may consult the procs_priv table, which
has the columns shown in the following table.
Table 6.5 procs_priv Table Columns
| Table Name | procs_priv |
|---|---|
| Scope columns | Host |
Db |
|
User |
|
Routine_name |
|
Routine_type |
|
| Privilege columns | Proc_priv |
| Other columns | Timestamp |
Grantor |
The Routine_type column is an
ENUM column with values of
'FUNCTION' or 'PROCEDURE' to
indicate the type of routine the row refers to. This column
enables privileges to be granted separately for a function and a
procedure with the same name.
The Timestamp and Grantor
columns are unused.
The proxies_priv table records information
about proxy accounts. It has these columns:
For an account to be able to grant the
PROXY privilege to other accounts,
it must have a row in the proxies_priv table
with With_grant set to 1 and
Proxied_host and
Proxied_user set to indicate the account or
accounts for which the privilege can be granted. For example, the
'root'@'localhost' account created during MySQL
installation has a row in the proxies_priv
table that enables granting the
PROXY privilege for
''@'', that is, for all users and all hosts.
This enables root to set up proxy users, as
well as to delegate to other accounts the authority to set up
proxy users. See Section 6.3.10, “Proxy Users”.
Scope columns in the grant tables contain strings. The default value for each is the empty string. The following table shows the number of characters permitted in each column.
Table 6.6 Grant Table Scope Column Lengths
| Column Name | Maximum Permitted Characters |
|---|---|
Host, Proxied_host |
60 |
User, Proxied_user |
32 |
Password |
41 |
Db |
64 |
Table_name |
64 |
Column_name |
64 |
Routine_name |
64 |
For access-checking purposes, comparisons of
User, Proxied_user,
Password,
authentication_string, Db,
and Table_name values are case-sensitive.
Comparisons of Host,
Proxied_host, Column_name,
and Routine_name values are not case-sensitive.
The user and db tables list
each privilege in a separate column that is declared as
ENUM('N','Y') DEFAULT 'N'. In other words, each
privilege can be disabled or enabled, with the default being
disabled.
The tables_priv,
columns_priv, and procs_priv
tables declare the privilege columns as
SET columns. Values in these
columns can contain any combination of the privileges controlled
by the table. Only those privileges listed in the column value are
enabled.
Table 6.7 Set-Type Privilege Column Values
| Table Name | Column Name | Possible Set Elements |
|---|---|---|
tables_priv |
Table_priv |
'Select', 'Insert', 'Update', 'Delete', 'Create', 'Drop',
'Grant', 'References', 'Index', 'Alter', 'Create View',
'Show view', 'Trigger' |
tables_priv |
Column_priv |
'Select', 'Insert', 'Update', 'References' |
columns_priv |
Column_priv |
'Select', 'Insert', 'Update', 'References' |
procs_priv |
Proc_priv |
'Execute', 'Alter Routine', 'Grant' |
Only the user table specifies administrative
privileges, such as RELOAD and
SHUTDOWN. Administrative operations
are operations on the server itself and are not database-specific,
so there is no reason to list these privileges in the other grant
tables. Consequently, the server need consult only the
user table to determine whether a user can
perform an administrative operation.
The FILE privilege also is
specified only in the user table. It is not an
administrative privilege as such, but a user's ability to read or
write files on the server host is independent of the database
being accessed.
The server reads the contents of the grant tables into memory when
it starts. You can tell it to reload the tables by issuing a
FLUSH PRIVILEGES statement or
executing a mysqladmin flush-privileges or
mysqladmin reload command. Changes to the grant
tables take effect as indicated in
Section 6.2.6, “When Privilege Changes Take Effect”.
When you modify an account, it is a good idea to verify that your
changes have the intended effect. To check the privileges for a
given account, use the SHOW GRANTS
statement. For example, to determine the privileges that are
granted to an account with user name and host name values of
bob and pc84.example.com,
use this statement:
SHOW GRANTS FOR 'bob'@'pc84.example.com';
To display nonprivilege properties of an account, use
SHOW CREATE USER:
SHOW CREATE USER 'bob'@'pc84.example.com';
MySQL account names consist of a user name and a host name. This enables creation of accounts for users with the same name who can connect from different hosts. This section describes how to write account names, including special values and wildcard rules.
In SQL statements such as CREATE
USER, GRANT, and
SET PASSWORD, account names follow
these rules:
Account name syntax is
'.user_name'@'host_name'An account name consisting only of a user name is equivalent to
'. For example,user_name'@'%''me'is equivalent to'me'@'%'.The user name and host name need not be quoted if they are legal as unquoted identifiers. Quotes are necessary to specify a
user_namestring containing special characters (such as space or-), or ahost_namestring containing special characters or wildcard characters (such as.or%); for example,'test-user'@'%.com'.Quote user names and host names as identifiers or as strings, using either backticks (
`), single quotation marks ('), or double quotation marks ("). For string-quoting and identifier-quoting guidelines, see Section 9.1.1, “String Literals”, and Section 9.2, “Schema Object Names”.The user name and host name parts, if quoted, must be quoted separately. That is, write
'me'@'localhost', not'me@localhost'; the latter is actually equivalent to'me@localhost'@'%'.A reference to the
CURRENT_USERorCURRENT_USER()function is equivalent to specifying the current client's user name and host name literally.
MySQL stores account names in grant tables in the
mysql system database using separate columns
for the user name and host name parts:
The
usertable contains one row for each account. TheUserandHostcolumns store the user name and host name. This table also indicates which global privileges the account has.Other grant tables indicate privileges an account has for databases and objects within databases. These tables have
UserandHostcolumns to store the account name. Each row in these tables associates with the account in theusertable that has the sameUserandHostvalues.For access-checking purposes, comparisons of User values are case-sensitive. Comparisons of Host values are not case sensitive.
For additional detail about grant table structure, see Section 6.2.2, “Grant Tables”.
User names and host names have certain special values or wildcard conventions, as described following.
The user name part of an account name is either a nonblank value
that literally matches the user name for incoming connection
attempts, or a blank value (empty string) that matches any user
name. An account with a blank user name is an anonymous user. To
specify an anonymous user in SQL statements, use a quoted empty
user name part, such as ''@'localhost'.
The host name part of an account name can take many forms, and wildcards are permitted:
A host value can be a host name or an IP address (IPv4 or IPv6). The name
'localhost'indicates the local host. The IP address'127.0.0.1'indicates the IPv4 loopback interface. The IP address'::1'indicates the IPv6 loopback interface.The
%and_wildcard characters are permitted in host name or IP address values. These have the same meaning as for pattern-matching operations performed with theLIKEoperator. For example, a host value of'%'matches any host name, whereas a value of'%.mysql.com'matches any host in themysql.comdomain.'198.51.100.%'matches any host in the 198.51.100 class C network.Because IP wildcard values are permitted in host values (for example,
'198.51.100.%'to match every host on a subnet), someone could try to exploit this capability by naming a host198.51.100.somewhere.com. To foil such attempts, MySQL does not perform matching on host names that start with digits and a dot. For example, if a host is named1.2.example.com, its name never matches the host part of account names. An IP wildcard value can match only IP addresses, not host names.For a host value specified as an IPv4 address, a netmask can be given to indicate how many address bits to use for the network number. Netmask notation cannot be used for IPv6 addresses.
The syntax is
host_ip/netmaskCREATE USER 'david'@'198.51.100.0/255.255.255.0';
This enables
davidto connect from any client host having an IP addressclient_ipfor which the following condition is true:client_ip&netmask=host_ipThat is, for the
CREATE USERstatement just shown:client_ip& 255.255.255.0 = 198.51.100.0IP addresses that satisfy this condition range from
198.51.100.0to198.51.100.255.A netmask typically begins with bits set to 1, followed by bits set to 0. Examples:
198.0.0.0/255.0.0.0: Any host on the 198 class A network198.51.100.0/255.255.0.0: Any host on the 198.51 class B network198.51.100.0/255.255.255.0: Any host on the 198.51.100 class C network198.51.100.1: Only the host with this specific IP address
The server performs matching of host values in account names against the client host using the value returned by the system DNS resolver for the client host name or IP address. Except in the case that the account host value is specified using netmask notation, the server performs this comparison as a string match, even for an account host value given as an IP address. This means that you should specify account host values in the same format used by DNS. Here are examples of problems to watch out for:
Suppose that a host on the local network has a fully qualified name of
host1.example.com. If DNS returns name lookups for this host ashost1.example.com, use that name in account host values. If DNS returns justhost1, usehost1instead.If DNS returns the IP address for a given host as
198.51.100.2, that will match an account host value of198.51.100.2but not198.051.100.2. Similarly, it will match an account host pattern like198.51.100.%but not198.051.100.%.
To avoid problems like these, it is advisable to check the format in which your DNS returns host names and addresses. Use values in the same format in MySQL account names.
When you attempt to connect to a MySQL server, the server accepts or rejects the connection based on these conditions:
Your identity and whether you can verify your identity by supplying the correct password
Whether your account is locked or unlocked
The server checks credentials first, then account locking state. A failure for either step causes the server to deny access to you completely. Otherwise, the server accepts the connection, and then enters Stage 2 and waits for requests.
Credential checking is performed using the three
user table scope columns
(Host, User, and
authentication_string). Locking state is
recorded in the user table
account_locked column. The server accepts the
connection only if the Host and
User columns in some user
table row match the client host name and user name, the client
supplies the password specified in that row, and the
account_locked value is 'N'.
The rules for permissible Host and
User values are given in
Section 6.2.3, “Specifying Account Names”. Account locking can be changed
with the ALTER USER statement.
Your identity is based on two pieces of information:
The client host from which you connect
Your MySQL user name
If the User column value is nonblank, the user
name in an incoming connection must match exactly. If the
User value is blank, it matches any user name.
If the user table row that matches an incoming
connection has a blank user name, the user is considered to be an
anonymous user with no name, not a user with the name that the
client actually specified. This means that a blank user name is
used for all further access checking for the duration of the
connection (that is, during Stage 2).
The authentication_string column can be blank.
This is not a wildcard and does not mean that any password
matches. It means that the user must connect without specifying a
password. If the server authenticates a client using a plugin, the
authentication method that the plugin implements may or may not
use the password in the authentication_string
column. In this case, it is possible that an external password is
also used to authenticate to the MySQL server.
Nonblank authentication_string values in the
user table represent encrypted passwords. MySQL
does not store passwords in cleartext form for anyone to see.
Rather, the password supplied by a user who is attempting to
connect is encrypted (using the password hashing method
implemented by the account authentication plugin). The encrypted
password then is used during the connection process when checking
whether the password is correct. This is done without the
encrypted password ever traveling over the connection. See
Section 6.3.1, “User Names and Passwords”.
From MySQL's point of view, the encrypted password is the
real password, so you should never give
anyone access to it. In particular, do not give
nonadministrative users read access to tables in the
mysql database.
The following table shows how various combinations of
User and Host values in the
user table apply to incoming connections.
User Value |
Host Value |
Permissible Connections |
|---|---|---|
'fred' |
'h1.example.net' |
fred, connecting from
h1.example.net |
'' |
'h1.example.net' |
Any user, connecting from h1.example.net |
'fred' |
'%' |
fred, connecting from any host |
'' |
'%' |
Any user, connecting from any host |
'fred' |
'%.example.net' |
fred, connecting from any host in the
example.net domain |
'fred' |
'x.example.%' |
fred, connecting from
x.example.net,
x.example.com,
x.example.edu, and so on; this is
probably not useful |
'fred' |
'198.51.100.177' |
fred, connecting from the host with IP address
198.51.100.177 |
'fred' |
'198.51.100.%' |
fred, connecting from any host in the
198.51.100 class C subnet |
'fred' |
'198.51.100.0/255.255.255.0' |
Same as previous example |
It is possible for the client host name and user name of an
incoming connection to match more than one row in the
user table. The preceding set of examples
demonstrates this: Several of the entries shown match a connection
from h1.example.net by fred.
When multiple matches are possible, the server must determine which of them to use. It resolves this issue as follows:
Whenever the server reads the
usertable into memory, it sorts the rows.When a client attempts to connect, the server looks through the rows in sorted order.
The server uses the first row that matches the client host name and user name.
The server uses sorting rules that order rows with the
most-specific Host values first. Literal host
names and IP addresses are the most specific. (The specificity of
a literal IP address is not affected by whether it has a netmask,
so 198.51.100.13 and
198.51.100.0/255.255.255.0 are considered
equally specific.) The pattern '%' means
“any host” and is least specific. The empty string
'' also means “any host” but sorts
after '%'. Rows with the same
Host value are ordered with the most-specific
User values first (a blank
User value means “any user” and is
least specific). For rows with equally-specific
Host and User values, the
order is indeterminate.
To see how this works, suppose that the user
table looks like this:
+-----------+----------+- | Host | User | ... +-----------+----------+- | % | root | ... | % | jeffrey | ... | localhost | root | ... | localhost | | ... +-----------+----------+-
When the server reads the table into memory, it sorts the rows using the rules just described. The result after sorting looks like this:
+-----------+----------+- | Host | User | ... +-----------+----------+- | localhost | root | ... | localhost | | ... | % | jeffrey | ... | % | root | ... +-----------+----------+-
When a client attempts to connect, the server looks through the
sorted rows and uses the first match found. For a connection from
localhost by jeffrey, two of
the rows from the table match: the one with
Host and User values of
'localhost' and '', and the
one with values of '%' and
'jeffrey'. The 'localhost'
row appears first in sorted order, so that is the one the server
uses.
Here is another example. Suppose that the user
table looks like this:
+----------------+----------+- | Host | User | ... +----------------+----------+- | % | jeffrey | ... | h1.example.net | | ... +----------------+----------+-
The sorted table looks like this:
+----------------+----------+- | Host | User | ... +----------------+----------+- | h1.example.net | | ... | % | jeffrey | ... +----------------+----------+-
A connection by jeffrey from
h1.example.net is matched by the first row,
whereas a connection by jeffrey from any host
is matched by the second.
It is a common misconception to think that, for a given user
name, all rows that explicitly name that user are used first
when the server attempts to find a match for the connection.
This is not true. The preceding example illustrates this, where
a connection from h1.example.net by
jeffrey is first matched not by the row
containing 'jeffrey' as the
User column value, but by the row with no
user name. As a result, jeffrey is
authenticated as an anonymous user, even though he specified a
user name when connecting.
If you are able to connect to the server, but your privileges are
not what you expect, you probably are being authenticated as some
other account. To find out what account the server used to
authenticate you, use the
CURRENT_USER() function. (See
Section 12.14, “Information Functions”.) It returns a value in
user_name@host_nameUser and
Host values from the matching
user table row. Suppose that
jeffrey connects and issues the following
query:
mysql> SELECT CURRENT_USER();
+----------------+
| CURRENT_USER() |
+----------------+
| @localhost |
+----------------+
The result shown here indicates that the matching
user table row had a blank
User column value. In other words, the server
is treating jeffrey as an anonymous user.
Another way to diagnose authentication problems is to print out
the user table and sort it by hand to see where
the first match is being made.
After you establish a connection, the server enters Stage 2 of
access control. For each request that you issue through that
connection, the server determines what operation you want to
perform, then checks whether you have sufficient privileges to do
so. This is where the privilege columns in the grant tables come
into play. These privileges can come from any of the
user, db,
tables_priv, columns_priv,
or procs_priv tables. (You may find it helpful
to refer to Section 6.2.2, “Grant Tables”, which lists the
columns present in each of the grant tables.)
The user table grants privileges that are
assigned to you on a global basis and that apply no matter what
the default database is. For example, if the
user table grants you the
DELETE privilege, you can delete
rows from any table in any database on the server host! It is wise
to grant privileges in the user table only to
people who need them, such as database administrators. For other
users, you should leave all privileges in the
user table set to 'N' and
grant privileges at more specific levels only. You can grant
privileges for particular databases, tables, columns, or routines.
The db table grants database-specific
privileges. Values in the scope columns of this table can take the
following forms:
A blank
Uservalue matches the anonymous user. A nonblank value matches literally; there are no wildcards in user names.The wildcard characters
%and_can be used in theHostandDbcolumns. These have the same meaning as for pattern-matching operations performed with theLIKEoperator. If you want to use either character literally when granting privileges, you must escape it with a backslash. For example, to include the underscore character (_) as part of a database name, specify it as\_in theGRANTstatement.A
'%'or blankHostvalue means “any host.”A
'%'or blankDbvalue means “any database.”
The server reads the db table into memory and
sorts it at the same time that it reads the
user table. The server sorts the
db table based on the Host,
Db, and User scope columns.
As with the user table, sorting puts the
most-specific values first and least-specific values last, and
when the server looks for matching rows, it uses the first match
that it finds.
The tables_priv,
columns_priv, and procs_priv
tables grant table-specific, column-specific, and routine-specific
privileges. Values in the scope columns of these tables can take
the following forms:
The wildcard characters
%and_can be used in theHostcolumn. These have the same meaning as for pattern-matching operations performed with theLIKEoperator.A
'%'or blankHostvalue means “any host.”The
Db,Table_name,Column_name, andRoutine_namecolumns cannot contain wildcards or be blank.
The server sorts the tables_priv,
columns_priv, and procs_priv
tables based on the Host,
Db, and User columns. This
is similar to db table sorting, but simpler
because only the Host column can contain
wildcards.
The server uses the sorted tables to verify each request that it
receives. For requests that require administrative privileges such
as SHUTDOWN or
RELOAD, the server checks only the
user table row because that is the only table
that specifies administrative privileges. The server grants access
if the row permits the requested operation and denies access
otherwise. For example, if you want to execute mysqladmin
shutdown but your user table row does
not grant the SHUTDOWN privilege to
you, the server denies access without even checking the
db table. (It contains no
Shutdown_priv column, so there is no need to do
so.)
For database-related requests
(INSERT,
UPDATE, and so on), the server
first checks the user's global privileges by looking in the
user table row. If the row permits the
requested operation, access is granted. If the global privileges
in the user table are insufficient, the server
determines the user's database-specific privileges by checking the
db table:
The server looks in the db table for a match on
the Host, Db, and
User columns. The Host and
User columns are matched to the connecting
user's host name and MySQL user name. The Db
column is matched to the database that the user wants to access.
If there is no row for the Host and
User, access is denied.
After determining the database-specific privileges granted by the
db table rows, the server adds them to the
global privileges granted by the user table. If
the result permits the requested operation, access is granted.
Otherwise, the server successively checks the user's table and
column privileges in the tables_priv and
columns_priv tables, adds those to the user's
privileges, and permits or denies access based on the result. For
stored-routine operations, the server uses the
procs_priv table rather than
tables_priv and
columns_priv.
Expressed in boolean terms, the preceding description of how a user's privileges are calculated may be summarized like this:
global privileges OR (database privileges AND host privileges) OR table privileges OR column privileges OR routine privileges
It may not be apparent why, if the global user
row privileges are initially found to be insufficient for the
requested operation, the server adds those privileges to the
database, table, and column privileges later. The reason is that a
request might require more than one type of privilege. For
example, if you execute an
INSERT INTO ...
SELECT statement, you need both the
INSERT and the
SELECT privileges. Your privileges
might be such that the user table row grants
one privilege and the db table row grants the
other. In this case, you have the necessary privileges to perform
the request, but the server cannot tell that from either table by
itself; the privileges granted by the rows in both tables must be
combined.
When mysqld starts, it reads all grant table contents into memory. The in-memory tables become effective for access control at that point.
If you modify the grant tables indirectly using account-management
statements such as GRANT,
REVOKE, SET
PASSWORD, or RENAME USER,
the server notices these changes and loads the grant tables into
memory again immediately.
If you modify the grant tables directly using statements such as
INSERT,
UPDATE, or
DELETE, your changes have no effect
on privilege checking until you either restart the server or tell
it to reload the tables. If you change the grant tables directly
but forget to reload them, your changes have no
effect until you restart the server. This may leave you
wondering why your changes seem to make no difference!
To tell the server to reload the grant tables, perform a
flush-privileges operation. This can be done by issuing a
FLUSH PRIVILEGES statement or by
executing a mysqladmin flush-privileges or
mysqladmin reload command.
A grant table reload affects privileges for each existing client connection as follows:
Table and column privilege changes take effect with the client's next request.
Database privilege changes take effect the next time the client executes a
USEstatement.db_nameNoteClient applications may cache the database name; thus, this effect may not be visible to them without actually changing to a different database.
Global privileges and passwords are unaffected for a connected client. These changes take effect only for subsequent connections.
If the server is started with the
--skip-grant-tables option, it does
not read the grant tables or implement any access control. Anyone
can connect and do anything, which is
insecure. To cause a server thus started to read the
tables and enable access checking, flush the privileges.
If you encounter problems when you try to connect to the MySQL server, the following items describe some courses of action you can take to correct the problem.
Make sure that the server is running. If it is not, clients cannot connect to it. For example, if an attempt to connect to the server fails with a message such as one of those following, one cause might be that the server is not running:
shell>
mysqlERROR 2003: Can't connect to MySQL server on 'host_name' (111) shell>mysqlERROR 2002: Can't connect to local MySQL server through socket '/tmp/mysql.sock' (111)It might be that the server is running, but you are trying to connect using a TCP/IP port, named pipe, or Unix socket file different from the one on which the server is listening. To correct this when you invoke a client program, specify a
--portoption to indicate the proper port number, or a--socketoption to indicate the proper named pipe or Unix socket file. To find out where the socket file is, you can use this command:shell>
netstat -ln | grep mysqlMake sure that the server has not been configured to ignore network connections or (if you are attempting to connect remotely) that it has not been configured to listen only locally on its network interfaces. If the server was started with
--skip-networking, it will not accept TCP/IP connections at all. If the server was started with--bind-address=127.0.0.1, it will listen for TCP/IP connections only locally on the loopback interface and will not accept remote connections.Check to make sure that there is no firewall blocking access to MySQL. Your firewall may be configured on the basis of the application being executed, or the port number used by MySQL for communication (3306 by default). Under Linux or Unix, check your IP tables (or similar) configuration to ensure that the port has not been blocked. Under Windows, applications such as ZoneAlarm or Windows Firewall may need to be configured not to block the MySQL port.
The grant tables must be properly set up so that the server can use them for access control. For some distribution types (such as binary distributions on Windows, or RPM distributions on Linux), the installation process initializes the MySQL data directory, including the
mysqldatabase containing the grant tables. For distributions that do not do this, you must initialize the data directory manually. For details, see Section 2.10, “Postinstallation Setup and Testing”.To determine whether you need to initialize the grant tables, look for a
mysqldirectory under the data directory. (The data directory normally is nameddataorvarand is located under your MySQL installation directory.) Make sure that you have a file nameduser.MYDin themysqldatabase directory. If not, initialize the data directory. After doing so and starting the server, you should be able to connect to the server.After a fresh installation, if you try to log on to the server as
rootwithout using a password, you might get the following error message.shell>
mysql -u rootERROR 1045 (28000): Access denied for user 'root'@'localhost' (using password: NO)It means a root password has already been assigned during installation and it has to be supplied. See Section 2.10.4, “Securing the Initial MySQL Accounts” on the different ways the password could have been assigned and, in some cases, how to find it. If you need to reset the root password, see instructions in Section B.5.3.2, “How to Reset the Root Password”. After you have found or reset your password, log on again as
rootusing the--password(or-p) option:shell>
mysql -u root -pEnter password:However, the server is going to let you connect as
rootwithout using a password if you have initialized MySQL using mysqld --initialize-insecure (see Section 2.10.1.1, “Initializing the Data Directory Manually Using mysqld” for details). That is a security risk, so you should set a password for therootaccount; see Section 2.10.4, “Securing the Initial MySQL Accounts” for instructions.If you have updated an existing MySQL installation to a newer version, did you run the mysql_upgrade script? If not, do so. The structure of the grant tables changes occasionally when new capabilities are added, so after an upgrade you should always make sure that your tables have the current structure. For instructions, see Section 4.4.7, “mysql_upgrade — Check and Upgrade MySQL Tables”.
If a client program receives the following error message when it tries to connect, it means that the server expects passwords in a newer format than the client is capable of generating:
shell>
mysqlClient does not support authentication protocol requested by server; consider upgrading MySQL clientFor information on how to deal with this, see Section 6.5.1.3, “Migrating Away from Pre-4.1 Password Hashing and the mysql_old_password Plugin”.
Remember that client programs use connection parameters specified in option files or environment variables. If a client program seems to be sending incorrect default connection parameters when you have not specified them on the command line, check any applicable option files and your environment. For example, if you get
Access deniedwhen you run a client without any options, make sure that you have not specified an old password in any of your option files!You can suppress the use of option files by a client program by invoking it with the
--no-defaultsoption. For example:shell>
mysqladmin --no-defaults -u root versionThe option files that clients use are listed in Section 4.2.6, “Using Option Files”. Environment variables are listed in Section 4.9, “MySQL Program Environment Variables”.
If you get the following error, it means that you are using an incorrect
rootpassword:shell>
mysqladmin -u root -pAccess denied for user 'root'@'localhost' (using password: YES)xxxxverIf the preceding error occurs even when you have not specified a password, it means that you have an incorrect password listed in some option file. Try the
--no-defaultsoption as described in the previous item.For information on changing passwords, see Section 6.3.6, “Assigning Account Passwords”.
If you have lost or forgotten the
rootpassword, see Section B.5.3.2, “How to Reset the Root Password”.localhostis a synonym for your local host name, and is also the default host to which clients try to connect if you specify no host explicitly.You can use a
--host=127.0.0.1option to name the server host explicitly. This will make a TCP/IP connection to the local mysqld server. You can also use TCP/IP by specifying a--hostoption that uses the actual host name of the local host. In this case, the host name must be specified in ausertable row on the server host, even though you are running the client program on the same host as the server.The
Access deniederror message tells you who you are trying to log in as, the client host from which you are trying to connect, and whether you were using a password. Normally, you should have one row in theusertable that exactly matches the host name and user name that were given in the error message. For example, if you get an error message that containsusing password: NO, it means that you tried to log in without a password.If you get an
Access deniederror when trying to connect to the database withmysql -u, you may have a problem with theuser_nameusertable. Check this by executingmysql -u root mysqland issuing this SQL statement:SELECT * FROM user;
The result should include a row with the
HostandUsercolumns matching your client's host name and your MySQL user name.If the following error occurs when you try to connect from a host other than the one on which the MySQL server is running, it means that there is no row in the
usertable with aHostvalue that matches the client host:Host ... is not allowed to connect to this MySQL server
You can fix this by setting up an account for the combination of client host name and user name that you are using when trying to connect.
If you do not know the IP address or host name of the machine from which you are connecting, you should put a row with
'%'as theHostcolumn value in theusertable. After trying to connect from the client machine, use aSELECT USER()query to see how you really did connect. Then change the'%'in theusertable row to the actual host name that shows up in the log. Otherwise, your system is left insecure because it permits connections from any host for the given user name.On Linux, another reason that this error might occur is that you are using a binary MySQL version that is compiled with a different version of the
glibclibrary than the one you are using. In this case, you should either upgrade your operating system orglibc, or download a source distribution of MySQL version and compile it yourself. A source RPM is normally trivial to compile and install, so this is not a big problem.If you specify a host name when trying to connect, but get an error message where the host name is not shown or is an IP address, it means that the MySQL server got an error when trying to resolve the IP address of the client host to a name:
shell>
mysqladmin -u root -pAccess denied for user 'root'@'' (using password: YES)xxxx-hsome_hostnameverIf you try to connect as
rootand get the following error, it means that you do not have a row in theusertable with aUsercolumn value of'root'and that mysqld cannot resolve the host name for your client:Access denied for user ''@'unknown'
These errors indicate a DNS problem. To fix it, execute mysqladmin flush-hosts to reset the internal DNS host cache. See Section 8.12.5.2, “DNS Lookup Optimization and the Host Cache”.
Some permanent solutions are:
Determine what is wrong with your DNS server and fix it.
Specify IP addresses rather than host names in the MySQL grant tables.
Put an entry for the client machine name in
/etc/hostson Unix or\windows\hostson Windows.Start mysqld with the
--skip-name-resolveoption.Start mysqld with the
--skip-host-cacheoption.On Unix, if you are running the server and the client on the same machine, connect to
localhost. For connections tolocalhost, MySQL programs attempt to connect to the local server by using a Unix socket file, unless there are connection parameters specified to ensure that the client makes a TCP/IP connection. For more information, see Section 4.2.2, “Connecting to the MySQL Server”.On Windows, if you are running the server and the client on the same machine and the server supports named pipe connections, connect to the host name
.(period). Connections to.use a named pipe rather than TCP/IP.
If
mysql -u rootworks butmysql -hresults inyour_hostname-u rootAccess denied(whereyour_hostnameis the actual host name of the local host), you may not have the correct name for your host in theusertable. A common problem here is that theHostvalue in theusertable row specifies an unqualified host name, but your system's name resolution routines return a fully qualified domain name (or vice versa). For example, if you have a row with host'pluto'in theusertable, but your DNS tells MySQL that your host name is'pluto.example.com', the row does not work. Try adding a row to theusertable that contains the IP address of your host as theHostcolumn value. (Alternatively, you could add a row to theusertable with aHostvalue that contains a wildcard; for example,'pluto.%'. However, use ofHostvalues ending with%is insecure and is not recommended!)If
mysql -uworks butuser_namemysql -udoes not, you have not granted access to the given user for the database nameduser_namesome_dbsome_db.If
mysql -uworks when executed on the server host, butuser_namemysql -hdoes not work when executed on a remote client host, you have not enabled access to the server for the given user name from the remote host.host_name-uuser_nameIf you cannot figure out why you get
Access denied, remove from theusertable all rows that haveHostvalues containing wildcards (rows that contain'%'or'_'characters). A very common error is to insert a new row withHost='%'andUser=', thinking that this enables you to specifysome_user'localhostto connect from the same machine. The reason that this does not work is that the default privileges include a row withHost='localhost'andUser=''. Because that row has aHostvalue'localhost'that is more specific than'%', it is used in preference to the new row when connecting fromlocalhost! The correct procedure is to insert a second row withHost='localhost'andUser=', or to delete the row withsome_user'Host='localhost'andUser=''. After deleting the row, remember to issue aFLUSH PRIVILEGESstatement to reload the grant tables. See also Section 6.2.4, “Access Control, Stage 1: Connection Verification”.If you are able to connect to the MySQL server, but get an
Access deniedmessage whenever you issue aSELECT ... INTO OUTFILEorLOAD DATA INFILEstatement, your row in theusertable does not have theFILEprivilege enabled.If you change the grant tables directly (for example, by using
INSERT,UPDATE, orDELETEstatements) and your changes seem to be ignored, remember that you must execute aFLUSH PRIVILEGESstatement or a mysqladmin flush-privileges command to cause the server to reload the privilege tables. Otherwise, your changes have no effect until the next time the server is restarted. Remember that after you change therootpassword with anUPDATEstatement, you will not need to specify the new password until after you flush the privileges, because the server will not know you've changed the password yet!If your privileges seem to have changed in the middle of a session, it may be that a MySQL administrator has changed them. Reloading the grant tables affects new client connections, but it also affects existing connections as indicated in Section 6.2.6, “When Privilege Changes Take Effect”.
If you have access problems with a Perl, PHP, Python, or ODBC program, try to connect to the server with
mysql -uoruser_namedb_namemysql -u. If you are able to connect using the mysql client, the problem lies with your program, not with the access privileges. (There is no space betweenuser_name-pyour_passdb_name-pand the password; you can also use the--password=syntax to specify the password. If you use theyour_pass-por--passwordoption with no password value, MySQL prompts you for the password.)For testing purposes, start the mysqld server with the
--skip-grant-tablesoption. Then you can change the MySQL grant tables and use theSHOW GRANTSstatement to check whether your modifications have the desired effect. When you are satisfied with your changes, execute mysqladmin flush-privileges to tell the mysqld server to reload the privileges. This enables you to begin using the new grant table contents without stopping and restarting the server.If everything else fails, start the mysqld server with a debugging option (for example,
--debug=d,general,query). This prints host and user information about attempted connections, as well as information about each command issued. See Section 28.5.3, “The DBUG Package”.If you have any other problems with the MySQL grant tables and feel you must post the problem to the mailing list, always provide a dump of the MySQL grant tables. You can dump the tables with the mysqldump mysql command. To file a bug report, see the instructions at Section 1.7, “How to Report Bugs or Problems”. In some cases, you may need to restart mysqld with
--skip-grant-tablesto run mysqldump.
- 6.3.1 User Names and Passwords
- 6.3.2 Adding User Accounts
- 6.3.3 Removing User Accounts
- 6.3.4 Reserved User Accounts
- 6.3.5 Setting Account Resource Limits
- 6.3.6 Assigning Account Passwords
- 6.3.7 Password Management
- 6.3.8 Password Expiration and Sandbox Mode
- 6.3.9 Pluggable Authentication
- 6.3.10 Proxy Users
- 6.3.11 User Account Locking
- 6.3.12 SQL-Based MySQL Account Activity Auditing
This section describes how to set up accounts for clients of your MySQL server. It discusses the following topics:
The meaning of account names and passwords as used in MySQL and how that compares to names and passwords used by your operating system
How to set up new accounts and remove existing accounts
How to change passwords
Guidelines for using passwords securely
See also Section 13.7.1, “Account Management Statements”, which describes the syntax and use for all user-management SQL statements.
MySQL stores accounts in the user table of the
mysql system database. An account is defined in
terms of a user name and the client host or hosts from which the
user can connect to the server. For information about account
representation in the user table, see
Section 6.2.2, “Grant Tables”.
The account may also have a password. MySQL supports authentication plugins, so it is possible that an account authenticates using some external authentication method. See Section 6.3.9, “Pluggable Authentication”.
There are several distinctions between the way user names and passwords are used by MySQL and your operating system:
User names, as used by MySQL for authentication purposes, have nothing to do with user names (login names) as used by Windows or Unix. On Unix, most MySQL clients by default try to log in using the current Unix user name as the MySQL user name, but that is for convenience only. The default can be overridden easily, because client programs permit any user name to be specified with a
-uor--useroption. This means that anyone can attempt to connect to the server using any user name, so you cannot make a database secure in any way unless all MySQL accounts have passwords. Anyone who specifies a user name for an account that has no password is able to connect successfully to the server.MySQL user names can be up to 32 characters long Operating system user names may be of a different maximum length. For example, Unix user names typically are limited to eight characters.
WarningThe limit on MySQL user name length is hardcoded in MySQL servers and clients, and trying to circumvent it by modifying the definitions of the tables in the
mysqldatabase does not work.You should never alter the structure of tables in the
mysqldatabase in any manner whatsoever except by means of the procedure that is described in Section 4.4.7, “mysql_upgrade — Check and Upgrade MySQL Tables”. Attempting to redefine MySQL's system tables in any other fashion results in undefined (and unsupported!) behavior. The server is free to ignore rows that become malformed as a result of such modifications.To authenticate client connections for accounts that use MySQL native authentication (implemented by the
mysql_native_passwordauthentication plugin), the server uses passwords stored in theusertable. These passwords are distinct from passwords for logging in to your operating system. There is no necessary connection between the “external” password you use to log in to a Windows or Unix machine and the password you use to access the MySQL server on that machine.If the server authenticates a client using some other plugin, the authentication method that the plugin implements may or may not use a password stored in the
usertable. In this case, it is possible that an external password is also used to authenticate to the MySQL server.Passwords stored in the
usertable are encrypted using plugin-specific algorithms. For information about MySQL native password hashing, see Section 6.1.2.4, “Password Hashing in MySQL”.If the user name and password contain only ASCII characters, it is possible to connect to the server regardless of character set settings. To connect when the user name or password contain non-ASCII characters, the client should call the
mysql_options()C API function with theMYSQL_SET_CHARSET_NAMEoption and appropriate character set name as arguments. This causes authentication to take place using the specified character set. Otherwise, authentication will fail unless the server default character set is the same as the encoding in the authentication defaults.Standard MySQL client programs support a
--default-character-setoption that causesmysql_options()to be called as just described. In addition, character set autodetection is supported as described in Section 10.4, “Connection Character Sets and Collations”. For programs that use a connector that is not based on the C API, the connector may provide an equivalent tomysql_options()that can be used instead. Check the connector documentation.The preceding notes do not apply for
ucs2,utf16, andutf32, which are not permitted as client character sets.
The MySQL installation process populates the grant tables with an
initial root account, as described in
Section 2.10.4, “Securing the Initial MySQL Accounts”, which also discusses how to
assign passwords to it. Thereafter, you normally set up, modify,
and remove MySQL accounts using statements such as
CREATE USER,
DROP USER,
GRANT, and
REVOKE. See
Section 13.7.1, “Account Management Statements”.
To connect to a MySQL server with a command-line client, specify user name and password options as necessary for the account that you want to use:
shell> mysql --user=finley --password db_name
If you prefer short options, the command looks like this:
shell> mysql -u finley -p db_name
If you omit the password value following the
--password or -p
option on the command line (as just shown), the client prompts for
one. Alternatively, the password can be specified on the command
line:
shell>mysql --user=finley --password=shell>passworddb_namemysql -u finley -ppassworddb_name
If you use the -p option, there must be
no space between -p and the
following password value.
Specifying a password on the command line should be considered insecure. See Section 6.1.2.1, “End-User Guidelines for Password Security”. You can use an option file or a login path file to avoid giving the password on the command line. See Section 4.2.6, “Using Option Files”, and Section 4.6.6, “mysql_config_editor — MySQL Configuration Utility”.
For additional information about specifying user names, passwords, and other connection parameters, see Section 4.2.2, “Connecting to the MySQL Server”.
You can create MySQL accounts two ways:
By using account-management statements intended for creating accounts and establishing their privileges, such as
CREATE USERandGRANT. These statements cause the server to make appropriate modifications to the underlying grant tables.By manipulating the MySQL grant tables directly with statements such as
INSERT,UPDATE, orDELETE.
The preferred method is to use account-management statements because they are more concise and less error-prone than manipulating the grant tables directly. All such statements are described in Section 13.7.1, “Account Management Statements”. Direct grant table modification is discouraged, and is not described here. The server is free to ignore rows that become malformed as a result of such modifications.
Another option for creating accounts is to use the GUI tool
MySQL Workbench. Also, several third-party programs offer capabilities
for MySQL account administration. phpMyAdmin is
one such program.
The following examples show how to use the
mysql client program to set up new accounts.
These examples assume that privileges have been set up according
to the defaults described in Section 2.10.4, “Securing the Initial MySQL Accounts”.
This means that to make changes, you must connect to the MySQL
server as the MySQL root user, which has the
CREATE USER privilege.
First, use the mysql program to connect to the
server as the MySQL root user:
shell> mysql --user=root mysql
If you have assigned a password to the root
account, you must also supply a --password or
-p option.
After connecting to the server as root, you can
add new accounts. The following example uses
CREATE USER and
GRANT statements to set up four
accounts:
mysql>CREATE USER 'finley'@'localhost' IDENTIFIED BY 'mysql>password';GRANT ALL PRIVILEGES ON *.* TO 'finley'@'localhost'->WITH GRANT OPTION;mysql>CREATE USER 'finley'@'%' IDENTIFIED BY 'mysql>password';GRANT ALL PRIVILEGES ON *.* TO 'finley'@'%'->WITH GRANT OPTION;mysql>CREATE USER 'admin'@'localhost' IDENTIFIED BY 'mysql>password';GRANT RELOAD,PROCESS ON *.* TO 'admin'@'localhost';mysql>CREATE USER 'dummy'@'localhost';
The accounts created by those statements have the following properties:
Two accounts have a user name of
finley. Both are superuser accounts with full privileges to do anything. The'finley'@'localhost'account can be used only when connecting from the local host. The'finley'@'%'account uses the'%'wildcard for the host part, so it can be used to connect from any host.The
'finley'@'localhost'account is necessary if there is an anonymous-user account forlocalhost. Without the'finley'@'localhost'account, that anonymous-user account takes precedence whenfinleyconnects from the local host andfinleyis treated as an anonymous user. The reason for this is that the anonymous-user account has a more specificHostcolumn value than the'finley'@'%'account and thus comes earlier in theusertable sort order. (usertable sorting is discussed in Section 6.2.4, “Access Control, Stage 1: Connection Verification”.)The
'admin'@'localhost'account can be used only byadminto connect from the local host. It is granted theRELOADandPROCESSadministrative privileges. These privileges enable theadminuser to execute the mysqladmin reload, mysqladmin refresh, and mysqladmin flush-xxxcommands, as well as mysqladmin processlist . No privileges are granted for accessing any databases. You could add such privileges usingGRANTstatements.The
'dummy'@'localhost'account has no password (which is insecure and not recommended). This account can be used only to connect from the local host. No privileges are granted. It is assumed that you will grant specific privileges to the account usingGRANTstatements.
To see the privileges for an account, use
SHOW GRANTS:
mysql> SHOW GRANTS FOR 'admin'@'localhost';
+-----------------------------------------------------+
| Grants for admin@localhost |
+-----------------------------------------------------+
| GRANT RELOAD, PROCESS ON *.* TO 'admin'@'localhost' |
+-----------------------------------------------------+
To see nonprivilege properties for an account, use
SHOW CREATE USER:
mysql> SHOW CREATE USER 'admin'@'localhost'\G
*************************** 1. row ***************************
CREATE USER for admin@localhost: CREATE USER 'admin'@'localhost'
IDENTIFIED WITH 'mysql_native_password'
AS '*67ACDEBDAB923990001F0FFB017EB8ED41861105'
REQUIRE NONE PASSWORD EXPIRE DEFAULT ACCOUNT UNLOCK
The next examples create three accounts and grant them access to
specific databases. Each of them has a user name of
custom and password of
password:
mysql>CREATE USER 'custom'@'localhost' IDENTIFIED BY 'mysql>password';GRANT SELECT,INSERT,UPDATE,DELETE,CREATE,DROP->ON bankaccount.*->TO 'custom'@'localhost';mysql>CREATE USER 'custom'@'host47.example.com' IDENTIFIED BY 'mysql>password';GRANT SELECT,INSERT,UPDATE,DELETE,CREATE,DROP->ON expenses.*->TO 'custom'@'host47.example.com';mysql>CREATE USER 'custom'@'%.example.com' IDENTIFIED BY 'mysql>password';GRANT SELECT,INSERT,UPDATE,DELETE,CREATE,DROP->ON customer.*->TO 'custom'@'%.example.com';
The three accounts can be used as follows:
The first account can access the
bankaccountdatabase, but only from the local host.The second account can access the
expensesdatabase, but only from the hosthost47.example.com.The third account can access the
customerdatabase, from any host in theexample.comdomain. This account has access from all machines in the domain due to use of the%wildcard character in the host part of the account name.
To remove an account, use the DROP
USER statement, which is described in
Section 13.7.1.3, “DROP USER Syntax”. For example:
mysql> DROP USER 'jeffrey'@'localhost';
One part of the MySQL installation process is data directory initialization (see Section 2.10.1.1, “Initializing the Data Directory Manually Using mysqld”). During data directory initialization, MySQL creates user accounts that should be considered reserved:
'root'@'localhost: Used for administrative purposes. This account has all privileges and can perform any operation.Strictly speaking, this account name is not reserved, in the sense that some installations rename the
rootaccount to something else to avoid exposing a highly privileged account with a well-known name.'mysql.sys'@'localhost': Used as theDEFINERforsysschema objects. Use of themysql.sysaccount avoids problems that occur if a DBA renames or removes therootaccount. This account is locked so that it cannot be used for client connections.'mysql.session'@'localhost': Used internally by plugins to access the server. This account is locked so that it cannot be used for client connections.
One means of restricting client use of MySQL server resources is
to set the global
max_user_connections system
variable to a nonzero value. This limits the number of
simultaneous connections that can be made by any given account,
but places no limits on what a client can do once connected. In
addition, setting
max_user_connections does not
enable management of individual accounts. Both types of control
are of interest to MySQL administrators.
To address such concerns, MySQL permits limits for individual accounts on use of these server resources:
The number of queries an account can issue per hour
The number of updates an account can issue per hour
The number of times an account can connect to the server per hour
The number of simultaneous connections to the server by an account
Any statement that a client can issue counts against the query limit, unless its results are served from the query cache. Only statements that modify databases or tables count against the update limit.
An “account” in this context corresponds to a row in
the mysql.user table. That is, a connection is
assessed against the User and
Host values in the user
table row that applies to the connection. For example, an account
'usera'@'%.example.com' corresponds to a row in
the user table that has User
and Host values of usera and
%.example.com, to permit
usera to connect from any host in the
example.com domain. In this case, the server
applies resource limits in this row collectively to all
connections by usera from any host in the
example.com domain because all such connections
use the same account.
Before MySQL 5.0, an “account” was assessed against
the actual host from which a user connects. This older method of
accounting may be selected by starting the server with the
--old-style-user-limits option. In
this case, if usera connects simultaneously
from host1.example.com and
host2.example.com, the server applies the
account resource limits separately to each connection. If
usera connects again from
host1.example.com, the server applies the
limits for that connection together with the existing connection
from that host.
To establish resource limits for an account at account-creation
time, use the CREATE USER
statement. To modify the limits for an existing account, use
ALTER USER. Provide a
WITH clause that names each resource to be
limited. The default value for each limit is zero (no limit). For
example, to create a new account that can access the
customer database, but only in a limited
fashion, issue these statements:
mysql>CREATE USER 'francis'@'localhost' IDENTIFIED BY 'frank'->WITH MAX_QUERIES_PER_HOUR 20->MAX_UPDATES_PER_HOUR 10->MAX_CONNECTIONS_PER_HOUR 5->MAX_USER_CONNECTIONS 2;
The limit types need not all be named in the
WITH clause, but those named can be present in
any order. The value for each per-hour limit should be an integer
representing a count per hour. For
MAX_USER_CONNECTIONS, the limit is an integer
representing the maximum number of simultaneous connections by the
account. If this limit is set to zero, the global
max_user_connections system
variable value determines the number of simultaneous connections.
If max_user_connections is also
zero, there is no limit for the account.
To modify limits for an existing account, use an
ALTER USER statement. The following
statement changes the query limit for francis
to 100:
mysql> ALTER USER 'francis'@'localhost' WITH MAX_QUERIES_PER_HOUR 100;
The statement modifies only the limit value specified and leaves the account otherwise unchanged.
To remove a limit, set its value to zero. For example, to remove
the limit on how many times per hour francis
can connect, use this statement:
mysql> ALTER USER 'francis'@'localhost' WITH MAX_CONNECTIONS_PER_HOUR 0;
As mentioned previously, the simultaneous-connection limit for an
account is determined from the
MAX_USER_CONNECTIONS limit and the
max_user_connections system
variable. Suppose that the global
max_user_connections value is 10
and three accounts have individual resource limits specified as
follows:
ALTER USER 'user1'@'localhost' WITH MAX_USER_CONNECTIONS 0; ALTER USER 'user2'@'localhost' WITH MAX_USER_CONNECTIONS 5; ALTER USER 'user3'@'localhost' WITH MAX_USER_CONNECTIONS 20;
user1 has a connection limit of 10 (the global
max_user_connections value)
because it has a MAX_USER_CONNECTIONS limit of
zero. user2 and user3 have
connection limits of 5 and 20, respectively, because they have
nonzero MAX_USER_CONNECTIONS limits.
The server stores resource limits for an account in the
user table row corresponding to the account.
The max_questions,
max_updates, and
max_connections columns store the per-hour
limits, and the max_user_connections column
stores the MAX_USER_CONNECTIONS limit. (See
Section 6.2.2, “Grant Tables”.)
Resource-use counting takes place when any account has a nonzero limit placed on its use of any of the resources.
As the server runs, it counts the number of times each account uses resources. If an account reaches its limit on number of connections within the last hour, the server rejects further connections for the account until that hour is up. Similarly, if the account reaches its limit on the number of queries or updates, the server rejects further queries or updates until the hour is up. In all such cases, the server issues appropriate error messages.
Resource counting occurs per account, not per client. For example, if your account has a query limit of 50, you cannot increase your limit to 100 by making two simultaneous client connections to the server. Queries issued on both connections are counted together.
The current per-hour resource-use counts can be reset globally for all accounts, or individually for a given account:
To reset the current counts to zero for all accounts, issue a
FLUSH USER_RESOURCESstatement. The counts also can be reset by reloading the grant tables (for example, with aFLUSH PRIVILEGESstatement or a mysqladmin reload command).The counts for an individual account can be reset to zero by setting any of its limits again. Specify a limit value equal to the value currently assigned to the account.
Per-hour counter resets do not affect the
MAX_USER_CONNECTIONS limit.
All counts begin at zero when the server starts. Counts do not carry over through server restarts.
For the MAX_USER_CONNECTIONS limit, an edge
case can occur if the account currently has open the maximum
number of connections permitted to it: A disconnect followed
quickly by a connect can result in an error
(ER_TOO_MANY_USER_CONNECTIONS or
ER_USER_LIMIT_REACHED) if the
server has not fully processed the disconnect by the time the
connect occurs. When the server finishes disconnect processing,
another connection will once more be permitted.
Required credentials for clients that connect to the MySQL server can include a password. This section describes how to assign passwords for MySQL accounts.
MySQL stores credentials in the user table in
the mysql system database. Operations that
assign or modify passwords are permitted only to users with the
CREATE USER privilege, or,
alternatively, privileges for the mysql
database (INSERT privilege to
create new accounts, UPDATE
privilege to modify existing accounts). If the
read_only system variable is
enabled, use of account-modification statements such as
CREATE USER or
ALTER USER additionally requires
the SUPER privilege.
The discussion here summarizes syntax only for the most common password-assignment statements. For complete details on other possibilities, see Section 13.7.1.2, “CREATE USER Syntax”, Section 13.7.1.1, “ALTER USER Syntax”, Section 13.7.1.4, “GRANT Syntax”, and Section 13.7.1.7, “SET PASSWORD Syntax”.
MySQL uses plugins to perform client authentication; see
Section 6.3.9, “Pluggable Authentication”. In password-assigning
statements, the authentication plugin associated with an account
performs any hashing required of a cleartext password specified.
This enables MySQL to obfuscate passwords prior to storing them in
the mysql.user table. For the statements
described here, MySQL automatically hashes the password specified.
There are also syntaxes for CREATE
USER and ALTER USER that
permit hashed values to be specified literally. For details, see
the descriptions of those statements.
To assign a password when you create a new account, use
CREATE USER and include an
IDENTIFIED BY clause:
CREATE USER 'jeffrey'@'localhost' IDENTIFIED BY 'password';
CREATE USER also supports syntax
for specifying the account authentication plugin. See
Section 13.7.1.2, “CREATE USER Syntax”.
To assign or change a password for an existing account, use the
ALTER USER statement with an
IDENTIFIED BY clause:
ALTER USER 'jeffrey'@'localhost' IDENTIFIED BY 'password';
If you are not connected as an anonymous user, you can change your own password without naming your own account literally:
ALTER USER USER() IDENTIFIED BY 'password';
To change an account password from the command line, use the mysqladmin command:
mysqladmin -uuser_name-hhost_namepassword "password"
The account for which this command sets the password is the one
with a mysql.user table row that matches
user_name in the
User column and the client host from
which you connect in the Host
column.
Setting a password using mysqladmin should be considered insecure. On some systems, your password becomes visible to system status programs such as ps that may be invoked by other users to display command lines. MySQL clients typically overwrite the command-line password argument with zeros during their initialization sequence. However, there is still a brief interval during which the value is visible. Also, on some systems this overwriting strategy is ineffective and the password remains visible to ps. (SystemV Unix systems and perhaps others are subject to this problem.)
If you are using MySQL Replication, be aware that, currently, a
password used by a replication slave as part of a
CHANGE MASTER TO statement is
effectively limited to 32 characters in length; if the password is
longer, any excess characters are truncated. This is not due to
any limit imposed by the MySQL Server generally, but rather is an
issue specific to MySQL Replication. (For more information, see
Bug #43439.)
MySQL enables database administrators to expire account passwords
manually, and to establish a policy for automatic password
expiration. It is possible to establish expiration policy
globally, as well as on a per-account basis. These capabilities
apply to accounts that use a MySQL built-in authentication plugin
(mysql_native_password or
sha256_password). For accounts that use plugins
that perform authentication against an external credential system,
password expiration must be handled externally as well.
To expire an account password manually, use the
ALTER USER statement:
ALTER USER 'jeffrey'@'localhost' PASSWORD EXPIRE;
This operation marks the password expired in the corresponding
mysql.user table row.
Password expiration according to policy is automatic and is based
on password age, which for a given account is assessed from the
date and time of its most recent password change. The
mysql.user table indicates for each account
when its password was last changed, and the server automatically
treats the password as expired at client connection time if its
age is greater than its permitted lifetime. This works with no
explicit manual password expiration.
To establish automatic password-expiration policy globally, use
the default_password_lifetime
system variable. Its default value is 0, which disables automatic
password expiration. If the value of
default_password_lifetime is a
positive integer N, it indicates the
permitted password lifetime, such that passwords must be changed
every N days.
Prior to 5.7.11, the default
default_password_lifetime value
is 360 (passwords must be changed approximately once per year).
For such versions, be aware that, if you make no changes to the
default_password_lifetime
variable or to individual user accounts, each user password
expires after 360 days and the account starts running in
restricted mode. Clients that connect to the server using the
account then get an error indicating that the password must be
changed: ERROR 1820 (HY000): You must reset your
password using ALTER USER statement before executing this
statement.
However, this is easy to miss for clients that automatically connect to the server, such as connections made from scripts. To avoid having such clients suddenly stop working due to a password expiring, make sure to change the password expiration settings for those clients, like this:
ALTER USER 'script'@'localhost' PASSWORD EXPIRE NEVER
Alternatively, set the
default_password_lifetime
variable to 0, thus disabling automatic
password expiration for all users.
Examples:
To establish a global policy that passwords have a lifetime of approximately six months, start the server with these lines in a server
my.cnffile:[mysqld] default_password_lifetime=180
To establish a global policy such that passwords never expire, set
default_password_lifetimeto 0:[mysqld] default_password_lifetime=0
default_password_lifetimecan also be changed at runtime:SET GLOBAL default_password_lifetime = 180; SET GLOBAL default_password_lifetime = 0;
To establish password-expiration policy for individual accounts,
use the PASSWORD EXPIRE options of the
CREATE USER and
ALTER USER statements. See
Section 13.7.1.2, “CREATE USER Syntax”, and Section 13.7.1.1, “ALTER USER Syntax”.
Example account-specific expiration statements:
Require the password to be changed every 90 days:
CREATE USER 'jeffrey'@'localhost' PASSWORD EXPIRE INTERVAL 90 DAY; ALTER USER 'jeffrey'@'localhost' PASSWORD EXPIRE INTERVAL 90 DAY;
Disable password expiration:
CREATE USER 'jeffrey'@'localhost' PASSWORD EXPIRE NEVER; ALTER USER 'jeffrey'@'localhost' PASSWORD EXPIRE NEVER;
Defer to the global expiration policy:
CREATE USER 'jeffrey'@'localhost' PASSWORD EXPIRE DEFAULT; ALTER USER 'jeffrey'@'localhost' PASSWORD EXPIRE DEFAULT;
When a client successfully connects, the server determines whether the account password has expired:
The server checks whether the password has been manually expired.
Otherwise, the server checks whether the password age is greater than its permitted lifetime according to the automatic password expiration policy. If so, the server considers the password expired.
If the password is expired (whether manually or automatically), the server either disconnects the client or restricts the operations permitted to it (see Section 6.3.8, “Password Expiration and Sandbox Mode”). Operations performed by a restricted client result in an error until the user establishes a new account password:
mysql>SELECT 1;ERROR 1820 (HY000): You must reset your password using ALTER USER statement before executing this statement. mysql>ALTER USER USER() IDENTIFIED BY 'Query OK, 0 rows affected (0.01 sec) mysql>password';SELECT 1;+---+ | 1 | +---+ | 1 | +---+ 1 row in set (0.00 sec)
This restricted mode of operation permits
SET
statements, which is useful before MySQL 5.7.6 if
SET PASSWORD must be used instead
of ALTER USER and the account
password has a hashing format that requires
old_passwords to be set to a
value different from its default.
After the client resets the password, the server restores normal access for the session, as well as for subsequent connections that use the account. It is also possible for an administrative user to reset the account password, but any existing restricted sessions for that account remain restricted. A client using the account must disconnect and reconnect before statements can be executed successfully.
It is possible to “reset” a password by setting it to its current value. As a matter of good policy, it is preferable to choose a different password.
MySQL provides password-expiration capability, which enables database administrators to require that users reset their password. Passwords can be expired manually, and on the basis of a policy for automatic expiration (see Section 6.3.7, “Password Management”).
For each connection that uses an account with an expired password, the server either disconnects the client or restricts the client to “sandbox mode,” in which the server permits to the client only those operations necessary to reset the expired password. Which action is taken by the server depends on both client and server settings, as discussed later.
If the server disconnects the client, it returns an
ER_MUST_CHANGE_PASSWORD_LOGIN
error:
shell>mysql -u myuser -pPassword:******ERROR 1862 (HY000): Your password has expired. To log in you must change it using a client that supports expired passwords.
If the server restricts the client to sandbox mode, these operations are permitted within the client session:
The client can reset the account password with
ALTER USERorSET PASSWORD. After the password has been reset, the server restores normal access for the session, as well as for subsequent connections that use the account.It is possible to “reset” a password by setting it to its current value. As a matter of good policy, it is preferable to choose a different password.
The client can use
SETstatements, which is useful before MySQL 5.7.6 ifSET PASSWORDmust be used instead ofALTER USERand the account password has a hashing format that requiresold_passwordsto be set to a value different from its default.
For any operation not permitted within the session, the server
returns an ER_MUST_CHANGE_PASSWORD
error:
mysql>USE performance_schema;ERROR 1820 (HY000): You must reset your password using ALTER USER statement before executing this statement. mysql>SELECT 1;ERROR 1820 (HY000): You must reset your password using ALTER USER statement before executing this statement.
That is what normally happens for interactive invocations of the mysql client because by default such invocations are put in sandbox mode. To clear the error and resume normal functioning, select a new password.
For noninteractive invocations of the mysql
client (for example, in batch mode), the server normally
disconnects the client if the password is expired. To permit
noninteractive mysql invocations to stay
connected so that the password can be changed (using the
statements just described), add the
--connect-expired-password option to
the mysql command.
As mentioned previously, whether the server disconnects an expired-password client or restricts it to sandbox mode depends on a combination of client and server settings. The following discussion describes the relevant settings and how they interact. The discussion applies only for accounts with expired passwords. If a client connects using a nonexpired password, the server handles the client normally.
On the client side, a given client indicates whether it can handle sandbox mode for expired passwords. For clients that use the C client library, there are two ways to do this:
Pass the
MYSQL_OPT_CAN_HANDLE_EXPIRED_PASSWORDSflag tomysql_options()prior to connecting:arg = 1; result = mysql_options(mysql, MYSQL_OPT_CAN_HANDLE_EXPIRED_PASSWORDS, &arg);The mysql client enables
MYSQL_OPT_CAN_HANDLE_EXPIRED_PASSWORDSif invoked interactively or the--connect-expired-passwordoption is given.Pass the
CLIENT_CAN_HANDLE_EXPIRED_PASSWORDSflag tomysql_real_connect()at connection time:mysql = mysql_real_connect(mysql, host, user, password, db, port, unix_socket, CLIENT_CAN_HANDLE_EXPIRED_PASSWORDS);
Other MySQL Connectors have their own conventions for indicating readiness to handle sandbox mode. See the documentation for the Connector in which you are interested.
On the server side, if a client indicates that it can handle expired passwords, the server puts it in sandbox mode.
If a client does not indicate that it can handle expired passwords
(or uses an older version of the client library that cannot so
indicate), the server action depends on the value of the
disconnect_on_expired_password
system variable:
If
disconnect_on_expired_passwordis enabled (the default), the server disconnects the client with anER_MUST_CHANGE_PASSWORD_LOGINerror.If
disconnect_on_expired_passwordis disabled, the server puts the client in sandbox mode.
When a client connects to the MySQL server, the server uses the
user name provided by the client and the client host to select the
appropriate account row from the mysql.user
system table. The server then authenticates the client,
determining from the account row which authentication plugin
applies to the client:
If the server cannot find the plugin, an error occurs and the connection attempt is rejected.
Otherwise, the server invokes that plugin to authenticate the user, and the plugin returns a status to the server indicating whether the user provided the correct password and is permitted to connect.
Pluggable authentication enables these important capabilities:
Choice of authentication methods. Pluggable authentication makes it easy for DBAs to choose and change the authentication method used for individual MySQL accounts.
External authentication. Pluggable authentication makes it possible for clients to connect to the MySQL server with credentials appropriate for authentication methods that store credentials elsewhere than in the
mysql.usersystem table. For example, plugins can be created to use external authentication methods such as PAM, Windows login IDs, LDAP, or Kerberos.Proxy users: If a user is permitted to connect, an authentication plugin can return to the server a user name different from the name of the connecting user, to indicate that the connecting user is a proxy for another user (the proxied user). While the connection lasts, the proxy user is treated, for purposes of access control, as having the privileges of the proxied user. In effect, one user impersonates another. For more information, see Section 6.3.10, “Proxy Users”.
If you start the server with the
--skip-grant-tables option,
authentication plugins are not used even if loaded because the
server performs no client authentication and permits any client
to connect. Because this is insecure, you might want to use
--skip-grant-tables in
conjunction with
--skip-networking to prevent
remote clients from connecting.
MySQL 5.7 provides these authentication plugins:
Plugins that perform native authentication; that is, authentication based on the password hashing methods in use from before the introduction of pluggable authentication in MySQL. The
mysql_native_passwordplugin implements authentication based on the native password hashing method. Themysql_old_passwordplugin implements native authentication based on the older (pre-4.1) password hashing method (and is deprecated and removed in MySQL 5.7.5). See Section 6.5.1.1, “Native Pluggable Authentication”, and Section 6.5.1.2, “Old Native Pluggable Authentication”.A plugin that performs authentication using SHA-256 password hashing. This is stronger encryption than that available with native authentication. See Section 6.5.1.4, “SHA-256 Pluggable Authentication”.
A client-side plugin that sends the password to the server without hashing or encryption. This plugin is used in conjunction with server-side plugins that require access to the password exactly as provided by the client user. See Section 6.5.1.5, “Client-Side Cleartext Pluggable Authentication”.
A plugin that performs external authentication using PAM (Pluggable Authentication Modules), enabling MySQL Server to use PAM to authenticate MySQL users. This plugin supports proxy users as well. See Section 6.5.1.6, “PAM Pluggable Authentication”.
A plugin that performs external authentication on Windows, enabling MySQL Server to use native Windows services to authenticate client connections. Users who have logged in to Windows can connect from MySQL client programs to the server based on the information in their environment without specifying an additional password. This plugin supports proxy users as well. See Section 6.5.1.7, “Windows Pluggable Authentication”.
Plugins that perform authentication using LDAP (Lightweight Directory Access Protocol) to authenticate MySQL users by accessing directory services such as X.500. These plugins support proxy users as well. See Section 6.5.1.8, “LDAP Pluggable Authentication”.
A plugin that prevents all client connections to any account that uses it. Use cases for this plugin include proxied accounts that should never permit direct login but are accessed only through proxy accounts and accounts that must be able to execute stored programs and views with elevated privileges without exposing those privileges to ordinary users. See Section 6.5.1.9, “No-Login Pluggable Authentication”.
A plugin that authenticates clients that connect from the local host through the Unix socket file. See Section 6.5.1.10, “Socket Peer-Credential Pluggable Authentication”.
A test plugin that checks account credentials and logs success or failure to the server error log. This plugin is intended for testing and development purposes, and as an example of how to write an authentication plugin. See Section 6.5.1.11, “Test Pluggable Authentication”.
For information about current restrictions on the use of pluggable authentication, including which connectors support which plugins, see Section C.9, “Restrictions on Pluggable Authentication”.
Third-party connector developers should read that section to determine the extent to which a connector can take advantage of pluggable authentication capabilities and what steps to take to become more compliant.
If you are interested in writing your own authentication plugins, see Section 28.2.4.9, “Writing Authentication Plugins”.
This section provides general instructions for installing and using authentication plugins. For instructions specific to a given plugin, see the section that describes that plugin under Section 6.5.1, “Authentication Plugins”.
In general, pluggable authentication uses a pair of corresponding plugins on the server and client sides, so you use a given authentication method like this:
If necessary, install the plugin library or libraries containing the appropriate plugins. On the server host, install the library containing the server-side plugin, so that the server can use it to authenticate client connections. Similarly, on each client host, install the library containing the client-side plugin for use by client programs. Authentication plugins that are built in need not be installed.
For each MySQL account that you create, specify the appropriate server-side plugin to use for authentication. If the account is to use the default authentication plugin, the account-creation statement need not specify the plugin explicitly. The
default_authentication_pluginsystem variable configures the default authentication plugin.When a client connects, the server-side plugin tells the client program which client-side plugin to use for authentication.
In the case that an account uses an authentication method that is the default for both the server and the client program, the server need not communicate to the client which client-side plugin to use, and a round trip in client/server negotiation can be avoided. This is true for accounts that use native MySQL authentication.
For standard MySQL clients such as mysql and
mysqladmin, the
--default-auth=
option can be specified on the command line as a hint about
which client-side plugin the program can expect to use, although
the server will override this if the server-side plugin
associated with the user account requires a different
client-side plugin.
plugin_name
If the client program does not find the client-side plugin
library file, specify a
--plugin-dir=
option to indicate the plugin library directory location.
dir_name
The MySQL server authenticates client connections using authentication plugins. The plugin that authenticates a given connection may request that the connecting (external) user be treated as a different user for privilege-checking purposes. This enables the external user to be a proxy for the second user; that is, to assume the privileges of the second user:
The external user is a “proxy user” (a user who can impersonate or become known as another user).
The second user is a “proxied user” (a user whose identity and privileges can be assumed by a proxy user).
This section describes how the proxy user capability works. For general information about authentication plugins, see Section 6.3.9, “Pluggable Authentication”. For information about specific plugins, see Section 6.5.1, “Authentication Plugins”. For information about writing authentication plugins that support proxy users, see Section 28.2.4.9.4, “Implementing Proxy User Support in Authentication Plugins”.
For proxying to occur for a given authentication plugin, these conditions must be satisfied:
Proxying must be supported, either by the plugin itself, or by the MySQL server on behalf of the plugin. In the latter case, server support may need to be enabled explicitly; see Server Support for Proxy User Mapping.
The proxy user account must be set up to be authenticated by the plugin. Use the
CREATE USERstatement to associate an account with an authentication plugin, orALTER USERto change its plugin.The proxied user account must be created and granted the privileges to be assumed by the proxy user. Use the
CREATE USERandGRANTstatements for this.The proxy user account must have the
PROXYprivilege for the proxied account. Use theGRANTstatement for this.For a client connecting to the proxy account to be treated as a proxy user, the authentication plugin must return a user name different from the client user name, to indicate the user name of the proxied account that defines the privileges to be assumed by the proxy user.
Alternatively, for plugins that are provided proxy mapping by the server, the proxied user is determined from the
PROXYprivilege held by the proxy user.
The proxy mechanism permits mapping only the client user name to the proxied user name. There is no provision for mapping host names. When a connecting client matches a proxy account, the server attempts to find a match for a proxied account using the user name returned by the authentication plugin and the host name of the proxy account.
Consider the following account definitions:
-- create proxy account CREATE USER 'employee_ext'@'localhost' IDENTIFIED WITH my_auth_plugin AS 'my_auth_string'; -- create proxied account and grant its privileges CREATE USER 'employee'@'localhost' IDENTIFIED BY 'employee_pass'; GRANT ALL ON employees.* TO 'employee'@'localhost'; -- grant PROXY privilege to proxy account for proxied account GRANT PROXY ON 'employee'@'localhost' TO 'employee_ext'@'localhost';
When a client connects as employee_ext from
the local host, MySQL uses the plugin named
my_auth_plugin to perform authentication.
Suppose that my_auth_plugin returns a user
name of employee to the server, based on the
content of 'my_auth_string' and perhaps by
consulting some external authentication system. The name
employee differs from
employee_ext, so returning
employee serves as a request to the server to
treat the employee_ext client, for purposes
of privilege checking, as the employee local
user.
In this case, employee_ext is the proxy user
and employee is the proxied user.
The server verifies that proxy authentication for
employee is possible for the
employee_ext user by checking whether
employee_ext (the proxy user) has the
PROXY privilege for
employee (the proxied user). If this
privilege has not been granted, an error occurs. Otherwise,
employee_ext assumes the privileges of
employee. The server checks statements
executed during the client session by
employee_ext against the privileges granted
to employee. In this case,
employee_ext can access tables in the
employees database.
When proxying occurs, the USER()
and CURRENT_USER() functions can
be used to see the difference between the connecting user (the
proxy user) and the account whose privileges apply during the
current session (the proxied user). For the example just
described, those functions return these values:
mysql> SELECT USER(), CURRENT_USER();
+------------------------+--------------------+
| USER() | CURRENT_USER() |
+------------------------+--------------------+
| employee_ext@localhost | employee@localhost |
+------------------------+--------------------+
In the CREATE USER statement that
creates the proxy user account, the IDENTIFIED
WITH clause that names the authentication plugin is
optionally followed by an AS
' clause
specifying a string that the server passes to the plugin when
the user connects. If present, the string provides information
that helps the plugin determine how to map the external client
user name to a proxied user name. It is up to each plugin
whether it requires the auth_string'AS clause. If so, the
format of the authentication string depends on how the plugin
intends to use it. Consult the documentation for a given plugin
for information about the authentication string values it
accepts.
The PROXY privilege is needed to
enable an external user to connect as and have the privileges of
another user. To grant this privilege, use the
GRANT statement. For example:
GRANT PROXY ON 'proxied_user' TO 'proxy_user';
The statement creates a row in the
mysql.proxies_priv grant table.
At connection time, proxy_user must
represent a valid externally authenticated MySQL user, and
proxied_user must represent a valid
locally authenticated user. Otherwise, the connection attempt
fails.
The corresponding REVOKE syntax
is:
REVOKE PROXY ON 'proxied_user' FROM 'proxy_user';
MySQL GRANT and
REVOKE syntax extensions work as
usual. For example:
GRANT PROXY ON 'a' TO 'b', 'c', 'd'; GRANT PROXY ON 'a' TO 'd' WITH GRANT OPTION; GRANT PROXY ON 'a' TO ''@''; REVOKE PROXY ON 'a' FROM 'b', 'c', 'd';
The PROXY privilege can be
granted in these cases:
By a user that has
GRANT PROXY ... WITH GRANT OPTIONforproxied_user.By
proxied_userfor itself: The value ofUSER()must exactly matchCURRENT_USER()andproxied_user, for both the user name and host name parts of the account name.
The initial root account created during MySQL
installation has the
PROXY ... WITH GRANT
OPTION privilege for ''@'', that
is, for all users and all hosts. This enables
root to set up proxy users, as well as to
delegate to other accounts the authority to set up proxy users.
For example, root can do this:
CREATE USER 'admin'@'localhost' IDENTIFIED BY 'test'; GRANT PROXY ON ''@'' TO 'admin'@'localhost' WITH GRANT OPTION;
Those statements create an admin user that
can manage all GRANT PROXY mappings. For
example, admin can do this:
GRANT PROXY ON sally TO joe;
To specify that some or all users should connect using a given
authentication plugin, create a “blank” MySQL
account (''@''), associate it with that
plugin, and let the plugin return the real authenticated user
name (if different from the blank user). For example, suppose
that there exists a plugin named ldap_auth
that implements LDAP authentication and maps connecting users
onto either a developer or manager account. To set up proxying
of users onto these accounts, use the following statements:
-- create default proxy account CREATE USER ''@'' IDENTIFIED WITH ldap_auth AS 'O=Oracle, OU=MySQL'; -- create proxied accounts CREATE USER 'developer'@'localhost' IDENTIFIED BY 'developer_pass'; CREATE USER 'manager'@'localhost' IDENTIFIED BY 'manager_pass'; -- grant PROXY privilege to default proxy account for proxied accounts GRANT PROXY ON 'manager'@'localhost' TO ''@''; GRANT PROXY ON 'developer'@'localhost' TO ''@'';
Now assume that a client connects as follows:
shell>mysql --user=myuser --password ...Enter password:myuser_pass
The server will not find myuser defined as a
MySQL user. But because there is a blank user account
(''@'') that matches the client user name and
host name, the server authenticates the client against that
account: The server invokes the ldap_auth
authentication plugin and passes myuser and
myuser_pass to it as the user name and
password.
If the ldap_auth plugin finds in the LDAP
directory that myuser_pass is not the correct
password for myuser, authentication fails and
the server rejects the connection.
If the password is correct and ldap_auth
finds that myuser is a developer, it returns
the user name developer to the MySQL server,
rather than myuser. Returning a user name
different from the client user name of myuser
signals to the server that it should treat
myuser as a proxy. The server verifies that
''@'' can authenticate as
developer (because that account has the
PROXY privilege to do so) and
accepts the connection. The session proceeds with
myuser having the privileges of
developer, the proxied user. (These
privileges should be set up by the DBA using
GRANT statements, not shown.) The
USER() and
CURRENT_USER() functions return
these values:
mysql> SELECT USER(), CURRENT_USER();
+------------------+---------------------+
| USER() | CURRENT_USER() |
+------------------+---------------------+
| myuser@localhost | developer@localhost |
+------------------+---------------------+
If the plugin instead finds in the LDAP directory that
myuser is a manager, it returns
manager as the user name and the session
proceeds with myuser having the privileges of
manager.
mysql> SELECT USER(), CURRENT_USER();
+------------------+-------------------+
| USER() | CURRENT_USER() |
+------------------+-------------------+
| myuser@localhost | manager@localhost |
+------------------+-------------------+
For simplicity, external authentication cannot be multilevel:
Neither the credentials for developer nor
those for manager are taken into account in
the preceding example. However, they are still used if a client
tries to connect and authenticate directly as the
developer or manager
account, which is why those accounts should be assigned
passwords.
If you intend to create a default proxy user, check for other existing “match any user” accounts that take precedence over the default proxy user because they can prevent that user from working as intended.
In the preceding discussion, the default proxy user account has
'' in the host part, which matches any host.
If you set up a default proxy user, take care to also check
whether nonproxy accounts exist with the same user part and
'%' in the host part, because
'%' also matches any host, but has precedence
over '' by the rules that the server uses to
sort account rows internally (see
Section 6.2.4, “Access Control, Stage 1: Connection Verification”).
Suppose that a MySQL installation includes these two accounts:
-- create default proxy account CREATE USER ''@'' IDENTIFIED WITH some_plugin AS 'some_auth_string'; -- create anonymous account CREATE USER ''@'%' IDENTIFIED BY 'some_password';
The first account (''@'') is intended as the
default proxy user, used to authenticate connections for users
who do not otherwise match a more-specific account. The second
account (''@'%') is an anonymous-user
account, which might have been created, for example, to enable
users without their own account to connect anonymously.
Both accounts have the same user part (''),
which matches any user. And each account has a host part that
matches any host. Nevertheless, there is a priority in account
matching for connection attempts because the matching rules sort
a host of '%' ahead of ''.
For accounts that do not match any more-specific account, the
server attempts to authenticate them against
''@'%' (the anonymous user) rather than
''@'' (the default proxy user). The result is
that the default proxy account is never used.
To avoid this problem, use one of the following strategies:
Remove the anonymous account so that it does not conflict with the default proxy user. This might be a good idea anyway if you want to associate every connection with a named user.
Use a more-specific default proxy user that matches ahead of the anonymous user. For example, to permit only
localhostproxy connections, use''@'localhost':CREATE USER ''@'localhost' IDENTIFIED WITH some_plugin AS 'some_auth_string';
In addition, modify any
GRANT PROXYstatements to name''@'localhost'rather than''@''as the proxy user.Be aware that this strategy prevents anonymous-user connections from
localhost.Create multiple proxy users, one for local connections and one for “everything else” (remote connections). This can be useful particularly when local users should have different privileges from remote users.
Create the proxy users:
-- create proxy user for local connections CREATE USER ''@'localhost' IDENTIFIED WITH some_plugin AS 'some_auth_string'; -- create proxy user for remote connections CREATE USER ''@'%' IDENTIFIED WITH some_plugin AS 'some_auth_string';
Create the proxied users:
-- create proxied user for local connections CREATE USER 'developer'@'localhost' IDENTIFIED BY 'some_password'; -- create proxied user for remote connections CREATE USER 'developer'@'%' IDENTIFIED BY 'some_password';
Grant the proxy privilege to each proxy user for the corresponding proxied user:
GRANT PROXY ON 'developer'@'localhost' TO ''@'localhost'; GRANT PROXY ON 'developer'@'%' TO ''@'%';
Finally, grant appropriate privileges to the local and remote proxied users (not shown).
Assume that the
some_plugin/'some_auth_string'combination causessome_pluginto map the client user name todeveloper. Local connections match the''@'localhost'proxy user, which maps to the'developer'@'localhost'proxied user. Remote connections match the''@'%'proxy user, which maps to the'developer'@'%'proxied user.
Some authentication plugins implement proxy user mapping for
themselves. For certain others, the MySQL server itself can map
proxy users according to granted proxy privileges. If the
check_proxy_users system
variable is enabled, the server performs proxy user mapping for
any authentication plugins that request it:
By default,
check_proxy_usersis disabled, so the server performs no proxy user mapping even for authentication plugins that request it.With
check_proxy_usersenabled, it may also be necessary to enable plugin-specific system variables to take advantage of server proxy user mapping support:For the
mysql_native_passwordplugin, enablemysql_native_password_proxy_users.For the
sha256_passwordplugin, enablesha256_password_proxy_users.
Proxy user mapping performed by the server is subject to these restrictions:
The server will not proxy to or from an anonymous user, even if the associated
PROXYprivilege is granted.When a single account has been granted proxy privileges for more than one proxied account, server proxy user mapping is nondeterministic. Therefore, granting to a single account proxy privileges for multiple proxied accounts is discouraged.
Two system variables help trace the proxy login process:
proxy_user: This value isNULLif proxying is not used. Otherwise, it indicates the proxy user account. For example, if a client authenticates through the''@''proxy account, this variable is set as follows:mysql>
SELECT @@proxy_user;+--------------+ | @@proxy_user | +--------------+ | ''@'' | +--------------+external_user: Sometimes the authentication plugin may use an external user to authenticate to the MySQL server. For example, when using Windows native authentication, a plugin that authenticates using the windows API does not need the login ID passed to it. However, it still uses a Windows user ID to authenticate. The plugin may return this external user ID (or the first 512 UTF-8 bytes of it) to the server using theexternal_userread-only session variable. If the plugin does not set this variable, its value isNULL.
As of version 5.7.6, MySQL supports locking and unlocking user
accounts using the ACCOUNT LOCK and
ACCOUNT UNLOCK clauses for the
CREATE USER and
ALTER USER statements:
When used with
CREATE USER, these clauses specify the initial locking state for a new account. In the absence of either clause, the account is created in an unlocked state.When used with
ALTER USER, these clauses specify the new locking state for an existing account. In the absence of either clause, the account locking state remains unchanged.
Account locking state is recorded in the
account_locked column of the
mysql.user table. The output from
SHOW CREATE USER indicates whether
an account is locked or unlocked.
If a client attempts to connect to a locked account, the attempt
fails. The server increments the
Locked_connects status variable
that indicates the number of attempts to connect to a locked
account, returns an
ER_ACCOUNT_HAS_BEEN_LOCKED error,
and writes a message to the error log:
Access denied for user 'user_name'@'host_name'. Account is locked.
Locking an account does not affect being able to connect using a
proxy user that assumes the identity of the locked account. It
also does not affect the ability to execute stored programs or
views that have a DEFINER clause naming the
locked account. That is, the ability to use a proxied account or
stored programs or views is not affected by locking the account.
The account-locking capability depends on the presence of the
account_locked column in the
mysql.user table. For upgrades to MySQL 5.7.6
and later from older versions, run
mysql_upgrade to ensure that this column
exists. For nonupgraded installations that have no
account_locked column, the server treats all
accounts as unlocked, and using the ACCOUNT
LOCK or ACCOUNT UNLOCK clauses
produces an error.
Applications can use the following guidelines to perform SQL-based auditing that ties database activity to MySQL accounts.
MySQL accounts correspond to rows in the
mysql.user table. When a client connects
successfully, the server authenticates the client to a particular
row in this table. The User and
Host column values in this row uniquely
identify the account and correspond to the
'
format in which account names are written in SQL statements.
user_name'@'host_name'
The account used to authenticate a client determines which
privileges the client has. Normally, the
CURRENT_USER() function can be
invoked to determine which account this is for the client user.
Its value is constructed from the User and
Host columns of the user
table row for the account.
However, there are circumstances under which the
CURRENT_USER() value corresponds
not to the client user but to a different account. This occurs in
contexts when privilege checking is not based the client's
account:
Stored routines (procedures and functions) defined with the
SQL SECURITY DEFINERcharacteristicViews defined with the
SQL SECURITY DEFINERcharacteristicTriggers and events
In those contexts, privilege checking is done against the
DEFINER account and
CURRENT_USER() refers to that
account, not to the account for the client who invoked the stored
routine or view or who caused the trigger to activate. To
determine the invoking user, you can call the
USER() function, which returns a
value indicating the actual user name provided by the client and
the host from which the client connected. However, this value does
not necessarily correspond directly to an account in the
user table, because the
USER() value never contains
wildcards, whereas account values (as returned by
CURRENT_USER()) may contain user
name and host name wildcards.
For example, a blank user name matches any user, so an account of
''@'localhost' enables clients to connect as an
anonymous user from the local host with any user name. In this
case, if a client connects as user1 from the
local host, USER() and
CURRENT_USER() return different
values:
mysql> SELECT USER(), CURRENT_USER();
+-----------------+----------------+
| USER() | CURRENT_USER() |
+-----------------+----------------+
| user1@localhost | @localhost |
+-----------------+----------------+
The host name part of an account can contain wildcards, too. If
the host name contains a '%' or
'_' pattern character or uses netmask notation,
the account can be used for clients connecting from multiple hosts
and the CURRENT_USER() value will
not indicate which one. For example, the account
'user2'@'%.example.com' can be used by
user2 to connect from any host in the
example.com domain. If user2
connects from remote.example.com,
USER() and
CURRENT_USER() return different
values:
mysql> SELECT USER(), CURRENT_USER();
+--------------------------+---------------------+
| USER() | CURRENT_USER() |
+--------------------------+---------------------+
| user2@remote.example.com | user2@%.example.com |
+--------------------------+---------------------+
If an application must invoke
USER() for user auditing (for
example, if it does auditing from within triggers) but must also
be able to associate the USER()
value with an account in the user table, it is
necessary to avoid accounts that contain wildcards in the
User or Host column.
Specifically, do not permit User to be empty
(which creates an anonymous-user account), and do not permit
pattern characters or netmask notation in Host
values. All accounts must have a nonempty User
value and literal Host value.
With respect to the previous examples, the
''@'localhost' and
'user2'@'%.example.com' accounts should be
changed not to use wildcards:
RENAME USER ''@'localhost' TO 'user1'@'localhost'; RENAME USER 'user2'@'%.example.com' TO 'user2'@'remote.example.com';
If user2 must be able to connect from several
hosts in the example.com domain, there should
be a separate account for each host.
To extract the user name or host name part from a
CURRENT_USER() or
USER() value, use the
SUBSTRING_INDEX() function:
mysql>SELECT SUBSTRING_INDEX(CURRENT_USER(),'@',1);+---------------------------------------+ | SUBSTRING_INDEX(CURRENT_USER(),'@',1) | +---------------------------------------+ | user1 | +---------------------------------------+ mysql>SELECT SUBSTRING_INDEX(CURRENT_USER(),'@',-1);+----------------------------------------+ | SUBSTRING_INDEX(CURRENT_USER(),'@',-1) | +----------------------------------------+ | localhost | +----------------------------------------+
- 6.4.1 Configuring MySQL to Use Encrypted Connections
- 6.4.2 Command Options for Encrypted Connections
- 6.4.3 Creating SSL and RSA Certificates and Keys
- 6.4.4 OpenSSL Versus yaSSL
- 6.4.5 Building MySQL with Support for Encrypted Connections
- 6.4.6 Encrypted Connection Protocols and Ciphers
- 6.4.7 Connecting to MySQL Remotely from Windows with SSH
With an unencrypted connection between the MySQL client and the server, someone with access to the network could watch all your traffic and inspect the data being sent or received between client and server.
When you must move information over a network in a secure fashion, an unencrypted connection is unacceptable. To make any kind of data unreadable, use encryption. Encryption algorithms must include security elements to resist many kinds of known attacks such as changing the order of encrypted messages or replaying data twice.
MySQL supports encrypted connections between clients and the server using the TLS (Transport Layer Security) protocol. TLS is sometimes referred to as SSL (Secure Sockets Layer) but MySQL does not actually use the SSL protocol for encrypted connections because its encryption is weak (see Section 6.4.6, “Encrypted Connection Protocols and Ciphers”).
TLS uses encryption algorithms to ensure that data received over a public network can be trusted. It has mechanisms to detect data change, loss, or replay. TLS also incorporates algorithms that provide identity verification using the X509 standard.
X509 makes it possible to identify someone on the Internet. In basic terms, there should be some entity called a “Certificate Authority” (or CA) that assigns electronic certificates to anyone who needs them. Certificates rely on asymmetric encryption algorithms that have two encryption keys (a public key and a secret key). A certificate owner can present the certificate to another party as proof of identity. A certificate consists of its owner's public key. Any data encrypted using this public key can be decrypted only using the corresponding secret key, which is held by the owner of the certificate.
MySQL can be compiled for encrypted-connection support using OpenSSL or yaSSL. For a comparison of the two packages, see Section 6.4.4, “OpenSSL Versus yaSSL” For information about the encryption protocols and ciphers each package supports, see Section 6.4.6, “Encrypted Connection Protocols and Ciphers”.
By default, MySQL programs attempt to connect using encryption if the server supports encrypted connections, falling back to an unencrypted connection if an encrypted connection cannot be established. For information about options that affect use of encrypted connections, see Section 6.4.1, “Configuring MySQL to Use Encrypted Connections” and Section 6.4.2, “Command Options for Encrypted Connections”.
MySQL performs encryption on a per-connection basis, and use of
encryption for a given user can be optional or mandatory. This
enables you to choose an encrypted or unencrypted connection
according to the requirements of individual applications. For
information on how to require users to use encrypted connections,
see the discussion of the REQUIRE clause of the
CREATE USER statement in
Section 13.7.1.2, “CREATE USER Syntax”. See also the description of the
require_secure_transport system
variable at Section 5.1.5, “Server System Variables”
Encrypted connections can be used between master and slave replication servers. See Section 16.3.8, “Setting Up Replication to Use Encrypted Connections”.
For information about using encrypted connections from the MySQL C API, see Section 27.8.15, “C API Encrypted Connection Support”.
It is also possible to connect using encryption from within an SSH connection to the MySQL server host. For an example, see Section 6.4.7, “Connecting to MySQL Remotely from Windows with SSH”.
Several improvements were made to encrypted-connection support in MySQL 5.7. The following timeline summarizes the changes:
5.7.3: On the client side, an explicit
--ssloption is no longer advisory but prescriptive. Given a server enabled to support encrypted connections, a client program can require an encrypted connection by specifying only the--ssloption. (Previously, it was necessary for the client to specify either the--ssl-caoption, or all three of the--ssl-ca,--ssl-key, and--ssl-certoptions.) The connection attempt fails if an encrypted connection cannot be established. Other--ssl-options on the client side are advisory in the absence ofxxx--ssl: The client attempts to connect using encryption but falls back to an unencrypted connection if an encrypted connection cannot be established.5.7.5: The server-side
--ssloption value is enabled by default.For servers compiled using OpenSSL, the
auto_generate_certsandsha256_password_auto_generate_rsa_keyssystem variables are available to enable autogeneration and autodiscovery of SSL/RSA certificate and key files at startup. For certificate and key autodiscovery, if--sslis enabled and other--ssl-options are not given to configure encrypted connections explicitly, the server attempts to enable support for encrypted connections automatically at startup if it discovers the requisite certificate and key files in the data directory.xxx5.7.6: The mysql_ssl_rsa_setup utility is available to make it easier to manually generate SSL/RSA certificate and key files. Autodiscovery of SSL/RSA files at startup is expanded to apply to all servers, whether compiled using OpenSSL or yaSSL. (This means that
auto_generate_certsneed not be enabled for autodiscovery to occur.)If the server discovers at startup that the CA certificate is self-signed, it writes a warning to the error log. (The certificate is self-signed if created automatically by the server, or manually using mysql_ssl_rsa_setup.)
5.7.7: The C client library attempts to establish an encrypted connection by default if the server supports encrypted connections. This affects client programs as follows:
In the absence of an
--ssloption, clients attempt to connect using encryption, falling back to an unencrypted connection if an encrypted connection cannot be established.The presence of an explicit
--ssloption or a synonym (--ssl=1,--enable-ssl) is prescriptive: Clients require an encrypted connection and fail if one cannot be established.With an
--ssl=0option or a synonym (--skip-ssl,--disable-ssl), clients use an unencrypted connection.
This change also affects subsequent releases of MySQL Connectors that are based on the C client library: Connector/C, Connector/C++, and Connector/ODBC.
5.7.8: The
require_secure_transportsystem variable is available to control whether client connections to the server must use some form of secure transport.5.7.10: TLS protocol support is extended from TLSv1 to also include TLSv1.1 and TLSv1.2. The
tls_versionsystem variable on the server side and--tls-versionoption on the client side enable the level of support to be selected. See Section 6.4.6, “Encrypted Connection Protocols and Ciphers”.5.7.11: MySQL client programs support an
--ssl-modeoption that enables you to specify the security state of the connection to the server. The--ssl-modeoption comprises the capabilities of the client-side--ssland--ssl-verify-server-certoptions. Consequently,--ssland--ssl-verify-server-certare deprecated, and are removed in MySQL 8.0.
Several options are available to indicate whether to use encrypted connections, and to specify the appropriate certificate and key files. This section provides general guidance about configuring the server and clients for encrypted connections:
For a complete list of options related to establishment of encrypted connections, see Section 6.4.2, “Command Options for Encrypted Connections”. If you need to create the required certificate and key files, see Section 6.4.3, “Creating SSL and RSA Certificates and Keys”.
Encrypted connections can be used between master and slave replication servers. See Section 16.3.8, “Setting Up Replication to Use Encrypted Connections”.
Encrypted connections are available through the MySQL C API. See Section 27.8.15, “C API Encrypted Connection Support”.
On the server side, the --ssl
option specifies that the server permits but does not require
encrypted connections. This option is enabled by default.
These options on the server side identify the certificate and key files the server uses when permitting clients to establish encrypted connections:
--ssl-ca: The path name of the Certificate Authority (CA) certificate file. (--ssl-capathis similar but specifies the path name of a directory of CA certificate files.)--ssl-cert: The path name of the server public key certificate file. This can be sent to the client and authenticated against the CA certificate that it has.--ssl-key: The path name of the server private key file.
For example, to enable the server for encrypted connections,
start it with these lines in the my.cnf
file, changing the file names as necessary:
[mysqld] ssl-ca=ca.pem ssl-cert=server-cert.pem ssl-key=server-key.pem
Each option names a file in PEM format. If you need to create
the required certificate and key files, see
Section 6.4.3, “Creating SSL and RSA Certificates and Keys”. Alternatively, if you
have a MySQL source distribution, you can test your setup using
the demonstration certificate and key files in its
mysql-test/std_data directory.
MySQL servers compiled using OpenSSL can generate missing certificate and key files automatically at startup. See Section 6.4.3.1, “Creating SSL and RSA Certificates and Keys using MySQL”.
The server performs certificate and key file autodiscovery. If
--ssl is enabled (possibly along
with --ssl-cipher) and other
--ssl- options
are not given to configure encrypted
connections explicitly, the server attempts to enable support
for encrypted connections automatically at startup:
xxx
If the server discovers valid certificate and key files named
ca.pem,server-cert.pem, andserver-key.pemin the data directory, it enables support for encrypted connections by clients. (The files need not have been generated automatically; what matters is that they have the indicated names and are valid.)If the server does not find valid certificate and key files in the data directory, it continues executing but without support for encrypted connections.
If the server automatically enables support for encrypted connections, it writes a note to the error log. If the server discovers that the CA certificate is self-signed, it writes a warning to the error log. (The certificate is self-signed if created automatically by the server, or manually using mysql_ssl_rsa_setup.)
The server uses the names of any automatically discovered and
used certificate and key files to set the corresponding system
variables (ssl_ca,
ssl_cert,
ssl_key).
For further control over whether clients must connect using
encryption, use the
require_secure_transport system
variable; see Section 5.1.5, “Server System Variables”. To
specify permitted encryption protocols explicitly, use the
tls_version system variable;
see Section 6.4.6, “Encrypted Connection Protocols and Ciphers”.
By default, MySQL client programs attempt to establish an
encrypted connection if the server supports encrypted
connections, with further control available through the
--ssl-mode option:
In the absence of an
--ssl-modeoption, clients attempt to connect using encryption, falling back to an unencrypted connection if an encrypted connection cannot be established. This is also the behavior with an explicit--ssl-mode=PREFFEREDoption.With
--ssl-mode=REQUIRED, clients require an encrypted connection and fail if one cannot be established.With
--ssl-mode=DISABLED, clients use an unencrypted connection.With
--ssl-mode=VERIFY_CAor--ssl-mode=VERIFY_IDENTITY, clients require an encrypted connection, and also perform verification against the server CA certificate and (withVERIFY_IDENTITY) against the server host name in its certificate.
The following options on the client side identify the
certificate and key files clients use when establishing
encrypted connections to the server. They are similar to the
options used on the server side, but
--ssl-cert and
--ssl-key identify the client
public and private key:
--ssl-ca: The path name of the Certificate Authority (CA) certificate file. This option, if used, must specify the same certificate used by the server. (--ssl-capathis similar but specifies the path name of a directory of CA certificate files.)--ssl-cert: The path name of the client public key certificate file.--ssl-key: The path name of the client private key file.
For additional security relative to that provided by the default encryption, clients can supply a CA certificate matching the one used by the server and enable host name identity verification. In this way, the server and client place their trust in the same CA certificate and the client verifies that the host to which it connected is the one intended:
To specify the CA certificate, use
--ssl-ca(or--ssl-capath), and specify--ssl-mode=VERIFY_CA.To enable host name identity verification as well, use
--ssl-mode=VERIFY_IDENTITYrather than--ssl-mode=VERIFY_CA.
Host name identity verification does not work with self-signed certificates created automatically by the server, or manually using mysql_ssl_rsa_setup (see Section 6.4.3.1, “Creating SSL and RSA Certificates and Keys using MySQL”). Such self-signed certificates do not contain the server name as the Common Name value.
Depending on the encryption requirements of the MySQL account used by a client, the client may be required to specify certain options to connect using encryption to a MySQL server that supports encrypted connections.
Suppose that you want to connect using an account that has no
special encryption requirements or was created using a
CREATE USER statement that
includes the REQUIRE SSL option. Assuming
that the server supports encrypted connections, a client can
connect using encryption with no
--ssl-mode option or with an
explicit --ssl-mode=PREFFERED
option:
mysql
Or:
mysql --ssl-mode=PREFERRED
For an account with REQUIRE SSL, the
connection attempt fails if an encrypted connection cannot be
established. For an account with no special encryption
requirements, the attempt falls back to an unencrypted
connection if an encrypted connection cannot be established. To
prevent fallback and fail if an encrypted connection cannot be
obtained, connect like this:
mysql --ssl-mode=REQUIRED
If the account has more stringent security requirements, other options must be specified to establish an encrypted connection:
For accounts with
REQUIRE X509, clients must specify at least--ssl-certand--ssl-key. In addition,--ssl-ca(or--ssl-capath) is recommended so that the public certificate provided by the server can be verified. For example:mysql --ssl-ca=ca.pem \ --ssl-cert=client-cert.pem \ --ssl-key=client-key.pemFor accounts that have
REQUIRE ISSUERorREQUIRE SUBJECT, the option requirements are the same as forREQUIRE X509, but the certificate must match the issue or subject, respectively, specified in the account definition.
For additional information about the REQUIRE
clause, see the discussion in Section 13.7.1.2, “CREATE USER Syntax”.
To prevent use of encryption and override other
--ssl- options,
invoke the client program with
xxx--ssl-mode=DISABLED:
mysql --ssl-mode=DISABLED
To specify permitted encryption protocols explicitly, use the
--tls-version option; see
Section 6.4.6, “Encrypted Connection Protocols and Ciphers”.
To determine whether the current connection with the server uses
encryption, check the value of the
Ssl_cipher status variable. If
the value is empty, the connection is not encrypted. Otherwise,
the connection is encrypted and the value indicates the
encryption cipher. For example:
mysql> SHOW SESSION STATUS LIKE 'Ssl_cipher';
+---------------+---------------------------+
| Variable_name | Value |
+---------------+---------------------------+
| Ssl_cipher | DHE-RSA-AES128-GCM-SHA256 |
+---------------+---------------------------+
For the mysql client, an alternative is to
use the STATUS or \s
command and check the SSL line:
mysql> \s
...
SSL: Not in use
...
Or:
mysql> \s
...
SSL: Cipher in use is DHE-RSA-AES128-GCM-SHA256
...
This section describes options that specify whether to use encrypted connections, the names of certificate and key files, and other parameters related to encrypted-connection support. These options can be given on the command line or in an option file. For examples of suggested use and how to check whether a connection is encrypted, see Section 6.4.1, “Configuring MySQL to Use Encrypted Connections”.
For information about using encrypted connections from the MySQL C API, see Section 27.8.15, “C API Encrypted Connection Support”.
Table 6.8 Encrypted-Connection Option Summary
| Format | Description | Introduced |
|---|---|---|
| --skip-ssl | Do not use encrypted connection | |
| --ssl | Enable encrypted connection | |
| --ssl-ca | File that contains list of trusted SSL Certificate Authorities | |
| --ssl-capath | Directory that contains trusted SSL Certificate Authority certificate files | |
| --ssl-cert | File that contains X509 certificate | |
| --ssl-cipher | List of permitted ciphers for connection encryption | |
| --ssl-crl | File that contains certificate revocation lists | |
| --ssl-crlpath | Directory that contains certificate revocation list files | |
| --ssl-key | File that contains X509 key | |
| --ssl-mode | Security state of connection to server | 5.7.11 |
| --ssl-verify-server-cert | Verify host name against server certificate Common Name identity | |
| --tls-version | Protocols permitted for encrypted connections | 5.7.10 |
This option has different effects on the client and server sides.
NoteThe client-side
--ssloption is deprecated as of MySQL 5.7.11 and is removed in MySQL 8.0. For client programs, use--ssl-modeinstead:Use
--ssl-mode=REQUIREDinstead of--ssl=1or--enable-ssl.Use
--ssl-mode=DISABLEDinstead of--ssl=0,--skip-ssl, or--disable-ssl.No explicit
--ssl-modeoption is equivalent to no explicit--ssloption.
The server-side
--ssloption is not deprecated.By default, MySQL client programs attempt to establish an encrypted connection if the server supports encrypted connections, with further control available through the
--ssloption: The client-side--ssloption works as follows:In the absence of an
--ssloption, clients attempt to connect using encryption, falling back to an unencrypted connection if an encrypted connection cannot be established.The presence of an explicit
--ssloption or a synonym (--ssl=1,--enable-ssl) is prescriptive: Clients require an encrypted connection and fail if one cannot be established.With an
--ssl=0option or a synonym (--skip-ssl,--disable-ssl), clients use an unencrypted connection.
To require use of encrypted connections by a MySQL account, use
CREATE USERto create the account with aREQUIRE SSLclause, or useALTER USERfor an existing account to add aREQUIRE SSLclause. Connection attempts by clients that use the account will be rejected unless MySQL supports encrypted connections and an encrypted connection can be established.The
REQUIREclause permits other encryption-related options, which can be used to enforce security requirements stricter thanREQUIRE SSL. For additional details about which command options may or must be specified by clients that connect using accounts configured using the variousREQUIREoptions, see the description ofREQUIREin Section 13.7.1.2, “CREATE USER Syntax”.On the server side, the
--ssloption specifies that the server permits but does not require encrypted connections. The option is enabled on the server side by default.--sslis implied by other--ssl-options, as indicated in the descriptions for those options.xxxThe
--ssloption in negated form indicates that encryption should not be used and overrides other--ssl-options. Specify the option asxxx--ssl=0or a synonym (--skip-ssl,--disable-ssl).To specify additional parameters for encrypted connections, use at least
--ssl-certand--ssl-keyon the server side and--ssl-caon the client side. See Section 6.4.1, “Configuring MySQL to Use Encrypted Connections”. That section also describes server capabilities for certificate and key file autogeneration and autodiscovery.The path name of the Certificate Authority (CA) certificate file in PEM format. On the server side, this option implies
--ssl.To tell the client not to authenticate the server certificate when establishing an encrypted connection to the server, specify neither
--ssl-canor--ssl-capath. The server still verifies the client according to any applicable requirements established for the client account, and it still uses any--ssl-caor--ssl-capathoption values specified on the server side.The path name of the directory that contains trusted SSL certificate authority (CA) certificate files in PEM format. On the server side, this option implies
--ssl.To tell the client not to authenticate the server certificate when establishing an encrypted connection to the server, specify neither
--ssl-canor--ssl-capath. The server still verifies the client according to any applicable requirements established for the client account, and it still uses any--ssl-caor--ssl-capathoption values specified on the server side.MySQL distributions compiled using OpenSSL support the
--ssl-capathoption (see Section 6.4.4, “OpenSSL Versus yaSSL”). Distributions compiled using yaSSL do not because yaSSL does not look in any directory and does not follow a chained certificate tree. yaSSL requires that all components of the CA certificate tree be contained within a single CA certificate tree and that each certificate in the file has a unique SubjectName value. To work around this yaSSL limitation, concatenate the individual certificate files comprising the certificate tree into a new file and specify that file as the value of the--ssl-caoption.The path name of the SSL public key certificate file in PEM format. On the client side, this is the client public key certificate. On the server side, this is the server public key certificate. On the server side, this option implies
--ssl.The list of permitted ciphers for connection encryption. If no cipher in the list is supported, encrypted connections will not work. On the server side, this option implies
--ssl.For greatest portability,
cipher_listshould be a list of one or more cipher names, separated by colons. This format is understood both by OpenSSL and yaSSL. Examples:--ssl-cipher=AES128-SHA --ssl-cipher=DHE-RSA-AES128-GCM-SHA256:AES128-SHA
OpenSSL supports a more flexible syntax for specifying ciphers, as described in the OpenSSL documentation at https://www.openssl.org/docs/manmaster/man1/ciphers.html. yaSSL does not, so attempts to use that extended syntax fail for a MySQL distribution compiled using yaSSL.
For information about which encryption ciphers MySQL supports, see Section 6.4.6, “Encrypted Connection Protocols and Ciphers”.
The path name of the file containing certificate revocation lists in PEM format. On the server side, this option implies
--ssl.If neither
--ssl-crlnor--ssl-crlpathis given, no CRL checks are performed, even if the CA path contains certificate revocation lists.MySQL distributions compiled using OpenSSL support the
--ssl-crloption (see Section 6.4.4, “OpenSSL Versus yaSSL”). Distributions compiled using yaSSL do not because revocation lists do not work with yaSSL.The path name of the directory that contains certificate revocation list files in PEM format. On the server side, this option implies
--ssl.If neither
--ssl-crlnor--ssl-crlpathis given, no CRL checks are performed, even if the CA path contains certificate revocation lists.MySQL distributions compiled using OpenSSL support the
--ssl-crlpathoption (see Section 6.4.4, “OpenSSL Versus yaSSL”). Distributions compiled using yaSSL do not because revocation lists do not work with yaSSL.The path name of the SSL private key file in PEM format. On the client side, this is the client private key. On the server side, this is the server private key. On the server side, this option implies
--ssl.If the key file is protected by a passphrase, the program prompts the user for the passphrase. The password must be given interactively; it cannot be stored in a file. If the passphrase is incorrect, the program continues as if it could not read the key.
For better security, use a certificate with an RSA key size of at least 2048 bits.
This option is available only for client programs, not the server. It specifies the security state of the connection to the server. These option values are permitted:
PREFERRED: Establish an encrypted connection if the server supports encrypted connections, falling back to an unencrypted connection if an encrypted connection cannot be established. This is the default if--ssl-modeis not specified.REQUIRED: Establish an encrypted connection if the server supports encrypted connections. The connection attempt fails if an encrypted connection cannot be established.VERIFY_CA: LikeREQUIRED, but additionally verify the server Certificate Authority (CA) certificate against the configured CA certificates. The connection attempt fails if no valid matching CA certificates are found.VERIFY_IDENTITY: LikeVERIFY_CA, but additionally perform host name identify verification by checking the server's Common Name identity in the certificate that the server sends to the client. The client verifies the Common Name against the host name the client uses for connecting to the server, and the connection fails if there is a mismatch. For encrypted connections, this option helps prevent man-in-the-middle attacks. This is like the legacy--ssl-verify-server-certoption.NoteHost name identity verification does not work with self-signed certificates created automatically by the server, or manually using mysql_ssl_rsa_setup (see Section 6.4.3.1, “Creating SSL and RSA Certificates and Keys using MySQL”). Such self-signed certificates do not contain the server name as the Common Name value.
DISABLED: Establish an unencrypted connection. This is like the legacy--ssl=0option or its synonyms (--skip-ssl,--disable-ssl).
The
--ssl-modeoption interacts with CA certificate options as follows:If
--ssl-modeis not explicitly set otherwise, use of--ssl-caor--ssl-capathimplies--ssl-mode=VERIFY_CA.For
--ssl-modevalues ofVERIFY_CAorVERIFY_IDENTITY,--ssl-caor--ssl-capathis also required, to supply a CA certificate that matches the one used by the server.An explicit
--ssl-modeoption with a value other thanVERIFY_CAorVERIFY_IDENTITY, together with an explicit--ssl-caor--ssl-capathoption, produces a warning that no verification of the server certificate will be done, despite a CA certificate option being specified.
The
--ssl-modeoption was added in MySQL 5.7.11.To require use of encrypted connections by a MySQL account, use
CREATE USERto create the account with aREQUIRE SSLclause, or useALTER USERfor an existing account to add aREQUIRE SSLclause. Connection attempts by clients that use the account will be rejected unless MySQL supports encrypted connections and an encrypted connection can be established.The
REQUIREclause permits other encryption-related options, which can be used to enforce security requirements stricter thanREQUIRE SSL. For additional details about which command options may or must be specified by clients that connect using accounts configured using the variousREQUIREoptions, see the description ofREQUIREin Section 13.7.1.2, “CREATE USER Syntax”.-
Note
The
--ssl-verify-server-certoption is deprecated as of MySQL 5.7.11 and is removed in MySQL 8.0. Use--ssl-mode=VERIFY_IDENTITYinstead.This option is available only for client programs, not the server. It causes the client to perform host name identify verification by checking the server's Common Name identity in the certificate that the server sends to the client. The client verifies the Common Name against the host name the client uses for connecting to the server, and the connection fails if there is a mismatch. For encrypted connections, this option helps prevent man-in-the-middle attacks. Host name identity verification is disabled by default.
NoteHost name identity verification does not work with self-signed certificates created automatically by the server, or manually using mysql_ssl_rsa_setup (see Section 6.4.3.1, “Creating SSL and RSA Certificates and Keys using MySQL”). Such self-signed certificates do not contain the server name as the Common Name value.
For client programs, the protocols permitted by the client for encrypted connections. The value is a comma-separated list containing one or more protocol names. For example:
mysql --tls-version="TLSv1.1,TLSv1.2"
The protocols that can be named for this option depend on the SSL library used to compile MySQL. For details, see Section 6.4.6, “Encrypted Connection Protocols and Ciphers”.
This option was added in MySQL 5.7.10.
On the server side, use the
tls_versionsystem variable instead.
The following discussion describes how to create the files required for SSL and RSA support in MySQL. File creation can be performed using facilities provided by MySQL itself, or by invoking the openssl command directly.
SSL certificate and key files enable MySQL to support sencrypted connections using SSL. See Section 6.4.1, “Configuring MySQL to Use Encrypted Connections”.
RSA key files enable MySQL to support secure password exchange
over unencrypted connections for accounts authenticated by the
sha256_password plugin. See
Section 6.5.1.4, “SHA-256 Pluggable Authentication”.
MySQL provides these ways to create the SSL certificate and key files and RSA key-pair files required to support encrypted connections using SSL and secure password exchange using RSA over unencrypted connections, if those files are missing:
The server can autogenerate these files at startup, for MySQL distributions compiled using OpenSSL.
Users can invoke the mysql_ssl_rsa_setup utility manually.
For some distribution types, such as RPM packages, mysql_ssl_rsa_setup invocation occurs during data directory initialization. In this case, the MySQL distribution need not have been compiled using OpenSSL as long as the openssl command is available.
Server autogeneration and mysql_ssl_rsa_setup help lower the barrier to using SSL by making it easier to generate the required files. However, certificates generated by these methods are self-signed, which may not be very secure. After you gain experience using such files, consider obtaining certificate/key material from a registered certificate authority.
For MySQL distributions compiled using OpenSSL, the MySQL
server has the capability of automatically generating missing
SSL and RSA files at startup. The
auto_generate_certs and
sha256_password_auto_generate_rsa_keys
system variables control automatic generation of these files.
Both variables are enabled by default. They can be enabled at
startup and inspected but not set at runtime.
At startup, the server automatically generates server-side and
client-side SSL certificate and key files in the data
directory if the
auto_generate_certs system
variable is enabled, no SSL options other than
--ssl are specified, and the
server-side SSL files are missing from the data directory.
These files enable encrypted client connections using SSL; see
Section 6.4.1, “Configuring MySQL to Use Encrypted Connections”.
The server checks the data directory for SSL files with the following names:
ca.pem server-cert.pem server-key.pem
If any of those files are present, the server creates no SSL files. Otherwise, it creates them, plus some additional files:
ca.pem Self-signed CA certificate ca-key.pem CA private key server-cert.pem Server certificate server-key.pem Server private key client-cert.pem Client certificate client-key.pem Client private key
If the server autogenerates SSL files, it uses the names of the
ca.pem,server-cert.pem, andserver-key.pemfiles to set the corresponding system variables (ssl_ca,ssl_cert,ssl_key).
At startup, the server automatically generates RSA
private/public key-pair files in the data directory if all of
these conditions are true: The
sha256_password_auto_generate_rsa_keys
system variable is enabled; no RSA options are specified; the
RSA files are missing from the data directory. These key-pair
files enable secure password exchange using RSA over
unencrypted connections for accounts authenticated by the
sha256_password plugin; see
Section 6.5.1.4, “SHA-256 Pluggable Authentication”.
The server checks the data directory for RSA files with the following names:
private_key.pem Private member of private/public key pair public_key.pem Public member of private/public key pair
If any of these files are present, the server creates no RSA files. Otherwise, it creates them.
If the server autogenerates the RSA files, it uses their names to set the corresponding system variables (
sha256_password_private_key_path,sha256_password_public_key_path).
MySQL distributions include a mysql_ssl_rsa_setup utility that can be invoked manually to generate SSL and RSA files. This utility is included with all MySQL distributions (whether compiled using OpenSSL or yaSSL), but it does require that the openssl command be available. For usage instructions, see Section 4.4.5, “mysql_ssl_rsa_setup — Create SSL/RSA Files”.
SSL and RSA files created automatically by the server or by invoking mysql_ssl_rsa_setup have these characteristics:
SSL and RSA keys are have a size of 2048 bits.
The SSL CA certificate is self signed.
The SSL server and client certificates are signed with the CA certificate and key, using the
sha256WithRSAEncryptionsignature algorithm.SSL certificates use these Common Name (CN) values, with the appropriate certificate type (CA, Server, Client):
ca.pem: MySQL_Server_
suffix_Auto_Generated_CA_Certificate server-cert.pm: MySQL_Server_suffix_Auto_Generated_Server_Certificate client-cert.pm: MySQL_Server_suffix_Auto_Generated_Client_CertificateThe
suffixvalue is based on the MySQL version number. For files generated by mysql_ssl_rsa_setup, the suffix can be specified explicitly using the--suffixoption.For files generated by the server, if the resulting CN values exceed 64 characters, the
_portion of the name is omitted.suffixSSL files have blank values for Country (C), State or Province (ST), Organization (O), Organization Unit Name (OU) and email address.
SSL files created by the server or by mysql_ssl_rsa_setup are valid for ten years from the time of generation.
RSA files do not expire.
SSL files have different serial numbers for each certificate/key pair (1 for CA, 2 for Server, 3 for Client).
Files created automatically by the server are owned by the account that runs the server. Files created using mysql_ssl_rsa_setup are owned by the user who invoked that program. This can be changed on systems that support the
chown()system call if the program is invoked byrootand the--uidoption is given to specify the user who should own the files.On Unix and Unix-like systems, the file access mode is 644 for certificate files (that is, world readable) and 600 for key files (that is, accessible only by the account that runs the server).
To see the contents of an SSL certificate (for example, to check the range of dates over which it is valid), invoke openssl directly:
openssl x509 -text -in ca.pem openssl x509 -text -in server-cert.pem openssl x509 -text -in client-cert.pem
It is also possible to check SSL certificate expiration information using this SQL statement:
mysql> SHOW STATUS LIKE 'Ssl_server_not%';
+-----------------------+--------------------------+
| Variable_name | Value |
+-----------------------+--------------------------+
| Ssl_server_not_after | Apr 28 14:16:39 2027 GMT |
| Ssl_server_not_before | May 1 14:16:39 2017 GMT |
+-----------------------+--------------------------+
This section describes how to use the openssl command to set up SSL certificate and key files for use by MySQL servers and clients. The first example shows a simplified procedure such as you might use from the command line. The second shows a script that contains more detail. The first two examples are intended for use on Unix and both use the openssl command that is part of OpenSSL. The third example describes how to set up SSL files on Windows.
There are easier alternatives to generating the files required for SSL than the procedure described here: Let the server autogenerate them or use the mysql_ssl_rsa_setup program. See Section 6.4.3.1, “Creating SSL and RSA Certificates and Keys using MySQL”.
Whatever method you use to generate the certificate and key files, the Common Name value used for the server and client certificates/keys must each differ from the Common Name value used for the CA certificate. Otherwise, the certificate and key files will not work for servers compiled using OpenSSL. A typical error in this case is:
ERROR 2026 (HY000): SSL connection error: error:00000001:lib(0):func(0):reason(1)
The following example shows a set of commands to create MySQL server and client certificate and key files. You will need to respond to several prompts by the openssl commands. To generate test files, you can press Enter to all prompts. To generate files for production use, you should provide nonempty responses.
# Create clean environment
rm -rf newcerts
mkdir newcerts && cd newcerts
# Create CA certificate
openssl genrsa 2048 > ca-key.pem
openssl req -new -x509 -nodes -days 3600 \
-key ca-key.pem -out ca.pem
# Create server certificate, remove passphrase, and sign it
# server-cert.pem = public key, server-key.pem = private key
openssl req -newkey rsa:2048 -days 3600 \
-nodes -keyout server-key.pem -out server-req.pem
openssl rsa -in server-key.pem -out server-key.pem
openssl x509 -req -in server-req.pem -days 3600 \
-CA ca.pem -CAkey ca-key.pem -set_serial 01 -out server-cert.pem
# Create client certificate, remove passphrase, and sign it
# client-cert.pem = public key, client-key.pem = private key
openssl req -newkey rsa:2048 -days 3600 \
-nodes -keyout client-key.pem -out client-req.pem
openssl rsa -in client-key.pem -out client-key.pem
openssl x509 -req -in client-req.pem -days 3600 \
-CA ca.pem -CAkey ca-key.pem -set_serial 01 -out client-cert.pem
After generating the certificates, verify them:
openssl verify -CAfile ca.pem server-cert.pem client-cert.pem
You should see a response like this:
server-cert.pem: OK client-cert.pem: OK
To see the contents of a certificate (for example, to check the range of dates over which a certificate is valid), invoke openssl like this:
openssl x509 -text -in ca.pem openssl x509 -text -in server-cert.pem openssl x509 -text -in client-cert.pem
Now you have a set of files that can be used as follows:
ca.pem: Use this as the argument to--ssl-caon the server and client sides. (The CA certificate, if used, must be the same on both sides.)server-cert.pem,server-key.pem: Use these as the arguments to--ssl-certand--ssl-keyon the server side.client-cert.pem,client-key.pem: Use these as the arguments to--ssl-certand--ssl-keyon the client side.
For additional usage instructions, see Section 6.4.1, “Configuring MySQL to Use Encrypted Connections”.
Here is an example script that shows how to set up SSL certificate and key files for MySQL. After executing the script, use the files for SSL connections as described in Section 6.4.1, “Configuring MySQL to Use Encrypted Connections”.
DIR=`pwd`/openssl
PRIV=$DIR/private
mkdir $DIR $PRIV $DIR/newcerts
cp /usr/share/ssl/openssl.cnf $DIR
replace ./demoCA $DIR -- $DIR/openssl.cnf
# Create necessary files: $database, $serial and $new_certs_dir
# directory (optional)
touch $DIR/index.txt
echo "01" > $DIR/serial
#
# Generation of Certificate Authority(CA)
#
openssl req -new -x509 -keyout $PRIV/cakey.pem -out $DIR/ca.pem \
-days 3600 -config $DIR/openssl.cnf
# Sample output:
# Using configuration from /home/finley/openssl/openssl.cnf
# Generating a 1024 bit RSA private key
# ................++++++
# .........++++++
# writing new private key to '/home/finley/openssl/private/cakey.pem'
# Enter PEM pass phrase:
# Verifying password - Enter PEM pass phrase:
# -----
# You are about to be asked to enter information that will be
# incorporated into your certificate request.
# What you are about to enter is what is called a Distinguished Name
# or a DN.
# There are quite a few fields but you can leave some blank
# For some fields there will be a default value,
# If you enter '.', the field will be left blank.
# -----
# Country Name (2 letter code) [AU]:FI
# State or Province Name (full name) [Some-State]:.
# Locality Name (eg, city) []:
# Organization Name (eg, company) [Internet Widgits Pty Ltd]:MySQL AB
# Organizational Unit Name (eg, section) []:
# Common Name (eg, YOUR name) []:MySQL admin
# Email Address []:
#
# Create server request and key
#
openssl req -new -keyout $DIR/server-key.pem -out \
$DIR/server-req.pem -days 3600 -config $DIR/openssl.cnf
# Sample output:
# Using configuration from /home/finley/openssl/openssl.cnf
# Generating a 1024 bit RSA private key
# ..++++++
# ..........++++++
# writing new private key to '/home/finley/openssl/server-key.pem'
# Enter PEM pass phrase:
# Verifying password - Enter PEM pass phrase:
# -----
# You are about to be asked to enter information that will be
# incorporated into your certificate request.
# What you are about to enter is what is called a Distinguished Name
# or a DN.
# There are quite a few fields but you can leave some blank
# For some fields there will be a default value,
# If you enter '.', the field will be left blank.
# -----
# Country Name (2 letter code) [AU]:FI
# State or Province Name (full name) [Some-State]:.
# Locality Name (eg, city) []:
# Organization Name (eg, company) [Internet Widgits Pty Ltd]:MySQL AB
# Organizational Unit Name (eg, section) []:
# Common Name (eg, YOUR name) []:MySQL server
# Email Address []:
#
# Please enter the following 'extra' attributes
# to be sent with your certificate request
# A challenge password []:
# An optional company name []:
#
# Remove the passphrase from the key
#
openssl rsa -in $DIR/server-key.pem -out $DIR/server-key.pem
#
# Sign server cert
#
openssl ca -cert $DIR/ca.pem -policy policy_anything \
-out $DIR/server-cert.pem -config $DIR/openssl.cnf \
-infiles $DIR/server-req.pem
# Sample output:
# Using configuration from /home/finley/openssl/openssl.cnf
# Enter PEM pass phrase:
# Check that the request matches the signature
# Signature ok
# The Subjects Distinguished Name is as follows
# countryName :PRINTABLE:'FI'
# organizationName :PRINTABLE:'MySQL AB'
# commonName :PRINTABLE:'MySQL admin'
# Certificate is to be certified until Sep 13 14:22:46 2003 GMT
# (365 days)
# Sign the certificate? [y/n]:y
#
#
# 1 out of 1 certificate requests certified, commit? [y/n]y
# Write out database with 1 new entries
# Data Base Updated
#
# Create client request and key
#
openssl req -new -keyout $DIR/client-key.pem -out \
$DIR/client-req.pem -days 3600 -config $DIR/openssl.cnf
# Sample output:
# Using configuration from /home/finley/openssl/openssl.cnf
# Generating a 1024 bit RSA private key
# .....................................++++++
# .............................................++++++
# writing new private key to '/home/finley/openssl/client-key.pem'
# Enter PEM pass phrase:
# Verifying password - Enter PEM pass phrase:
# -----
# You are about to be asked to enter information that will be
# incorporated into your certificate request.
# What you are about to enter is what is called a Distinguished Name
# or a DN.
# There are quite a few fields but you can leave some blank
# For some fields there will be a default value,
# If you enter '.', the field will be left blank.
# -----
# Country Name (2 letter code) [AU]:FI
# State or Province Name (full name) [Some-State]:.
# Locality Name (eg, city) []:
# Organization Name (eg, company) [Internet Widgits Pty Ltd]:MySQL AB
# Organizational Unit Name (eg, section) []:
# Common Name (eg, YOUR name) []:MySQL user
# Email Address []:
#
# Please enter the following 'extra' attributes
# to be sent with your certificate request
# A challenge password []:
# An optional company name []:
#
# Remove the passphrase from the key
#
openssl rsa -in $DIR/client-key.pem -out $DIR/client-key.pem
#
# Sign client cert
#
openssl ca -cert $DIR/ca.pem -policy policy_anything \
-out $DIR/client-cert.pem -config $DIR/openssl.cnf \
-infiles $DIR/client-req.pem
# Sample output:
# Using configuration from /home/finley/openssl/openssl.cnf
# Enter PEM pass phrase:
# Check that the request matches the signature
# Signature ok
# The Subjects Distinguished Name is as follows
# countryName :PRINTABLE:'FI'
# organizationName :PRINTABLE:'MySQL AB'
# commonName :PRINTABLE:'MySQL user'
# Certificate is to be certified until Sep 13 16:45:17 2003 GMT
# (365 days)
# Sign the certificate? [y/n]:y
#
#
# 1 out of 1 certificate requests certified, commit? [y/n]y
# Write out database with 1 new entries
# Data Base Updated
#
# Create a my.cnf file that you can use to test the certificates
#
cat <<EOF > $DIR/my.cnf
[client]
ssl-ca=$DIR/ca.pem
ssl-cert=$DIR/client-cert.pem
ssl-key=$DIR/client-key.pem
[mysqld]
ssl-ca=$DIR/ca.pem
ssl-cert=$DIR/server-cert.pem
ssl-key=$DIR/server-key.pem
EOF
Download OpenSSL for Windows if it is not installed on your system. An overview of available packages can be seen here:
http://www.slproweb.com/products/Win32OpenSSL.html
Choose the Win32 OpenSSL Light or Win64 OpenSSL Light package,
depending on your architecture (32-bit or 64-bit). The default
installation location will be
C:\OpenSSL-Win32 or
C:\OpenSSL-Win64, depending on which
package you downloaded. The following instructions assume a
default location of C:\OpenSSL-Win32.
Modify this as necessary if you are using the 64-bit package.
If a message occurs during setup indicating
'...critical component is missing: Microsoft Visual
C++ 2008 Redistributables', cancel the setup and
download one of the following packages as well, again
depending on your architecture (32-bit or 64-bit):
Visual C++ 2008 Redistributables (x86), available at:
http://www.microsoft.com/downloads/details.aspx?familyid=9B2DA534-3E03-4391-8A4D-074B9F2BC1BF
Visual C++ 2008 Redistributables (x64), available at:
http://www.microsoft.com/downloads/details.aspx?familyid=bd2a6171-e2d6-4230-b809-9a8d7548c1b6
After installing the additional package, restart the OpenSSL setup procedure.
During installation, leave the default
C:\OpenSSL-Win32 as the install path, and
also leave the default option 'Copy OpenSSL DLL files
to the Windows system directory' selected.
When the installation has finished, add
C:\OpenSSL-Win32\bin to the Windows
System Path variable of your server (depending on your version
of Windows, the following path-setting instructions might
differ slightly):
On the Windows desktop, right-click the My Computer icon, and select .
Select the tab from the menu that appears, and click the button.
Under System Variables, select , then click the button. The dialogue should appear.
Add
';C:\OpenSSL-Win32\bin'to the end (notice the semicolon).Press OK 3 times.
Check that OpenSSL was correctly integrated into the Path variable by opening a new command console (Start>Run>cmd.exe) and verifying that OpenSSL is available:
Microsoft Windows [Version ...] Copyright (c) 2006 Microsoft Corporation. All rights reserved. C:\Windows\system32>
cd \C:\>opensslOpenSSL>exit<<< If you see the OpenSSL prompt, installation was successful. C:\>
After OpenSSL has been installed, use instructions similar to those from Example 1 (shown earlier in this section), with the following changes:
Change the following Unix commands:
# Create clean environment rm -rf newcerts mkdir newcerts && cd newcerts
On Windows, use these commands instead:
# Create clean environment md c:\newcerts cd c:\newcerts
When a
'\'character is shown at the end of a command line, this'\'character must be removed and the command lines entered all on a single line.
After generating the certificate and key files, to use them for SSL connections, see Section 6.4.1, “Configuring MySQL to Use Encrypted Connections”.
This section describes how to use the openssl
command to set up the RSA key files that enable MySQL to support
secure password exchange over unencrypted connections for
accounts authenticated by the sha256_password
plugin.
There are easier alternatives to generating the files required for RSA than the procedure described here: Let the server autogenerate them or use the mysql_ssl_rsa_setup program. See Section 6.4.3.1, “Creating SSL and RSA Certificates and Keys using MySQL”.
To create the RSA private and public key-pair files, run these commands while logged into the system account used to run the MySQL server so the files will be owned by that account:
openssl genrsa -out private_key.pem 2048 openssl rsa -in private_key.pem -pubout -out public_key.pem
Those commands create 2,048-bit keys. To create stronger keys, use a larger value.
Then set the access modes for the key files. The private key should be readable only by the server, whereas the public key can be freely distributed to client users:
chmod 400 private_key.pem chmod 444 public_key.pem
MySQL can be compiled using OpenSSL or yaSSL, both of which enable encrypted connections based on the OpenSSL API:
MySQL Enterprise Edition binary distributions are compiled using OpenSSL. It is not possible to use yaSSL with MySQL Enterprise Edition.
MySQL Community Edition binary distributions are compiled using yaSSL.
MySQL Community Edition source distributions can be compiled using either OpenSSL or yaSSL (see Section 6.4.5, “Building MySQL with Support for Encrypted Connections”).
OpenSSL and yaSSL offer the same basic functionality, but MySQL distributions compiled using OpenSSL have additional features:
OpenSSL supports a wider range of encryption ciphers from which to choose for the
--ssl-cipheroption. OpenSSL supports the--ssl-capath,--ssl-crl, and--ssl-crlpathoptions. See Section 6.4.2, “Command Options for Encrypted Connections”.Accounts that authenticate using the
sha256_passwordplugin can use RSA key files for secure password exchange over unencrypted connections. See Section 6.5.1.4, “SHA-256 Pluggable Authentication”.The server can automatically generate missing SSL and RSA certificate and key files at startup. See Section 6.4.3.1, “Creating SSL and RSA Certificates and Keys using MySQL”.
OpenSSL supports more encryption modes for the
AES_ENCRYPT()andAES_DECRYPT()functions. See Section 12.13, “Encryption and Compression Functions”
Certain OpenSSL-related system and status variables are present only if MySQL was compiled using OpenSSL:
To determine whether a server was compiled using OpenSSL, test the existence of any of those variables. For example, this statement returns a row if OpenSSL was used and an empty result if yaSSL was used:
SHOW STATUS LIKE 'Rsa_public_key';
To use SSL connections between the MySQL server and client programs, your system must support either OpenSSL or yaSSL:
MySQL Enterprise Edition binary distributions are compiled using OpenSSL. It is not possible to use yaSSL with MySQL Enterprise Edition.
MySQL Community Edition binary distributions are compiled using yaSSL.
MySQL Community Edition source distributions can be compiled using either OpenSSL or yaSSL.
If you compile MySQL from a source distribution, CMake configures the distribution to use yaSSL by default. To compile using OpenSSL instead, use this procedure:
Ensure OpenSSL 1.0.1 or higher is installed on your system. To obtain OpenSSL, visit http://www.openssl.org.
If the installed OpenSSL version is lower than 1.0.1, CMake produces an error at MySQL configuration time.
To use OpenSSL, add the
-DWITH_SSL=systemoption to the CMake command you normally use to configure the MySQL source distribution. For example:cmake . -DWITH_SSL=system
That command configures the distribution to use the installed OpenSSL library. Alternatively, to explicitly specify the path name to the OpenSSL installation, use the following syntax. This can be useful if you have multiple versions of OpenSSL installed, to prevent CMake from choosing the wrong one:
cmake . -DWITH_SSL=
path_nameCompile and install the distribution.
To check whether a mysqld server supports
encrypted connections, examine the value of the
have_ssl system variable:
mysql> SHOW VARIABLES LIKE 'have_ssl';
+---------------+-------+
| Variable_name | Value |
+---------------+-------+
| have_ssl | YES |
+---------------+-------+
If the value is YES, the server supports
encrypted connections. If the value is
DISABLED, the server is capable of supporting
encrypted connections but was not started with the appropriate
--ssl- options to
enable encrypted connections to be used; see
Section 6.4.1, “Configuring MySQL to Use Encrypted Connections”.
xxx
To determine whether a server was compiled using OpenSSL or yaSSL, check the existence of any of the system or status variables that are present only for OpenSSL. See Section 6.4.4, “OpenSSL Versus yaSSL”
To determine which encryption protocol and cipher are in use for
an encrypted connection, use the following statements to check the
values of the Ssl_version and
Ssl_cipher status variables:
mysql>SHOW SESSION STATUS LIKE 'Ssl_version';+---------------+-------+ | Variable_name | Value | +---------------+-------+ | Ssl_version | TLSv1 | +---------------+-------+ mysql>SHOW SESSION STATUS LIKE 'Ssl_cipher';+---------------+---------------------------+ | Variable_name | Value | +---------------+---------------------------+ | Ssl_cipher | DHE-RSA-AES128-GCM-SHA256 | +---------------+---------------------------+
If the connection is not encrypted, both variables have an empty value.
MySQL supports encrypted connections using TLS protocols:
When compiled using OpenSSL 1.0.1 or higher, MySQL supports the TLSv1, TLSv1.1, and TLSv1.2 protocols.
When compiled using the bundled version of yaSSL, MySQL supports the TLSv1 and TLSv1.1 protocols.
The value of the tls_version
system variable determines which protocols the server is permitted
to use from those that are available. The
tls_version value is a
comma-separated list containing one or more of these protocols
(not case-sensitive): TLSv1, TLSv1.1, TLSv1.2. By default, this
variable lists all protocols supported by the SSL library used to
compile MySQL (TLSv1,TLSv1.1,TLSv1.2 for
OpenSSL, TLSv1,TLSv1.1 for yaSSL). To determine
the value of tls_version at
runtime, use this statement:
mysql> SHOW GLOBAL VARIABLES LIKE 'tls_version';
+---------------+-----------------------+
| Variable_name | Value |
+---------------+-----------------------+
| tls_version | TLSv1,TLSv1.1,TLSv1.2 |
+---------------+-----------------------+
To change the value of
tls_version, set it at server
startup. For example, to prohibit connections that use the
less-secure TLSv1 protocol, use these lines in the server
my.cnf file:
[mysqld] tls_version=TLSv1.1,TLSv1.2
To be even more restrict and permit only TLSv1.2 connections, set
tls_version like this (assuming
that your server is compiled using OpenSSL because yaSSL does not
support TLSv1.2):
[mysqld] tls_version=TLSv1.2
For client programs, the
--tls-version option enables
specifying the TLS protocols permitted per client invocation. The
value format is the same as for
tls_version.
By default, MySQL attempts to use the highest TLS protocol version
available, depending on which SSL library was used to compile the
server and client, which key size is used, and whether the server
or client are restricted from using some protocols; for example,
by means of
tls_version/--tls-version:
If the server and client are compiled using OpenSSL, TLSv1.2 is used if possible.
If either or both the server and client are compiled using yaSSL, TLSv1.1 is used if possible.
TLSv1.2 does not work with all ciphers that have a key size of 512 bits or less. To use this protocol with such a key, use
--ssl-cipherto specify the cipher name explicitly:AES128-SHA AES128-SHA256 AES256-SHA AES256-SHA256 CAMELLIA128-SHA CAMELLIA256-SHA DES-CBC3-SHA DHE-RSA-AES256-SHA RC4-MD5 RC4-SHA SEED-SHA
For better security, use a certificate with an RSA key size of at least 2048 bits.
Prior to MySQL 5.7.10, MySQL supports only TLSv1, for both OpenSSL and yaSSL, and no system variable or client option exist for specifying which TLS protocols to permit.
If the server and client protocol capabilities have no protocol in
common, the server terminates the connection request. For example,
if the server is configured with
tls_version=TLSv1.1,TLSv1.2,
connection attempts will fail for clients invoked with
--tls-version=TLSv1, and for older
clients that do not support the
--tls-version option and
implicitly support only TLSv1.
To determine which ciphers a given server supports, use the
following statement to check the value of the
Ssl_cipher_list status variable:
SHOW SESSION STATUS LIKE 'Ssl_cipher_list';
The set of available ciphers depends on your MySQL version and whether MySQL was compiled using OpenSSL or yaSSL, and (for OpenSSL) the library version used to compile MySQL.
As of MySQL 5.7.10, order of ciphers passed by MySQL to the SSL library is significant. More secure ciphers are mentioned first in the list, and the first cipher supported by the provided certificate is selected.
MySQL passes this cipher list to OpenSSL:
ECDHE-ECDSA-AES128-GCM-SHA256 ECDHE-ECDSA-AES256-GCM-SHA384 ECDHE-RSA-AES128-GCM-SHA256 ECDHE-RSA-AES256-GCM-SHA384 ECDHE-ECDSA-AES128-SHA256 ECDHE-RSA-AES128-SHA256 ECDHE-ECDSA-AES256-SHA384 ECDHE-RSA-AES256-SHA384 DHE-RSA-AES128-GCM-SHA256 DHE-DSS-AES128-GCM-SHA256 DHE-RSA-AES128-SHA256 DHE-DSS-AES128-SHA256 DHE-DSS-AES256-GCM-SHA384 DHE-RSA-AES256-SHA256 DHE-DSS-AES256-SHA256 ECDHE-RSA-AES128-SHA ECDHE-ECDSA-AES128-SHA ECDHE-RSA-AES256-SHA ECDHE-ECDSA-AES256-SHA DHE-DSS-AES128-SHA DHE-RSA-AES128-SHA TLS_DHE_DSS_WITH_AES_256_CBC_SHA DHE-RSA-AES256-SHA AES128-GCM-SHA256 DH-DSS-AES128-GCM-SHA256 ECDH-ECDSA-AES128-GCM-SHA256 AES256-GCM-SHA384 DH-DSS-AES256-GCM-SHA384 ECDH-ECDSA-AES256-GCM-SHA384 AES128-SHA256 DH-DSS-AES128-SHA256 ECDH-ECDSA-AES128-SHA256 AES256-SHA256 DH-DSS-AES256-SHA256 ECDH-ECDSA-AES256-SHA384 AES128-SHA DH-DSS-AES128-SHA ECDH-ECDSA-AES128-SHA AES256-SHA DH-DSS-AES256-SHA ECDH-ECDSA-AES256-SHA DHE-RSA-AES256-GCM-SHA384 DH-RSA-AES128-GCM-SHA256 ECDH-RSA-AES128-GCM-SHA256 DH-RSA-AES256-GCM-SHA384 ECDH-RSA-AES256-GCM-SHA384 DH-RSA-AES128-SHA256 ECDH-RSA-AES128-SHA256 DH-RSA-AES256-SHA256 ECDH-RSA-AES256-SHA384 ECDHE-RSA-AES128-SHA ECDHE-ECDSA-AES128-SHA ECDHE-RSA-AES256-SHA ECDHE-ECDSA-AES256-SHA DHE-DSS-AES128-SHA DHE-RSA-AES128-SHA TLS_DHE_DSS_WITH_AES_256_CBC_SHA DHE-RSA-AES256-SHA AES128-SHA DH-DSS-AES128-SHA ECDH-ECDSA-AES128-SHA AES256-SHA DH-DSS-AES256-SHA ECDH-ECDSA-AES256-SHA DH-RSA-AES128-SHA ECDH-RSA-AES128-SHA DH-RSA-AES256-SHA ECDH-RSA-AES256-SHA DES-CBC3-SHA
MySQL passes this cipher list to yaSSL:
DHE-RSA-AES256-SHA DHE-RSA-AES128-SHA AES128-RMD DES-CBC3-RMD DHE-RSA-AES256-RMD DHE-RSA-AES128-RMD DHE-RSA-DES-CBC3-RMD AES256-SHA RC4-SHA RC4-MD5 DES-CBC3-SHA DES-CBC-SHA EDH-RSA-DES-CBC3-SHA EDH-RSA-DES-CBC-SHA AES128-SHA:AES256-RMD
As of MySQL 5.7.10, these cipher restrictions are in place:
The following ciphers are permanently restricted:
!DHE-DSS-DES-CBC3-SHA !DHE-RSA-DES-CBC3-SHA !ECDH-RSA-DES-CBC3-SHA !ECDH-ECDSA-DES-CBC3-SHA !ECDHE-RSA-DES-CBC3-SHA !ECDHE-ECDSA-DES-CBC3-SHA
The following categories of ciphers are permanently restricted:
!aNULL !eNULL !EXPORT !LOW !MD5 !DES !RC2 !RC4 !PSK !SSLv3
If the server is started using a compatible certificate that uses any of the preceding restricted ciphers or cipher categories, the server starts with support for encrypted connections disabled.
This section describes how to get an encrypted connection to a
remote MySQL server with SSH. The information was provided by
David Carlson <dcarlson@mplcomm.com>.
Install an SSH client on your Windows machine. For a comparison of SSH clients, see http://en.wikipedia.org/wiki/Comparison_of_SSH_clients.
Start your Windows SSH client. Set
Host_Name =. Setyourmysqlserver_URL_or_IPuserid=to log in to your server. Thisyour_useriduseridvalue might not be the same as the user name of your MySQL account.Set up port forwarding. Either do a remote forward (Set
local_port: 3306,remote_host:,yourmysqlservername_or_ipremote_port: 3306) or a local forward (Setport: 3306,host: localhost,remote port: 3306).Save everything, otherwise you will have to redo it the next time.
Log in to your server with the SSH session you just created.
On your Windows machine, start some ODBC application (such as Access).
Create a new file in Windows and link to MySQL using the ODBC driver the same way you normally do, except type in
localhostfor the MySQL host server, notyourmysqlservername.
At this point, you should have an ODBC connection to MySQL, encrypted using SSH.
MySQL includes several plugins that implement security features:
Plugins for authenticating attempts by clients to connect to MySQL Server. Plugins are available for several authentication protocols. For general discussion of the authentication process, see Section 6.3.9, “Pluggable Authentication”. For characteristics of specific authentication plugins, see Section 6.5.1, “Authentication Plugins”.
A password-validation plugin for implementing password strength policies and assessing the strength of potential passwords. See Section 6.5.3, “The Password Validation Plugin”.
A keyring plugin that provides secure storage for sensitive information. See Section 6.5.4, “The MySQL Keyring”.
(MySQL Enterprise Edition only) MySQL Enterprise Audit, implemented using a server plugin, uses the open MySQL Audit API to enable standard, policy-based monitoring and logging of connection and query activity executed on specific MySQL servers. Designed to meet the Oracle audit specification, MySQL Enterprise Audit provides an out of box, easy to use auditing and compliance solution for applications that are governed by both internal and external regulatory guidelines.
(MySQL Enterprise Edition only) MySQL Enterprise Firewall, an application-level firewall that enables database administrators to permit or deny SQL statement execution based on matching against whitelists of accepted statement patterns. This helps harden MySQL Server against attacks such as SQL injection or attempts to exploit applications by using them outside of their legitimate query workload characteristics.
- 6.5.1.1 Native Pluggable Authentication
- 6.5.1.2 Old Native Pluggable Authentication
- 6.5.1.3 Migrating Away from Pre-4.1 Password Hashing and the mysql_old_password Plugin
- 6.5.1.4 SHA-256 Pluggable Authentication
- 6.5.1.5 Client-Side Cleartext Pluggable Authentication
- 6.5.1.6 PAM Pluggable Authentication
- 6.5.1.7 Windows Pluggable Authentication
- 6.5.1.8 LDAP Pluggable Authentication
- 6.5.1.9 No-Login Pluggable Authentication
- 6.5.1.10 Socket Peer-Credential Pluggable Authentication
- 6.5.1.11 Test Pluggable Authentication
- 6.5.1.12 Pluggable Authentication System Variables
The following sections describe pluggable authentication methods available in MySQL and the plugins that implement these methods. For general discussion of the authentication process, see Section 6.3.9, “Pluggable Authentication”.
The default plugin is indicated by the value of the
default_authentication_plugin
system variable.
MySQL includes two plugins that implement native authentication;
that is, authentication based on the password hashing methods in
use from before the introduction of pluggable authentication.
This section describes mysql_native_password,
which implements authentication against the
mysql.user table using the native password
hashing method. For information about
mysql_old_password, which implements
authentication using the older (pre-4.1) native password hashing
method, see
Section 6.5.1.2, “Old Native Pluggable Authentication”. For
information about these password hashing methods, see
Section 6.1.2.4, “Password Hashing in MySQL”.
The following table shows the plugin names on the server and client sides.
Table 6.9 Plugin and Library Names for Native Password Authentication
| Plugin or File | Plugin or File Name |
|---|---|
| Server-side plugin | mysql_native_password |
| Client-side plugin | mysql_native_password |
| Library file | None (plugins are built in) |
The following sections provide installation and usage information specific to native pluggable authentication:
For general information about pluggable authentication in MySQL, see Section 6.3.9, “Pluggable Authentication”.
The mysql_native_password plugin exists in
server and client forms:
The server-side plugin is built into the server, need not be loaded explicitly, and cannot be disabled by unloading it.
The client-side plugin is built into the
libmysqlclientclient library and is available to any program linked againstlibmysqlclient.
MySQL client programs use
mysql_native_password by default. The
--default-auth option can be
used as a hint about which client-side plugin the program can
expect to use:
shell> mysql --default-auth=mysql_native_password ...
MySQL includes two plugins that implement native authentication;
that is, authentication based on the password hashing methods in
use from before the introduction of pluggable authentication.
This section describes mysql_old_password,
which implements authentication against the
mysql.user table using the older (pre-4.1)
native password hashing method. For information about
mysql_native_password, which implements
authentication using the native password hashing method, see
Section 6.5.1.1, “Native Pluggable Authentication”. For
information about these password hashing methods, see
Section 6.1.2.4, “Password Hashing in MySQL”.
Passwords that use the pre-4.1 hashing method are less secure
than passwords that use the native password hashing method and
should be avoided. Pre-4.1 passwords are deprecated and
support for them (including the
mysql_old_password plugin) was removed in
MySQL 5.7.5. For account upgrade instructions, see
Section 6.5.1.3, “Migrating Away from Pre-4.1 Password Hashing and the mysql_old_password
Plugin”.
The following table shows the plugin names on the server and client sides.
Table 6.10 Plugin and Library Names for Old Native Password Authentication
| Plugin or File | Plugin or File Name |
|---|---|
| Server-side plugin | mysql_old_password |
| Client-side plugin | mysql_old_password |
| Library file | None (plugins are built in) |
The following sections provide installation and usage information specific to old native pluggable authentication:
For general information about pluggable authentication in MySQL, see Section 6.3.9, “Pluggable Authentication”.
The mysql_old_password plugin exists in
server and client forms:
The server-side plugin is built into the server, need not be loaded explicitly, and cannot be disabled by unloading it.
The client-side plugin is built into the
libmysqlclientclient library and is available to any program linked againstlibmysqlclient.
MySQL client programs can use the
--default-auth option to specify
the mysql_old_password plugin as a hint
about which client-side plugin the program can expect to use:
shell> mysql --default-auth=mysql_old_password ...
The MySQL server authenticates connection attempts for each
account listed in the mysql.user table using
the authentication plugin named in the plugin
column. If the plugin column is empty, the
server authenticates the account as follows:
Before MySQL 5.7, the server uses the
mysql_native_passwordormysql_old_passwordplugin implicitly, depending on the format of the password hash in thePasswordcolumn. If thePasswordvalue is empty or a 4.1 password hash (41 characters), the server usesmysql_native_password. If the password value is a pre-4.1 password hash (16 characters), the server usesmysql_old_password. (For additional information about these hash formats, see Section 6.1.2.4, “Password Hashing in MySQL”.)As of MySQL 5.7, the server requires the
plugincolumn to be nonempty and disables accounts that have an emptypluginvalue.
Pre-4.1 password hashes and the
mysql_old_password plugin are deprecated in
MySQL 5.6 and support for them is removed in MySQL 5.7. They
provide a level of security inferior to that offered by 4.1
password hashing and the
mysql_native_password plugin.
Given the requirement in MySQL 5.7 that the
plugin column must be nonempty, coupled with
removal of mysql_old_password support, DBAs
are advised to upgrade accounts as follows:
Upgrade accounts that use
mysql_native_passwordimplicitly to use it explicitlyUpgrade accounts that use
mysql_old_password(either implicitly or explicitly) to usemysql_native_passwordexplicitly
The instructions in this section describe how to perform those
upgrades. The result is that no account has an empty
plugin value and no account uses pre-4.1
password hashing or the mysql_old_password
plugin.
As a variant on these instructions, DBAs might offer users the
choice to upgrade to the sha256_password
plugin, which authenticates using SHA-256 password hashes. For
information about this plugin, see
Section 6.5.1.4, “SHA-256 Pluggable Authentication”.
The following table lists the types of
mysql.user accounts considered in this
discussion.
plugin Column |
Password Column |
Authentication Result | Upgrade Action |
|---|---|---|---|
| Empty | Empty | Implicitly uses mysql_native_password |
Assign plugin |
| Empty | 4.1 hash | Implicitly uses mysql_native_password |
Assign plugin |
| Empty | Pre-4.1 hash | Implicitly uses mysql_old_password |
Assign plugin, rehash password |
mysql_native_password |
Empty | Explicitly uses mysql_native_password |
None |
mysql_native_password |
4.1 hash | Explicitly uses mysql_native_password |
None |
mysql_old_password |
Empty | Explicitly uses mysql_old_password |
Upgrade plugin |
mysql_old_password |
Pre-4.1 hash | Explicitly uses mysql_old_password |
Upgrade plugin, rehash password |
Accounts corresponding to lines for the
mysql_native_password plugin require no
upgrade action (because no change of plugin or hash format is
required). For accounts corresponding to lines for which the
password is empty, consider asking the account owners to choose
a password (or require it by using ALTER
USER to expire empty account passwords).
Upgrading Accounts from Implicit to Explicit mysql_native_password Use
Accounts that have an empty plugin and a 4.1 password hash use
mysql_native_password implicitly. To upgrade
these accounts to use mysql_native_password
explicitly, execute these statements:
UPDATE mysql.user SET plugin = 'mysql_native_password' WHERE plugin = '' AND (Password = '' OR LENGTH(Password) = 41); FLUSH PRIVILEGES;
Before MySQL 5.7, you can execute those statements to uprade accounts proactively. As of MySQL 5.7, you can run mysql_upgrade, which performs the same operation among its upgrade actions.
Notes:
The upgrade operation just described is safe to execute at any time because it makes the
mysql_native_passwordplugin explicit only for accounts that already use it implicitly.This operation requires no password changes, so it can be performed without affecting users or requiring their involvement in the upgrade process.
Upgrading Accounts from mysql_old_password to mysql_native_password
Accounts that use mysql_old_password (either
implicitly or explicitly) should be upgraded to use
mysql_native_password explicitly. This
requires changing the plugin and changing
the password from pre-4.1 to 4.1 hash format.
For the accounts covered in this step that must be upgraded, one of these conditions is true:
The account uses
mysql_old_passwordimplicitly because theplugincolumn is empty and the password has the pre-4.1 hash format (16 characters).The account uses
mysql_old_passwordexplicitly.
To identify such accounts, use this query:
SELECT User, Host, Password FROM mysql.user WHERE (plugin = '' AND LENGTH(Password) = 16) OR plugin = 'mysql_old_password';
The following discussion provides two methods for updating that set of accounts. They have differing characteristics, so read both and decide which is most suitable for a given MySQL installation.
Method 1.
Characteristics of this method:
It requires that server and clients be run with
secure_auth=0until all users have been upgraded tomysql_native_password. (Otherwise, users cannot connect to the server using their old-format password hashes for the purpose of upgrading to a new-format hash.)It works for MySQL 5.5 and 5.6. In 5.7, it does not work because the server requires accounts to have a nonempty plugin and disables them otherwise. Therefore, if you have already upgraded to 5.7, choose Method 2, described later.
You should ensure that the server is running with
secure_auth=0.
For all accounts that use mysql_old_password
explicitly, set them to the empty plugin:
UPDATE mysql.user SET plugin = '' WHERE plugin = 'mysql_old_password'; FLUSH PRIVILEGES;
To also expire the password for affected accounts, use these statements instead:
UPDATE mysql.user SET plugin = '', password_expired = 'Y' WHERE plugin = 'mysql_old_password'; FLUSH PRIVILEGES;
Now affected users can reset their password to use 4.1 hashing. Ask each user who now has an empty plugin to connect to the server and execute these statements:
SET old_passwords = 0;
SET PASSWORD = PASSWORD('user-chosen-password');
The client-side --secure-auth
option is enabled by default, so remind users to disable it or
they will be unable to connect:
shell> mysql -u user_name -p --secure-auth=0
After an affected user has executed those statements, you can
set the corresponding account plugin to
mysql_native_password to make the plugin
explicit. Or you can periodically run these statements to find
and fix any accounts for which affected users have reset their
password:
UPDATE mysql.user SET plugin = 'mysql_native_password' WHERE plugin = '' AND (Password = '' OR LENGTH(Password) = 41); FLUSH PRIVILEGES;
When there are no more accounts with an empty plugin, this query returns an empty result:
SELECT User, Host, Password FROM mysql.user WHERE plugin = '' AND LENGTH(Password) = 16;
At that point, all accounts have been migrated away from pre-4.1
password hashing and the server no longer need be run with
secure_auth=0.
Method 2.
Characteristics of this method:
It assigns each affected account a new password, so you must tell each such user the new password and ask the user to choose a new one. Communication of passwords to users is outside the scope of MySQL, but should be done carefully.
It does not require server or clients to be run with
secure_auth=0.It works for any version of MySQL 5.5 or later (and for 5.7 has an easier variant).
With this method, you update each account separately due to the need to set passwords individually. Choose a different password for each account.
Suppose that 'user1'@'localhost' is one of
the accounts to be upgraded. Modify it as follows:
In MySQL 5.7,
ALTER USERprovides the capability of modifying both the account password and its authentication plugin, so you need not modify themysql.usertable directly:ALTER USER 'user1'@'localhost' IDENTIFIED WITH mysql_native_password BY '
DBA-chosen-password';To also expire the account password, use this statement instead:
ALTER USER 'user1'@'localhost' IDENTIFIED WITH mysql_native_password BY '
DBA-chosen-password' PASSWORD EXPIRE;Then tell the user the new password and ask the user to connect to the server with that password and execute this statement to choose a new password:
ALTER USER USER() IDENTIFIED BY '
user-chosen-password';Before MySQL 5.7, you must modify the
mysql.usertable directly using these statements:SET old_passwords = 0; UPDATE mysql.user SET plugin = 'mysql_native_password', Password = PASSWORD('DBA-chosen-password') WHERE (User, Host) = ('user1', 'localhost'); FLUSH PRIVILEGES;To also expire the account password, use these statements instead:
SET old_passwords = 0; UPDATE mysql.user SET plugin = 'mysql_native_password', Password = PASSWORD('DBA-chosen-password'), password_expired = 'Y' WHERE (User, Host) = ('user1', 'localhost'); FLUSH PRIVILEGES;Then tell the user the new password and ask the user to connect to the server with that password and execute these statements to choose a new password:
SET old_passwords = 0; SET PASSWORD = PASSWORD('user-chosen-password');
Repeat for each account to be upgraded.
MySQL provides an authentication plugin that implements SHA-256 hashing for user account passwords.
To connect to the server using an account that authenticates
with the sha256_password plugin, you must
use either a TLS connection or an unencrypted connection that
supports password exchange using an RSA key pair, as described
later in this section. Either way, the
sha256_password plugin uses MySQL's
encryption capabilities. See
Section 6.4, “Using Encrypted Connections”.
The following table shows the plugin names on the server and client sides.
Table 6.11 Plugin and Library Names for SHA-256 Authentication
| Plugin or File | Plugin or File Name |
|---|---|
| Server-side plugin | sha256_password |
| Client-side plugin | sha256_password |
| Library file | None (plugins are built in) |
The following sections provide installation and usage information specific to SHA-256 pluggable authentication:
For general information about pluggable authentication in MySQL, see Section 6.3.9, “Pluggable Authentication”.
The sha256_password plugin exists in server
and client forms:
The server-side plugin is built into the server, need not be loaded explicitly, and cannot be disabled by unloading it.
The client-side plugin is built into the
libmysqlclientclient library and is available to any program linked againstlibmysqlclient.
To set up an account that uses the
sha256_password plugin for SHA-256 password
hashing, use the following statement, where
password is the desired account
password:
CREATE USER 'sha256user'@'localhost'
IDENTIFIED WITH sha256_password BY 'password';
The server assigns the sha256_password
plugin to the account and uses it to encrypt the password
using SHA-256, storing those values in the
plugin and
authentication_string columns of the
mysql.user system table.
The preceding instructions do not assume that
sha256_password is the default
authentication plugin. If sha256_password
is the default authentication plugin, a simpler
CREATE USER syntax can be used.
To start the server with the default authentication plugin set
to sha256_password, put these lines in the
server option file:
[mysqld] default_authentication_plugin=sha256_password
That causes the sha256_password plugin to
be used by default for new accounts. As a result, it is
possible to create the account and set its password without
naming the plugin explicitly:
CREATE USER 'sha256user'@'localhost' IDENTIFIED BY 'password';
Another consequence of setting
default_authentication_plugin
to sha256_password is that, to use some
other plugin for account creation, you must specify that
plugin explicitly. For example, to use the
mysql_native_password plugin, use this
statement:
CREATE USER 'nativeuser'@'localhost'
IDENTIFIED WITH mysql_native_password BY 'password';
MySQL can be compiled using either OpenSSL or yaSSL (see
Section 6.4.4, “OpenSSL Versus yaSSL”). The
sha256_password plugin works with
distributions compiled using either package, but if MySQL is
compiled using OpenSSL, sha256_password
supports the use of RSA encryption. (To enable this
capability, you must follow the RSA configuration procedure
given later in this section.) RSA support has these
characteristics:
Two system variables name the RSA private and public key-pair files:
sha256_password_private_key_pathandsha256_password_public_key_path. The database administrator must set these variables at server startup if the key files to use have names that differ from the system variable default values.The server uses the
sha256_password_auto_generate_rsa_keyssystem variable to determine whether to automatically generate the RSA key-pair files. See Section 6.4.3, “Creating SSL and RSA Certificates and Keys”.The
Rsa_public_keystatus variable displays the RSA public key value used by thesha256_passwordauthentication plugin.Clients that have the RSA public key can perform RSA key pair-based password exchange with the server during the connection process, as described later.
For connections by accounts that authenticate using
sha256_passwordand RSA public key pair-based password exchange, the server sends the RSA public key to the client as needed. However, if a copy of the public key is available on the client host, the client can use it to save a round trip in the client/server protocol:For these command-line clients, use the
--server-public-key-pathoption to specify the RSA public key file: mysql, mysqltest.For programs that use the C API, call
mysql_options()to specify the RSA public key file by passing theMYSQL_SERVER_PUBLIC_KEYoption and the name of the file.For replication slaves, RSA key pair-based password exchange cannot be used to connect to master servers for accounts that authenticate with the
sha256_passwordplugin. For such accounts, only secure connections can be used.
For clients that use the sha256_password
plugin, passwords are never exposed as cleartext when
connecting to the server. How password transmission occurs
depends on whether a secure connection or RSA encryption is
used:
If the connection is secure, an RSA key pair is unnecessary and is not used. This applies to encrypted connections that use TLS. The password is sent as cleartext but cannot be snooped because the connection is secure.
If the connection is not secure, and an RSA key pair is available, the connection remains unencrypted. This applies to unencrypted connections without TLS. RSA is used only for password exchange between client and server, to prevent password snooping. When the server receives the encrypted password, it decrypts it. A scramble is used in the encryption to prevent repeat attacks.
If a secure connection is not used and RSA encryption is not available, the connection attempt fails because the password cannot be sent without being exposed as cleartext.
As mentioned previously, RSA password encryption is available only if MySQL was compiled using OpenSSL. The implication for MySQL distributions compiled using yaSSL is that, to use SHA-256 passwords, clients must use an encrypted connection to access the server. See Section 6.4.1, “Configuring MySQL to Use Encrypted Connections”.
To use RSA password encryption with
sha256_password, the client and server
both must be compiled using OpenSSL, not just one of them.
Assuming that MySQL has been compiled using OpenSSL, use the following procedure to enable use of an RSA key pair for password exchange during the client connection process:
Create the RSA private and public key-pair files using the instructions in Section 6.4.3, “Creating SSL and RSA Certificates and Keys”.
If the private and public key files are located in the data directory and are named
private_key.pemandpublic_key.pem(the default values of thesha256_password_private_key_pathandsha256_password_public_key_pathsystem variables), the server uses them automatically at startup.Otherwise, to name the key files explicitly, set the system variables to the key file names in the server option file. If the files are located in the server data directory, you need not specify their full path names:
[mysqld] sha256_password_private_key_path=myprivkey.pem sha256_password_public_key_path=mypubkey.pem
If the key files are not located in the data directory, or to make their locations explicit in the system variable values, use full path names:
[mysqld] sha256_password_private_key_path=/usr/local/mysql/myprivkey.pem sha256_password_public_key_path=/usr/local/mysql/mypubkey.pem
Restart the server, then connect to it and check the
Rsa_public_keystatus variable value. The value will differ from that shown here, but should be nonempty:mysql>
SHOW STATUS LIKE 'Rsa_public_key'\G*************************** 1. row *************************** Variable_name: Rsa_public_key Value: -----BEGIN PUBLIC KEY----- MIGfMA0GCSqGSIb3DQEBAQUAA4GNADCBiQKBgQDO9nRUDd+KvSZgY7cNBZMNpwX6 MvE1PbJFXO7u18nJ9lwc99Du/E7lw6CVXw7VKrXPeHbVQUzGyUNkf45Nz/ckaaJa aLgJOBCIDmNVnyU54OT/1lcs2xiyfaDMe8fCJ64ZwTnKbY2gkt1IMjUAB5Ogd5kJ g8aV7EtKwyhHb0c30QIDAQAB -----END PUBLIC KEY-----If the value is empty, the server found some problem with the key files. Check the error log for diagnostic information.
After the server has been configured with the RSA key files,
accounts that authenticate with the
sha256_password plugin have the option of
using those key files to connect to the server. As mentioned
previously, such accounts can use either a secure connection
(in which case RSA is not used) or an unencrypted connection
that performs password exchange using RSA. Suppose that an
unencrypted connection is used. For example:
shell>mysql --ssl-mode=DISABLED -u sha256user -pEnter password:password
For this connection attempt by sha256user,
the server determines that sha256_password
is the appropriate authentication plugin and invokes it
(because that was the plugin specified at
CREATE USER time). The plugin
finds that the connection is not encrypted and thus requires
the password to be transmitted using RSA encryption. In this
case, the plugin sends the RSA public key to the client, which
uses it to encrypt the password and returns the result to the
server. The plugin uses the RSA private key on the server side
to decrypt the password and accepts or rejects the connection
based on whether the password is correct.
The server sends the RSA public key to the client as needed.
However, if the client has a file containing a local copy of
the RSA public key required by the server, it can specify the
file using the
--server-public-key-path option:
shell>mysql --ssl-mode=DISABLED -u sha256user -p --server-public-key-path=Enter password:file_namepassword
The public key value in the file named by the
--server-public-key-path option
should be the same as the key value in the server-side file
named by the
sha256_password_public_key_path
system variable. If the key file contains a valid public key
value but the value is incorrect, an access-denied error
occurs. If the key file does not contain a valid public key,
the client program cannot use it. In this case, the
sha256_password plugin sends the public key
to the client as if no
--server-public-key-path option
had been specified.
Client users can obtain the RSA public key two ways:
The database administrator can provide a copy of the public key file.
A client user who can connect to the server some other way can use a
SHOW STATUS LIKE 'Rsa_public_key'statement and save the returned key value in a file.
A client-side authentication plugin is available that sends the password to the server without hashing or encryption. This plugin is built into the MySQL client library.
The following table shows the plugin name.
Table 6.12 Plugin and Library Names for Cleartext Authentication
| Plugin or File | Plugin or File Name |
|---|---|
| Server-side plugin | None, see discussion |
| Client-side plugin | mysql_clear_password |
| Library file | None (plugin is built in) |
With many MySQL authentication methods, the client performs hashing or encryption of the password before sending it to the server. This enables the client to avoid sending the password in clear text.
Hashing or encryption cannot be done for authentication schemes
that require the server to receive the password as entered on
the client side. In such cases, the client-side
mysql_clear_password plugin is used to send
the password to the server in clear text. There is no
corresponding server-side plugin. Rather, the client-side plugin
can be used by any server-side plugin that needs a cleartext
password. (Examples are the PAM and simple LDAP authentication
plugins; see Section 6.5.1.6, “PAM Pluggable Authentication”, and
Section 6.5.1.8, “LDAP Pluggable Authentication”.)
The following discussion provides usage information specific to clear text pluggable authentication. For For general information about pluggable authentication in MySQL, see Section 6.3.9, “Pluggable Authentication”.
Sending passwords in clear text may be a security problem in some configurations. To avoid problems if there is any possibility that the password would be intercepted, clients should connect to MySQL Server using a method that protects the password. Possibilities include SSL (see Section 6.4, “Using Encrypted Connections”), IPsec, or a private network.
To make inadvertent use of the
mysql_clear_password plugin less likely,
MySQL clients must explicitly enable it. This can be done in
several ways:
Set the
LIBMYSQL_ENABLE_CLEARTEXT_PLUGINenvironment variable to a value that begins with1,Y, ory. This enables the plugin for all client connections.The mysql, mysqladmin, and mysqlslap client programs (also mysqlcheck, mysqldump, and mysqlshow for MySQL 5.7.10 and later) support an
--enable-cleartext-pluginoption that enables the plugin on a per-invocation basis.The
mysql_options()C API function supports aMYSQL_ENABLE_CLEARTEXT_PLUGINoption that enables the plugin on a per-connection basis. Also, any program that useslibmysqlclientand reads option files can enable the plugin by including anenable-cleartext-pluginoption in an option group read by the client library.
PAM pluggable authentication is an extension included in MySQL Enterprise Edition, a commercial product. To learn more about commercial products, see http://www.mysql.com/products/.
MySQL Enterprise Edition supports an authentication method that enables MySQL Server to use PAM (Pluggable Authentication Modules) to authenticate MySQL users. PAM enables a system to use a standard interface to access various kinds of authentication methods, such as Unix passwords or an LDAP directory.
PAM pluggable authentication provides these capabilities:
External authentication: PAM authentication enables MySQL Server to accept connections from users defined outside the MySQL grant tables and that authenticate using methods supported by PAM.
Proxy user support: PAM authentication can return to MySQL a user name different from the login user, based on the groups the external user is in and the authentication string provided. This means that the plugin can return the MySQL user that defines the privileges the external PAM-authenticated user should have. For example, a user named
joecan connect and have the privileges of the user nameddeveloper.
PAM pluggable authentication has been tested on Linux and macOS.
The PAM plugin uses the information passed to it by MySQL Server
(such as user name, host name, password, and authentication
string), plus whatever method is available for PAM lookup. The
plugin checks the user credentials against PAM and returns
'Authentication succeeded, Username is
or
user_name''Authentication failed'.
The following table shows the plugin and library file names. The
file name suffix might differ on your system. The file must be
located in the directory named by the
plugin_dir system variable. For
installation information, see
Installing PAM Pluggable Authentication.
Table 6.13 Plugin and Library Names for PAM Authentication
| Plugin or File | Plugin or File Name |
|---|---|
| Server-side plugin | authentication_pam |
| Client-side plugin | mysql_clear_password |
| Library file | authentication_pam.so |
The client-side clear-text plugin that communicates with the
server-side PAM plugin is built into the
libmysqlclient client library and is included
in all distributions, including community distributions.
Inclusion of the client-side clear-text plugin in all MySQL
distributions enables clients from any distribution to connect
to a server that has the server-side plugin loaded.
The following sections provide installation and usage information specific to PAM pluggable authentication:
For general information about pluggable authentication in MySQL,
see Section 6.3.9, “Pluggable Authentication”. For information
about the mysql_clear_password plugin, see
Section 6.5.1.5, “Client-Side Cleartext Pluggable Authentication”. For proxy
user information, see Section 6.3.10, “Proxy Users”.
This section describes how to install the PAM authentication plugin. For general information about installing plugins, see Section 5.5.1, “Installing and Uninstalling Plugins”.
To be usable by the server, the plugin library file must be
located in the MySQL plugin directory (the directory named by
the plugin_dir system
variable). If necessary, set the value of
plugin_dir at server startup
to tell the server the plugin directory location.
The plugin library file base name is
authentication_pam. The file name suffix
differs per platform (for example, .so
for Unix and Unix-like systems, .dll for
Windows).
To load the plugin at server startup, use the
--plugin-load-add option to
name the library file that contains it. With this
plugin-loading method, the option must be given each time the
server starts. For example, put these lines in your
my.cnf file (adjust the
.so suffix for your platform as
necessary):
[mysqld] plugin-load-add=authentication_pam.so
After modifying my.cnf, restart the
server to cause the new settings to take effect.
Alternatively, to register the plugin at runtime, use this
statement (adjust the .so suffix as
necessary):
INSTALL PLUGIN authentication_pam SONAME 'authentication_pam.so';
INSTALL PLUGIN loads a plugin,
and also registers it in the mysql.plugins
system table to cause the plugin to be loaded for each
subsequent normal server startup.
To verify plugin installation, examine the
INFORMATION_SCHEMA.PLUGINS table
or use the SHOW PLUGINS
statement (see
Section 5.5.2, “Obtaining Server Plugin Information”). For example:
mysql>SELECT PLUGIN_NAME, PLUGIN_STATUSFROM INFORMATION_SCHEMA.PLUGINSWHERE PLUGIN_NAME LIKE '%pam%';+--------------------+---------------+ | PLUGIN_NAME | PLUGIN_STATUS | +--------------------+---------------+ | authentication_pam | ACTIVE | +--------------------+---------------+
If the plugin fails to initialize, check the server error log for diagnostic messages.
To associate MySQL accounts with the PAM plugin, see Using PAM Pluggable Authentication.
The method used to uninstall the PAM authentication plugin depends on how you installed it:
If you installed the plugin at server startup using a
--plugin-load-addoption, restart the server without the option.If you installed the plugin at runtime using
INSTALL PLUGIN, it remains installed across server restarts. To uninstall it, useUNINSTALL PLUGIN:UNINSTALL PLUGIN authentication_pam;
This section describes how to use the PAM authentication plugin to connect from MySQL client programs to the server. It is assumed that the server is running with the server-side plugin enabled, as described in Installing PAM Pluggable Authentication.
To refer to the PAM authentication plugin in the
IDENTIFIED WITH clause of a
CREATE USER statement, use the
name authentication_pam. For example:
CREATE USERuserIDENTIFIED WITH authentication_pam AS 'authentication_string';
The authentication string specifies the following types of information:
PAM supports the notion of “service name,” which is a name that the system administrator can use to configure the authentication method for a particular application. There can be several such “applications” associated with a single database server instance, so the choice of service name is left to the SQL application developer. When you define an account that should authenticate using PAM, specify the service name in the authentication string.
PAM provides a way for a PAM module to return to the server a MySQL user name other than the login name supplied at login time. Use the authentication string to control the mapping between login name and MySQL user name. If you want to take advantage of proxy user capabilities, the authentication string must include this kind of mapping.
For example, if the service name is mysql
and users in the root and
users PAM groups should be mapped to the
developer and data_entry
MySQL users, respectively, use a statement like this:
CREATE USER user
IDENTIFIED WITH authentication_pam
AS 'mysql, root=developer, users=data_entry';
Authentication string syntax for the PAM authentication plugin follows these rules:
The string consists of a PAM service name, optionally followed by a group mapping list consisting of one or more keyword/value pairs each specifying a group name and a MySQL user name:
pam_service_name[,group_name=mysql_user_name]...The plugin parses the authentication string on each login check. To minimize overhead, keep the string as short as possible.
Each
group_name=mysql_user_nameLeading and trailing spaces not inside double quotation marks are ignored.
Unquoted
pam_service_name,group_name, andmysql_user_namevalues can contain anything except equal sign, comma, or space.If a
pam_service_name,group_name, ormysql_user_namevalue is quoted with double quotation marks, everything between the quotation marks is part of the value. This is necessary, for example, if the value contains space characters. All characters are legal except double quotation mark and backslash (\). To include either character, escape it with a backslash.
If the plugin successfully authenticates a login name, it looks for a group mapping list in the authentication string and, if present, uses it to return a different user name to the MySQL server based on the groups the external user is a member of:
If the authentication string contains no group mapping list, the plugin returns the login name.
If the authentication string does contain a group mapping list, the plugin examines each
group_name=mysql_user_namegroup_namevalue in a non-MySQL directory of the groups assigned to the authenticated user and returnsmysql_user_namefor the first match it finds. If the plugin finds no match for any group, it returns the login name. If the plugin is not capable of looking up a group in a directory, it ignores the group mapping list and returns the login name.
The following sections describe how to set up several authentication scenarios that use the PAM authentication plugin:
No proxy users. This uses PAM only to check login names and passwords. Every external user permitted to connect to MySQL Server should have a matching MySQL account that is defined to use external PAM authentication. (For a MySQL account of
user_name@host_nameuser_namemust be the login name andhost_namemust match the host from which the client connects.) Authentication can be performed by various PAM-supported methods. The discussion shows how to use traditional Unix passwords and LDAP.PAM authentication, when not done through proxy users or groups, requires the MySQL account to have the same user name as the Unix account. MySQL user names are limited to 32 characters (see Section 6.2.2, “Grant Tables”), which limits PAM nonproxy authentication to Unix accounts with names of at most 32 characters.
Proxy login only and group mapping. For this scenario, create one or a few MySQL accounts that define different sets of privileges. (Ideally, nobody should connect using those accounts directly.) Then define a default user authenticating through PAM that uses some mapping scheme (usually by the external groups the users are in) to map all the external logins to the few MySQL accounts holding the privilege sets. Any user that logs in is mapped to one of the MySQL accounts and uses its privileges. The discussion shows how to set this up using Unix passwords, but other PAM methods such as LDAP could be used instead.
Variations on these scenarios are possible. For example, you can permit some users to log in directly (without proxying) but require others to connect through proxy users.
The examples make the following assumptions. You might need to make some adjustments if your system is set up differently.
The PAM configuration directory is
/etc/pam.d.The PAM service name is
mysql, which means that you must set up a PAM file namedmysqlin the PAM configuration directory (creating the file if it does not exist). If you use a service name different frommysql, the file name will differ and you must use a different name in theAS 'clause ofauth_string'CREATE USERstatements.The examples use a login name of
antonioand password ofverysecret. Change these to correspond to the users you want to authenticate.
The PAM authentication plugin checks at initialization time
whether the AUTHENTICATION_PAM_LOG
environment value is set in the server's startup environment.
If so, the plugin enables logging of diagnostic messages to
the standard output. Depending on how your server is started,
the message might appear on the console or in the error log.
These messages can be helpful for debugging PAM-related
problems that occur when the plugin performs authentication.
For more information, see
PAM Pluggable Authentication Debugging.
This authentication scenario uses PAM only to check Unix user login names and passwords. Every external user permitted to connect to MySQL Server should have a matching MySQL account that is defined to use external PAM authentication.
Verify that Unix authentication in PAM permits you to log in as
antoniowith passwordverysecret.Set up PAM to authenticate the
mysqlservice by creating a file named/etc/pam.d/mysql. The file contents are system dependent, so check existing login-related files in the/etc/pam.ddirectory to see what they look like. On Linux, themysqlfile might look like this:#%PAM-1.0 auth include password-auth account include password-auth
For Gentoo Linux, use
system-loginrather thanpassword-auth. For macOS, useloginrather thanpassword-auth.The PAM file format might differ on some systems. For example, on Ubuntu and other Debian-based systems, use these file contents instead:
@include common-auth @include common-account @include common-session-noninteractive
Create a MySQL account with the same user name as the Unix login name and define it to authenticate using the PAM plugin:
CREATE USER 'antonio'@'localhost' IDENTIFIED WITH authentication_pam AS 'mysql'; GRANT ALL PRIVILEGES ON mydb.* TO 'antonio'@'localhost';
Connect to the MySQL server using the mysql command-line client. For example:
mysql --user=antonio --password --enable-cleartext-plugin mydb Enter password:
verysecretThe server should permit the connection and the following query should return output as shown:
mysql>
SELECT USER(), CURRENT_USER(), @@proxy_user;+-------------------+-------------------+--------------+ | USER() | CURRENT_USER() | @@proxy_user | +-------------------+-------------------+--------------+ | antonio@localhost | antonio@localhost | NULL | +-------------------+-------------------+--------------+This demonstrates that
antoniouses the privileges granted to theantonioMySQL account, and that no proxying has occurred.
The client-side mysql_clear_password
plugin with which the server-side PAM plugin communicates
sends the password to the MySQL server in clear text so it
can be passed to PAM. This is necessary to use the
server-side PAM library, but may be a security problem in
some configurations. These measures minimize the risk:
To make inadvertent use of the
mysql_clear_passwordplugin less likely, MySQL clients must explicitly enable it; for example, with the--enable-cleartext-pluginoption.To avoid password exposure with the
mysql_clear_passwordplugin enabled, MySQL clients should connect to the MySQL server using a secure connection.
For additinal information, see Section 6.5.1.5, “Client-Side Cleartext Pluggable Authentication”, and Section 6.4.1, “Configuring MySQL to Use Encrypted Connections”.
On some systems, Unix authentication uses
/etc/shadow, a file that typically has
restricted access permissions. This can cause MySQL
PAM-based authentication to fail. Unfortunately, the PAM
implementation does not permit distinguishing
“password could not be checked” (due, for
example, to inability to read
/etc/shadow) from “password does
not match.” If your system uses
/etc/shadow, you may be able enable
access to it by MySQL using this method (assuming that the
MySQL server is run from the mysql system
account):
Create a
shadowgroup in/etc/group.Add the
mysqluser to theshadowgroup in/etc/group.Assign
/etc/groupto theshadowgroup and enable the group read permission:chgrp shadow /etc/shadow chmod g+r /etc/shadow
Restart the MySQL server.
This authentication scenario uses PAM only to check LDAP user login names and passwords. Every external user permitted to connect to MySQL Server should have a matching MySQL account that is defined to use external PAM authentication.
Verify that LDAP authentication in PAM permits you to log in as
antoniowith passwordverysecret.Set up PAM to authenticate the
mysqlservice through LDAP by creating a file named/etc/pam.d/mysql. The file contents are system dependent, so check existing login-related files in the/etc/pam.ddirectory to see what they look like. On Linux, themysqlfile might look like this:#%PAM-1.0 auth required pam_ldap.so account required pam_ldap.so
If PAM object files have a suffix different from
.soon your system, substitute the correct suffix.The PAM file format might differ on some systems.
MySQL account creation and connecting to the server is the same as described in Unix Password Authentication without Proxy Users.
The authentication scheme described here uses proxying and group mapping to map connecting MySQL users who authenticate using PAM onto other MySQL accounts that define different sets of privileges. Users do not connect directly through the accounts that define the privileges. Instead, they connect through a default proxy user authenticated using PAM, such that all the external logins are mapped to the MySQL accounts that hold the privileges. Any user who connects is mapped to one of those MySQL accounts, the privileges for which determine the database operations permitted to the external user.
The procedure shown here uses Unix password authentication. To use LDAP instead, see the early steps of LDAP Authentication without Proxy Users.
For information regarding possible problems related to
/etc/shadow, see
Unix Password Authentication without Proxy Users.
Verify that Unix authentication in PAM permits you to log in as
antoniowith passwordverysecretand thatantoniois a member of therootorusersgroup.Set up PAM to authenticate the
mysqlservice. Put the following in/etc/pam.d/mysql:#%PAM-1.0 auth include password-auth account include password-auth
For Gentoo Linux, use
system-loginrather thanpassword-auth. For macOS, useloginrather thanpassword-auth.The PAM file format might differ on some systems. For example, on Ubuntu and other Debian-based systems, use these file contents instead:
@include common-auth @include common-account @include common-session-noninteractive
Create a default proxy user (
''@'') that maps the external PAM users to the proxied accounts. It maps external users from therootPAM group to thedeveloperMySQL account and the external users from theusersPAM group to thedata_entryMySQL account:CREATE USER ''@'' IDENTIFIED WITH authentication_pam AS 'mysql, root=developer, users=data_entry';
The mapping list following the service name is required when you set up proxy users. Otherwise, the plugin cannot tell how to map the name of PAM groups to the proper proxied user name.
NoteIf your MySQL installation has anonymous users, they might conflict with the default proxy user. For more information about this problem, and ways of dealing with it, see Default Proxy User and Anonymous User Conflicts.
Create the proxied accounts that will be used to access the databases:
CREATE USER 'developer'@'localhost' IDENTIFIED BY '
very secret password'; GRANT ALL PRIVILEGES ON mydevdb.* TO 'developer'@'localhost'; CREATE USER 'data_entry'@'localhost' IDENTIFIED BY 'very secret password'; GRANT ALL PRIVILEGES ON mydb.* TO 'data_entry'@'localhost';If you do not let anyone know the passwords for these accounts, other users cannot use them to connect directly to the MySQL server. Instead, it is expected that users will authenticate using PAM and that they will use the
developerordata_entryaccount by proxy based on their PAM group.Grant the
PROXYprivilege to the proxy account for the proxied accounts:GRANT PROXY ON 'developer'@'localhost' TO ''@''; GRANT PROXY ON 'data_entry'@'localhost' TO ''@'';
Connect to the MySQL server using the mysql command-line client. For example:
mysql --user=antonio --password --enable-cleartext-plugin mydb Enter password:
verysecretThe server authenticates the connection using the
''@''account. The privilegesantoniowill have depends on what PAM groups he is a member of. Ifantoniois a member of therootPAM group, the PAM plugin mapsrootto thedeveloperMySQL user name and returns that name to the server. The server verifies that''@''has thePROXYprivilege fordeveloperand permits the connection. the following query should return output as shown:mysql>
SELECT USER(), CURRENT_USER(), @@proxy_user;+-------------------+---------------------+--------------+ | USER() | CURRENT_USER() | @@proxy_user | +-------------------+---------------------+--------------+ | antonio@localhost | developer@localhost | ''@'' | +-------------------+---------------------+--------------+This demonstrates that
antoniouses the privileges granted to thedeveloperMySQL account, and that proxying occurred through the default proxy user account.If
antoniois not a member of therootPAM group but is a member of theusersgroup, a similar process occurs, but the plugin mapsusergroup membership to thedata_entryMySQL user name and returns that name to the server. In this case,antoniouses the privileges of thedata_entryMySQL account:mysql>
SELECT USER(), CURRENT_USER(), @@proxy_user;+-------------------+----------------------+--------------+ | USER() | CURRENT_USER() | @@proxy_user | +-------------------+----------------------+--------------+ | antonio@localhost | data_entry@localhost | ''@'' | +-------------------+----------------------+--------------+
The client-side mysql_clear_password
plugin with which the server-side PAM plugin communicates
sends the password to the MySQL server in clear text so it
can be passed to PAM. This is necessary to use the
server-side PAM library, but may be a security problem in
some configurations. These measures minimize the risk:
To make inadvertent use of the
mysql_clear_passwordplugin less likely, MySQL clients must explicitly enable it; for example, with the--enable-cleartext-pluginoption.To avoid password exposure with the
mysql_clear_passwordplugin enabled, MySQL clients should connect to the MySQL server using a secure connection.
For additinal information, see Section 6.5.1.5, “Client-Side Cleartext Pluggable Authentication”, and Section 6.4.1, “Configuring MySQL to Use Encrypted Connections”.
The PAM authentication plugin checks at initialization time
whether the AUTHENTICATION_PAM_LOG
environment value is set (the value does not matter). If so,
the plugin enables logging of diagnostic messages to the
standard output. These messages may be helpful for debugging
PAM-related problems that occur when the plugin performs
authentication.
Some messages include reference to PAM plugin source files and line numbers, which enables plugin actions to be tied more closely to the location in the code where they occur.
Windows pluggable authentication is an extension included in MySQL Enterprise Edition, a commercial product. To learn more about commercial products, see http://www.mysql.com/products/.
MySQL Enterprise Edition for Windows supports an authentication method that performs external authentication on Windows, enabling MySQL Server to use native Windows services to authenticate client connections. Users who have logged in to Windows can connect from MySQL client programs to the server based on the information in their environment without specifying an additional password.
The client and server exchange data packets in the authentication handshake. As a result of this exchange, the server creates a security context object that represents the identity of the client in the Windows OS. This identity includes the name of the client account. Windows pluggable authentication uses the identity of the client to check whether it is a given account or a member of a group. By default, negotiation uses Kerberos to authenticate, then NTLM if Kerberos is unavailable.
Windows pluggable authentication provides these capabilities:
External authentication: Windows authentication enables MySQL Server to accept connections from users defined outside the MySQL grant tables who have logged in to Windows.
Proxy user support: Windows authentication can return to MySQL a user name different from the client user. This means that the plugin can return the MySQL user that defines the privileges the external Windows-authenticated user should have. For example, a user named
joecan connect and have the privileges of the user nameddeveloper.
The following table shows the plugin and library file names. The
file must be located in the directory named by the
plugin_dir system variable.
Table 6.14 Plugin and Library Names for Windows Authentication
| Plugin or File | Plugin or File Name |
|---|---|
| Server-side plugin | authentication_windows |
| Client-side plugin | authentication_windows_client |
| Library file | authentication_windows.dll |
The library file includes only the server-side plugin. The
client-side plugin is built into the
libmysqlclient client library.
The server-side Windows authentication plugin is included only in MySQL Enterprise Edition. It is not included in MySQL community distributions. The client-side plugin is included in all distributions, including community distributions. This permits clients from any distribution to connect to a server that has the server-side plugin loaded.
The Windows authentication plugin is supported on any version of Windows supported by MySQL 5.7 (see http://www.mysql.com/support/supportedplatforms/database.html).
The following sections provide installation and usage information specific to Windows pluggable authentication:
For general information about pluggable authentication in MySQL, see Section 6.3.9, “Pluggable Authentication”. For proxy user information, see Section 6.3.10, “Proxy Users”.
This section describes how to install the Windows authentication plugin. For general information about installing plugins, see Section 5.5.1, “Installing and Uninstalling Plugins”.
To be usable by the server, the plugin library file must be
located in the MySQL plugin directory (the directory named by
the plugin_dir system
variable). If necessary, set the value of
plugin_dir at server startup
to tell the server the plugin directory location.
To load the plugin at server startup, use the
--plugin-load-add option to
name the library file that contains it. With this
plugin-loading method, the option must be given each time the
server starts. For example, put these lines in your
my.cnf file:
[mysqld] plugin-load-add=authentication_windows.dll
After modifying my.cnf, restart the
server to cause the new settings to take effect.
Alternatively, to register the plugin at runtime, use this statement:
INSTALL PLUGIN authentication_windows SONAME 'authentication_windows.dll';
INSTALL PLUGIN loads a plugin,
and also registers it in the mysql.plugins
system table to cause the plugin to be loaded for each
subsequent normal server startup.
To verify plugin installation, examine the
INFORMATION_SCHEMA.PLUGINS table
or use the SHOW PLUGINS
statement (see
Section 5.5.2, “Obtaining Server Plugin Information”). For example:
mysql>SELECT PLUGIN_NAME, PLUGIN_STATUSFROM INFORMATION_SCHEMA.PLUGINSWHERE PLUGIN_NAME LIKE '%windows%';+------------------------+---------------+ | PLUGIN_NAME | PLUGIN_STATUS | +------------------------+---------------+ | authentication_windows | ACTIVE | +------------------------+---------------+
If the plugin fails to initialize, check the server error log for diagnostic messages.
To associate MySQL accounts with the Windows authentication plugin, see Using Windows Pluggable Authentication.
The method used to uninstall the Windows authentication plugin depends on how you installed it:
If you installed the plugin at server startup using a
--plugin-load-addoption, restart the server without the option.If you installed the plugin at runtime using
INSTALL PLUGIN, it remains installed across server restarts. To uninstall it, useUNINSTALL PLUGIN:UNINSTALL PLUGIN authentication_windows;
In addition, remove any startup options that set Windows plugin-related system variables.
The Windows authentication plugin supports the use of MySQL accounts such that users who have logged in to Windows can connect to the MySQL server without having to specify an additional password. It is assumed that the server is running with the server-side plugin enabled, as described in Installing Windows Pluggable Authentication. Once the DBA has enabled the server-side plugin and set up accounts to use it, clients can connect using those accounts with no other setup required on their part.
To refer to the Windows authentication plugin in the
IDENTIFIED WITH clause of a
CREATE USER statement, use the
name authentication_windows. Suppose that
the Windows users Rafal and
Tasha should be permitted to connect to
MySQL, as well as any users in the
Administrators or Power
Users group. To set this up, create a MySQL account
named sql_admin that uses the Windows
plugin for authentication:
CREATE USER sql_admin IDENTIFIED WITH authentication_windows AS 'Rafal, Tasha, Administrators, "Power Users"';
The plugin name is authentication_windows.
The string following the AS keyword is the
authentication string. It specifies that the Windows users
named Rafal or Tasha are
permitted to authenticate to the server as the MySQL user
sql_admin, as are any Windows users in the
Administrators or Power
Users group. The latter group name contains a space,
so it must be quoted with double quote characters.
After you create the sql_admin account, a
user who has logged in to Windows can attempt to connect to
the server using that account:
C:\> mysql --user=sql_admin
No password is required here. The
authentication_windows plugin uses the
Windows security API to check which Windows user is
connecting. If that user is named Rafal or
Tasha, or is in the
Administrators or Power
Users group, the server grants access and the client
is authenticated as sql_admin and has
whatever privileges are granted to the
sql_admin account. Otherwise, the server
denies access.
Authentication string syntax for the Windows authentication plugin follows these rules:
The string consists of one or more user mappings separated by commas.
Each user mapping associates a Windows user or group name with a MySQL user name:
win_user_or_group_name=mysql_user_namewin_user_or_group_nameFor the latter syntax, with no
mysql_user_namevalue given, the implicit value is the MySQL user created by theCREATE USERstatement. Thus, these statements are equivalent:CREATE USER sql_admin IDENTIFIED WITH authentication_windows AS 'Rafal, Tasha, Administrators, "Power Users"'; CREATE USER sql_admin IDENTIFIED WITH authentication_windows AS 'Rafal=sql_admin, Tasha=sql_admin, Administrators=sql_admin, "Power Users"=sql_admin';Each backslash (
'\') in a value must be doubled because backslash is the escape character in MySQL strings.Leading and trailing spaces not inside double quotation marks are ignored.
Unquoted
win_user_or_group_nameandmysql_user_namevalues can contain anything except equal sign, comma, or space.If a
win_user_or_group_nameand ormysql_user_namevalue is quoted with double quotation marks, everything between the quotation marks is part of the value. This is necessary, for example, if the name contains space characters. All characters within double quotes are legal except double quotation mark and backslash. To include either character, escape it with a backslash.win_user_or_group_namevalues use conventional syntax for Windows principals, either local or in a domain. Examples (note the doubling of backslashes):domain\\user .\\user domain\\group .\\group BUILTIN\\WellKnownGroup
When invoked by the server to authenticate a client, the
plugin scans the authentication string left to right for a
user or group match to the Windows user. If there is a match,
the plugin returns the corresponding
mysql_user_name to the MySQL
server. If there is no match, authentication fails.
A user name match takes preference over a group name match.
Suppose that the Windows user named
win_user is a member of
win_group and the authentication string
looks like this:
'win_group = sql_user1, win_user = sql_user2'
When win_user connects to the MySQL server,
there is a match both to win_group and to
win_user. The plugin authenticates the user
as sql_user2 because the more-specific user
match takes precedence over the group match, even though the
group is listed first in the authentication string.
Windows authentication always works for connections from the same computer on which the server is running. For cross-computer connections, both computers must be registered with Windows Active Directory. If they are in the same Windows domain, it is unnecessary to specify a domain name. It is also possible to permit connections from a different domain, as in this example:
CREATE USER sql_accounting IDENTIFIED WITH authentication_windows AS 'SomeDomain\\Accounting';
Here SomeDomain is the name of the other
domain. The backslash character is doubled because it is the
MySQL escape character within strings.
MySQL supports the concept of proxy users whereby a client can connect and authenticate to the MySQL server using one account but while connected has the privileges of another account (see Section 6.3.10, “Proxy Users”). Suppose that you want Windows users to connect using a single user name but be mapped based on their Windows user and group names onto specific MySQL accounts as follows:
The
local_userandMyDomain\domain_userlocal and domain Windows users should map to thelocal_wladMySQL account.Users in the
MyDomain\Developersdomain group should map to thelocal_devMySQL account.Local machine administrators should map to the
local_adminMySQL account.
To set this up, create a proxy account for Windows users to
connect to, and configure this account so that users and
groups map to the appropriate MySQL accounts
(local_wlad, local_dev,
local_admin). In addition, grant the MySQL
accounts the privileges appropriate to the operations they
need to perform. The following instructions use
win_proxy as the proxy account, and
local_wlad, local_dev,
and local_admin as the proxied accounts.
Create the proxy MySQL account:
CREATE USER win_proxy IDENTIFIED WITH authentication_windows AS 'local_user = local_wlad, MyDomain\\domain_user = local_wlad, MyDomain\\Developers = local_dev, BUILTIN\\Administrators = local_admin';NoteIf your MySQL installation has anonymous users, they might conflict with the default proxy user. For more information about this problem, and ways of dealing with it, see Default Proxy User and Anonymous User Conflicts.
For proxying to work, the proxied accounts must exist, so create them:
CREATE USER local_wlad IDENTIFIED BY 'wlad_pass'; CREATE USER local_dev IDENTIFIED BY 'dev_pass'; CREATE USER local_admin IDENTIFIED BY 'admin_pass';
If you do not let anyone know the passwords for these accounts, other users cannot use them to connect directly to the MySQL server.
You should also issue
GRANTstatements (not shown) that grant each proxied account the privileges it needs.The proxy account must have the
PROXYprivilege for each of the proxied accounts:GRANT PROXY ON local_wlad TO win_proxy; GRANT PROXY ON local_dev TO win_proxy; GRANT PROXY ON local_admin TO win_proxy;
Now the Windows users local_user and
MyDomain\domain_user can connect to the
MySQL server as win_proxy and when
authenticated have the privileges of the account given in the
authentication string—in this case,
local_wlad. A user in the
MyDomain\Developers group who connects as
win_proxy has the privileges of the
local_dev account. A user in the
BUILTIN\Administrators group has the
privileges of the local_admin account.
To configure authentication so that all Windows users who do
not have their own MySQL account go through a proxy account,
substitute the default proxy user (''@'')
for win_proxy in the preceding
instructions. For information about the default proxy user,
see Section 6.3.10, “Proxy Users”.
To use the Windows authentication plugin with Connector/Net connection strings in Connection/Net 6.4.4 and higher, see Using the Windows Native Authentication Plugin.
Additional control over the Windows authentication plugin is
provided by the
authentication_windows_use_principal_name
and
authentication_windows_log_level
system variables. See
Section 5.1.5, “Server System Variables”.
LDAP pluggable authentication is an extension included in MySQL Enterprise Edition, a commercial product. To learn more about commercial products, see http://www.mysql.com/products/.
As of MySQL 5.7.19, MySQL Enterprise Edition supports an authentication method that enables MySQL Server to use LDAP (Lightweight Directory Access Protocol) to authenticate MySQL users by accessing directory services such as X.500. MySQL uses LDAP to fetch user, credential, and group information.
LDAP pluggable authentication provides these capabilities:
External authentication: LDAP authentication enables MySQL Server to accept connections from users defined outside the MySQL grant tables in LDAP directories.
Proxy user support: LDAP authentication can return to MySQL a user name different from the login user, based on the LDAP group of the external user. This means that an LDAP plugin can return the MySQL user that defines the privileges the external LDAP-authenticated user should have. For example, an LDAP user named
joecan connect and have the privileges of the MySQL user nameddeveloper, if the LDAP group forjoeisdeveloper.Security: Using TLS, connections to the LDAP server can be secure.
The following table shows the plugin and library file names. The
file name suffix might differ on your system. The files must be
located in the directory named by the
plugin_dir system variable.
Table 6.15 Plugin and Library Names for LDAP Authentication
| Plugin or File | Plugin or File Name |
|---|---|
| Server-side plugin names | authentication_ldap_sasl,
authentication_ldap_simple |
| Client-side plugin names | authentication_ldap_sasl_client,
mysql_clear_password |
| Library file names | authentication_ldap_sasl.so,
authentication_ldap_sasl_client.so,
authentication_ldap_simple.so |
The library files include only the
authentication_ldap_
plugins. The client-side XXXmysql_clear_password
plugin is built into the libmysqlclient
client library.
There are two server-side LDAP plugins, each of which works with a specific client-side plugin:
The server-side
authentication_ldap_simpleplugin performs simple LDAP authentication. For connections by accounts that use this plugin, client programs use the client-sidemysql_clear_passwordplugin, which sends the password to the server in clear text. No password hashing or encryption is used, so a secure connection between the MySQL client and server is recommended to prevent password exposure.The server-side
authentication_ldap_saslplugin performs SASL-based LDAP authentication. For connections by accounts that use this plugin, client programs use the client-sideauthentication_ldap_sasl_clientplugin. The client-side and server-side SASL LDAP plugins use SASL messages for secure transmission of credentials within the LDAP protocol, to avoid sending the clear-text password between the MySQL client and server.
The following sections provide installation and usage information specific to LDAP pluggable authentication:
For general information about pluggable authentication in MySQL,
see Section 6.3.9, “Pluggable Authentication”. For information
about the mysql_clear_password plugin, see
Section 6.5.1.5, “Client-Side Cleartext Pluggable Authentication”. For proxy
user information, see Section 6.3.10, “Proxy Users”.
If your system supports PAM and permits LDAP as a PAM
authentication method, another way to use LDAP for MySQL user
authentication is to use the server-side
authentication_pam plugin. See
Section 6.5.1.6, “PAM Pluggable Authentication”.
To use LDAP pluggable authentication for MySQL, these prerequisites must be satisfied:
An LDAP server must be available for the LDAP authentication plugins to communicate with.
LDAP users to be authenticated by MySQL must be present in the directory managed by the LDAP server.
An LDAP client library must be available on systems where the server-side
authentication_ldap_saslorauthentication_ldap_simpleplugin is used. Currently, supported libraries are the Windows native LDAP library, or the OpenLDAP library on non-Windows systems.To use SASL-based LDAP authentication:
The LDAP server must be configured to communicate with a SASL server.
A SASL client library must be is available on systems where the client-side
authentication_ldap_sasl_clientplugin is used. Currently, the only supported library is the Cyrus SASL library.
This section provides a general overview of how MySQL and LDAP work together to authenticate MySQL users. For examples showing how to set up MySQL accounts to use specific LDAP authentication plugins, see Using LDAP Pluggable Authentication.
The client connects to the MySQL server, providing the MySQL client user name and the LDAP password:
For simple LDAP authentication, the client-side and server-side plugins communicate the plugin in clear text.
For SASL-based LDAP authentication, the client-side and server-side plugins use SASL messages for secure transmission of credentials within the LDAP protocol, to avoid sending the clear-text password between the MySQL client and server.
If the client user name and host name match no MySQL account, the connection is rejected.
If there is a matching MySQL account, authentication against LDAP occurs. The LDAP server looks for an entry matching the user and authenticates the entry against the password:
If the MySQL account names an the LDAP user distinguished name (DN), LDAP authentication uses that value and the LDAP password provided by the client. (To associate an LDAP user DN with a MySQL account, include a
BYclause in theCREATE USERstatement that creates the account.)If the MySQL account names no LDAP user DN, LDAP authentication uses the user name and LDAP password provided by the client. In this case, the authentication plugin first binds to the LDAP server using the root DN and password as credentials to find the user DN based on the client user name, then authenticates the user DN against the LDAP password. This bind using the root credentials fails if the root DN and password are set but to incorrect values, or are empty (not set) and the LDAP server does not permit anonymous connections.
If the LDAP server finds no match or multiple matches, authentication fails and the client connection is rejected.
If the LDAP server finds a single match, LDAP authentication succeeds (assuming that the password is correct), the LDAP server returns the LDAP entry, and the authentication plugin determines the name of the authenticated user based on that entry:
If the LDAP entry has a group attribute (by default, the
cnattribute), the plugin returns its value as the authenticated user name.If the LDAP entry has no group attribute, the authentication plugin returns the client user name as the authenticated user name.
The MySQL server compares the client user name with the authenticated user name to determine whether proxying occurs for the client session:
If the names are the same, no proxying occurs: The MySQL account matching the client user name is used for privilege checking.
If the names differ, proxying occurs: MySQL looks for an account matching the authenticated user name. That account becomes the proxied user, which is used for privilege checking. The MySQL account that matched the client user name is treated as the external proxy user.
This section describes how to install the LDAP authentication plugins. For general information about installing plugins, see Section 5.5.1, “Installing and Uninstalling Plugins”.
To be usable by the server, the plugin library files must be
located in the MySQL plugin directory (the directory named by
the plugin_dir system
variable). If necessary, set the value of
plugin_dir at server startup
to tell the server the plugin directory location.
The server-side plugin library file base names are
authentication_ldap_sasl and
authentication_ldap_simple. The file name
suffix differs per platform (for example,
.so for Unix and Unix-like systems,
.dll for Windows).
To load the plugins at server startup, use
--plugin-load-add options to
name the library files that contain them. With this
plugin-loading method, the options must be given each time the
server starts. Also, specify values for any plugin-provided
system variables you wish to configure.
Each server-side LDAP plugin exposes a set of system variables that enable its operation to be configured. Setting most of these is optional, but you must set the variables that specify the LDAP server host (so the plugin knows where to connect) and base distinguished name for LDAP bind operations (to limit the scope of searches and obtain faster searches). For details about all LDAP system variables, see Section 6.5.1.12, “Pluggable Authentication System Variables”.
To load the plugins and set the LDAP server host and base
distinguished name for LDAP bind operations, put lines such as
these in your my.cnf file (adjust the
.so suffix for your platform as
necessary):
[mysqld] plugin-load-add=authentication_ldap_sasl.so authentication_ldap_sasl_server_host=127.0.0.1 authentication_ldap_sasl_bind_base_dn="dc=example,dc=com" plugin-load-add=authentication_ldap_simple.so authentication_ldap_simple_server_host=127.0.0.1 authentication_ldap_simple_bind_base_dn="dc=example,dc=com"
After modifying my.cnf, restart the
server to cause the new settings to take effect.
Alternatively, to register the plugins at runtime, use these
statements (adjust the .so suffix as
necessary):
INSTALL PLUGIN authentication_ldap_sasl SONAME 'authentication_ldap_sasl.so'; INSTALL PLUGIN authentication_ldap_simple SONAME 'authentication_ldap_simple.so';
INSTALL PLUGIN loads a plugin,
and also registers it in the mysql.plugins
system table to cause the plugin to be loaded for each
subsequent normal server startup.
After installing the plugins at runtime, their system
variables become available and you can add settings for them
to your my.cnf file to configure the
plugins for subsequent restarts. For example:
[mysqld] authentication_ldap_sasl_server_host=127.0.0.1 authentication_ldap_sasl_bind_base_dn="dc=example,dc=com" authentication_ldap_simple_server_host=127.0.0.1 authentication_ldap_simple_bind_base_dn="dc=example,dc=com"
After modifying my.cnf, restart the
server to cause the new settings to take effect.
To verify plugin installation, examine the
INFORMATION_SCHEMA.PLUGINS table
or use the SHOW PLUGINS
statement (see
Section 5.5.2, “Obtaining Server Plugin Information”). For example:
mysql>SELECT PLUGIN_NAME, PLUGIN_STATUSFROM INFORMATION_SCHEMA.PLUGINSWHERE PLUGIN_NAME LIKE '%ldap%';+----------------------------+---------------+ | PLUGIN_NAME | PLUGIN_STATUS | +----------------------------+---------------+ | authentication_ldap_sasl | ACTIVE | | authentication_ldap_simple | ACTIVE | +----------------------------+---------------+
If a plugin fails to initialize, check the server error log for diagnostic messages.
To associate MySQL accounts with an LDAP plugin, see Using LDAP Pluggable Authentication.
The method used to uninstall the LDAP authentication plugins depends on how you installed them:
If you installed the plugins at server startup using
--plugin-load-addoptions, restart the server without those options.If you installed the plugins at runtime using
INSTALL PLUGIN, they remain installed across server restarts. To uninstall them, useUNINSTALL PLUGIN:UNINSTALL PLUGIN authentication_ldap_sasl; UNINSTALL PLUGIN authentication_ldap_simple;
In addition, remove from your my.cnf file
any startup options that set LDAP plugin-related system
variables.
This section describes how to enable MySQL accounts to connect to the MySQL server using LDAP pluggable authentication. It is assumed that the server is running with the appropriate server-side plugins enabled, as described in Installing LDAP Pluggable Authentication, and that the appropriate client-side plugins are available on the client host.
This section does not describe LDAP configuration or administration. It is assumed that you are familiar with those topics.
There are two server-side LDAP plugins, each of which works with a specific client-side plugin:
The server-side
authentication_ldap_simpleplugin performs simple LDAP authentication. For connections by accounts that use this plugin, client programs use the client-sidemysql_clear_passwordplugin, which sends the password to the server in clear text. No password hashing or encryption is used, so a secure connection between the MySQL client and server is recommended to prevent password exposure.The server-side
authentication_ldap_saslplugin performs SASL-based LDAP authentication. For connections by accounts that use this plugin, client programs use the client-sideauthentication_ldap_sasl_clientplugin. The client-side and server-side SASL LDAP plugins use SASL messages for secure transmission of credentials within the LDAP protocol, to avoid sending the clear-text password between the MySQL client and server.
Overall requirements for LDAP authentication of MySQL users:
There must be an LDAP directory entry for each user to be authenticated.
There must be a MySQL user account that specifies a server-side LDAP authentication plugin and optionally names the associated LDAP user distinguished name (DN). (To associate an LDAP user DN with a MySQL account, include a
BYclause in theCREATE USERstatement that creates the account.) If an account names no LDAP string, LDAP authentication uses the user name specified by the client to find the LDAP entry.Client programs connect using the connection method appropriate for the server-side authentication plugin the MySQL account uses. For LDAP authentication, connections require the MySQL user name and LDAP password. In addition, for accounts that use the server-side
authentication_ldap_simpleplugin, invoke client programs with the--enable-cleartext-pluginoption to enable the client-sidemysql_clear_passwordplugin.
The instructions here assume the following scenario:
MySQL users
betsyandborisauthenticate to the LDAP entries forbetsy_ldapandboris_ldap, respectively. (It is not necessary that the MySQL and LDAP user names differ, but using different names here helps clarify whether an operation context is MySQL or LDAP.)LDAP entries use the
uidattribute to specify user names. (This may vary depending on LDAP server. Some LDAP servers use thecnattribute for user names rather thanuid.)These LDAP entries are available in the directory managed by the LDAP server, to provide distinguished name values that uniquely identify each user:
uid=betsy_ldap,pwd=pwd1,ou=People,dc=example,dc=com uid=boris_ldap,pwd=pwd2,ou=People,dc=example,dc=com
CREATE USERstatements that create MySQL accounts name an LDAP user in theBYclause, to indicate which LDAP entry the MySQL account authenticates against.
The instructions for setting up an account that uses LDAP authentication depend on which server-side LDAP plugin is used.
Simple LDAP Authentication
To configure a MySQL account for simple LDAP authentication,
the CREATE USER statement
should specify the
authentication_ldap_simple plugin, and
optionally name the LDAP user distinguished name (DN):
CREATE USERuserIDENTIFIED WITH authentication_ldap_simple [BY 'LDAP user DN'];
Suppose that a MySQL user betsy has this
entry in the LDAP directory:
uid=betsy_ldap,pwd=pwd1,ou=People,dc=example,dc=com
Then the statement to create the MySQL account for
betsy looks like this:
CREATE USER 'betsy'@'localhost' IDENTIFIED WITH authentication_ldap_simple BY 'uid=betsy_ldap,ou=People,dc=example,dc=com';
The authentication string specified in the
BY clause does not include the LDAP
password. That must be provided by the client user at connect
time.
Clients connect to the MySQL server by providing the MySQL
user name and LDAP password, and by enabling the client-side
mysql_clear_password plugin:
shell>mysql --user=betsy --password --enable-cleartext-pluginEnter password:pwd1(betsy_ldap LDAP password)
The client-side mysql_clear_password
plugin with which the server-side
authentication_ldap_simple plugin
communicates sends the password to the MySQL server in clear
text so it can be passed as is to the LDAP server. This is
necessary to use the server-side LDAP library without SASL,
but may be a security problem in some configurations. These
measures minimize the risk:
To make inadvertent use of the
mysql_clear_passwordplugin less likely, MySQL clients must explicitly enable it; for example, with the--enable-cleartext-pluginoption.To avoid password exposure with the
mysql_clear_passwordplugin enabled, MySQL clients should connect to the MySQL server using a secure connection.
For additional information, see Section 6.5.1.5, “Client-Side Cleartext Pluggable Authentication”, and Section 6.4.1, “Configuring MySQL to Use Encrypted Connections”.
The authentication process occurs as follows:
The client-side plugin sends
betsyandpwd1as the client user name and LDAP password to the MySQL server.The connection attempt matches the
'betsy'@'localhost'account. The server-side LDAP plugin finds that this account has an authentication string of'uid=betsy_ldap,ou=People,dc=example,dc=com'to name the LDAP user DN. The plugin sends this string and the LDAP password to the LDAP server.The LDAP server finds the LDAP entry for
betsy_ldapand the password matches, so LDAP authentication succeeds.The LDAP entry has no group attribute, so the server-side plugin returns the client user name (
betsy) as the authenticated user. This is the same user name supplied by the client, so no proxying occurs and the client session uses the'betsy'@'localhost'account for privilege checking.
Had the matching LDAP entry contained a group attribute, that
attribute value would have been the authenticated user name
and, if the value differed from betsy,
proxying would have occurred. For examples that use the group
attribute, see
LDAP Authentication with Proxying.
Had the CREATE USER statement
contained no BY clause to specify the
betsy_ldap LDAP distinguished name,
authentication attempts would use the user name provided by
the client (in this case, betsy). In the
absence of an LDAP entry for betsy,
authentication would fail.
SASL-Based LDAP Authentication
To configure a MySQL account for SASL LDAP authentication, the
CREATE USER statement should
specify the authentication_ldap_sasl
plugin, and optionally name the LDAP user distinguished name
(DN):
CREATE USERuserIDENTIFIED WITH authentication_ldap_sasl [BY 'LDAP user DN'];
Suppose that a MySQL user boris has this
entry in the LDAP directory:
uid=boris_ldap,pwd=pwd2,ou=People,dc=example,dc=com
Then the statement to create the MySQL account for
boris looks like this:
CREATE USER 'boris'@'localhost' IDENTIFIED WITH authentication_ldap_sasl BY 'uid=boris_ldap,ou=People,dc=example,dc=com';
The authentication string specified in the
BY clause does not include the LDAP
password. That must be provided by the client user at connect
time.
Clients connect to the MySQL server by providing the MySQL user name and LDAP password:
shell>mysql --user=boris --passwordEnter password:pwd2(boris_ldap LDAP password)
For the server-side
authentication_ldap_sasl plugin, clients
use the client-side
authentication_ldap_sasl_client plugin. If
a client program does not find the client-side plugin, specify
a --plugin-dir option that names the
directory where the plugin library file is installed.
The authentication process for boris is
similar to that previously described for
betsy with simple LDAP authentication,
except that The client-side and server-side SASL LDAP plugins
use SASL messages for secure transmission of credentials
within the LDAP protocol, to avoid sending the clear-text
password between the MySQL client and server.
LDAP Authentication User DN Suffixes
As of MySQL 5.7.21, LDAP authentication plugins permit the
authentication string that provides user DN information to
begin with a + character. In the absence of
this character, the authentication string value is treated as
is without modification, as it has been prior to 5.7.21. If
the authentication string begins with +,
the plugin constructs the full user DN value from the account
user name as the cn attribute value,
together with the authentication string (with the
+ removed). The authentication string is
stored as given in the mysql.user system
table, with the full user DN constructed on the fly before
authentication.
This account authentication string does not have
+ at the beginning, so it is taken as the
full user DN:
CREATE USER 'admin' IDENTIFIED WITH authentication_ldap_simple BY "cn=admin,ou=People,dc=example,dc=com";
This account authentication string does have
+ at the beginning, so it is taken as just
part of the full user DN:
CREATE USER 'accounting' IDENTIFIED WITH authentication_ldap_simple BY "+ou=People,dc=example,dc=com";
In this case, the full user DN is constructed using
accounting as the cn
attribute together with the authentication string, to yield
"cn=accounting,ou=People,dc=example,dc=com".
For account names that include a host name part, the user name is taken from the user name sent by the client. (Effectively, this is the user name part of the account name, ignoring the host name part.)
LDAP Authentication with Proxying
The authentication scheme described here uses proxying based on LDAP group attribute values to map connecting MySQL users who authenticate using LDAP onto other MySQL accounts that define different sets of privileges. Users do not connect directly through the accounts that define the privileges. Instead, they connect through a default proxy user authenticated with LDAP, such that all the external logins are mapped to the MySQL accounts that hold the privileges. Any user who connects is mapped to one of those MySQL accounts, the privileges for which determine the database operations permitted to the external user.
The instructions here assume the following scenario:
LDAP entries use the
uidandcnattributes to specify user name and group values, respectively. To use different user and group attribute names, set the appropriate system variables to configure the plugin:For
authentication_ldap_simple: Setauthentication_ldap_simple_user_search_attrandauthentication_ldap_simple_group_search_attr.For
authentication_ldap_sasl: Setauthentication_ldap_sasl_user_search_attrandauthentication_ldap_sasl_group_search_attr.
These LDAP entries are available in the directory managed by the LDAP server, to provide distinguished name values that uniquely identify each user:
uid=basha,pwd=pwd3,ou=People,dc=example,dc=com,cn=accounting uid=basil,pwd=pwd4,ou=People,dc=example,dc=com,cn=front_office
The group attribute values will become the authenticated user names, so they name the proxied accounts,
accountingandfront_office.The examples assume use of SASL LDAP authentication. Make the appropriate adjustments for simple LDAP authentication.
Create the default proxy MySQL account:
CREATE USER ''@'%' IDENTIFIED WITH authentication_ldap_sasl;
The proxy account definition has no BY
' clause to
name an LDAP user DN, so that when clients connect, the client
user name is used as the LDAP user name to search for. The
matching LDAP entry is expected to include a group attribute
naming the proxied MySQL account that defines the privileges
the client should have.
auth_string'
If your MySQL installation has anonymous users, they might conflict with the default proxy user. For more information about this problem, and ways of dealing with it, see Default Proxy User and Anonymous User Conflicts.
Create the proxied accounts and grant their privileges:
CREATE USER 'accounting'@'localhost' ACCOUNT LOCK; CREATE USER 'front_office'@'localhost' ACCOUNT LOCK; GRANT ALL PRIVILEGES ON accountingdb.* TO 'accounting'@'localhost'; GRANT ALL PRIVILEGES ON frontdb.* TO 'front_office'@'localhost';
Grant the PROXY privilege to
the proxy account for the proxied accounts:
GRANT PROXY ON 'accounting'@'localhost' TO ''@'%'; GRANT PROXY ON 'front_office'@'localhost' TO ''@'%';
Connect to the MySQL server as basha using
the mysql command-line client:
shell>mysql --user=basha --passwordEnter password:pwd3(basha LDAP password)
The server authenticates the connection using the
''@'%' account, for client user
basha. The matching LDAP entry has group
attribute cn=accounting, so
accounting becomes the authenticated user.
This differs from the client user name
basha, with the result that
basha is treated as a proxy for
accounting and basha
assumes the privileges of the accounting
account. The following query should return output as shown:
mysql> SELECT USER(), CURRENT_USER(), @@proxy_user;
+-----------------+----------------------+--------------+
| USER() | CURRENT_USER() | @@proxy_user |
+-----------------+----------------------+--------------+
| basha@localhost | accounting@localhost | ''@'%' |
+-----------------+----------------------+--------------+
This demonstrates that basha uses the
privileges granted to the accounting MySQL
account, and that proxying occurred through the default proxy
user account.
Now connect as basil instead:
shell>mysql --user=basil --passwordEnter password:pwd4(basil LDAP password)
The authentication process for basil is
similar to that previously described for
basha. In this case, the matching LDAP
entry has group attribute cn=front_office,
so front_office becomes the authenticated
user. This differs from the client user name
basil, with the result that
basil is treated as a proxy for
front_office and basil
assumes the privileges of the front_office
account. The following query should return output as shown:
mysql> SELECT USER(), CURRENT_USER(), @@proxy_user;
+-----------------+------------------------+--------------+
| USER() | CURRENT_USER() | @@proxy_user |
+-----------------+------------------------+--------------+
| basil@localhost | front_office@localhost | ''@'%' |
+-----------------+------------------------+--------------+
This demonstrates that basil uses the
privileges granted to the front_office
MySQL account, and that proxying occurred through the default
proxy user account.
The mysql_no_login server-side authentication
plugin prevents all client connections to any account that uses
it. Use cases for such a plugin include proxied accounts that
should never permit direct login but are accessed only through
proxy accounts and accounts that must be able to execute stored
programs and views with elevated privileges without exposing
those privileges to ordinary users.
The following table shows the plugin and library file names. The
file name suffix might differ on your system. The file must be
located in the directory named by the
plugin_dir system variable.
Table 6.16 Plugin and Library Names for No-Login Authentication
| Plugin or File | Plugin or File Name |
|---|---|
| Server-side plugin | mysql_no_login |
| Client-side plugin | None |
| Library file | mysql_no_login.so |
The following sections provide installation and usage information specific to no-login pluggable authentication:
For general information about pluggable authentication in MySQL, see Section 6.3.9, “Pluggable Authentication”. For proxy user information, see Section 6.3.10, “Proxy Users”.
This section describes how to install the no-login authentication plugin. For general information about installing plugins, see Section 5.5.1, “Installing and Uninstalling Plugins”.
To be usable by the server, the plugin library file must be
located in the MySQL plugin directory (the directory named by
the plugin_dir system
variable). If necessary, set the value of
plugin_dir at server startup
to tell the server the plugin directory location.
The plugin library file base name is
mysql_no_login. The file name suffix
differs per platform (for example, .so
for Unix and Unix-like systems, .dll for
Windows).
To load the plugin at server startup, use the
--plugin-load-add option to
name the library file that contains it. With this
plugin-loading method, the option must be given each time the
server starts. For example, put these lines in your
my.cnf file (adjust the
.so suffix for your platform as
necessary):
[mysqld] plugin-load-add=mysql_no_login.so
After modifying my.cnf, restart the
server to cause the new settings to take effect.
Alternatively, to register the plugin at runtime, use this
statement (adjust the .so suffix as
necessary):
INSTALL PLUGIN mysql_no_login SONAME 'mysql_no_login.so';
INSTALL PLUGIN loads a plugin,
and also registers it in the mysql.plugins
system table to cause the plugin to be loaded for each
subsequent normal server startup.
To verify plugin installation, examine the
INFORMATION_SCHEMA.PLUGINS table
or use the SHOW PLUGINS
statement (see
Section 5.5.2, “Obtaining Server Plugin Information”). For example:
mysql>SELECT PLUGIN_NAME, PLUGIN_STATUSFROM INFORMATION_SCHEMA.PLUGINSWHERE PLUGIN_NAME LIKE '%login%';+----------------+---------------+ | PLUGIN_NAME | PLUGIN_STATUS | +----------------+---------------+ | mysql_no_login | ACTIVE | +----------------+---------------+
If the plugin fails to initialize, check the server error log for diagnostic messages.
To associate MySQL accounts with the no-login plugin, see Using No-Login Pluggable Authentication.
The method used to uninstall the no-login authentication plugin depends on how you installed it:
If you installed the plugin at server startup using a
--plugin-load-addoption, restart the server without the option.If you installed the plugin at runtime using
INSTALL PLUGIN, it remains installed across server restarts. To uninstall it, useUNINSTALL PLUGIN:UNINSTALL PLUGIN mysql_no_login;
This section describes how to use the no-login authentication plugin to prevent connections from MySQL client programs to the server. It is assumed that the server is running with the server-side plugin enabled, as described in Installing No-Login Pluggable Authentication.
To refer to the no-login authentication plugin in the
IDENTIFIED WITH clause of a
CREATE USER statement, use the
name mysql_no_login.
An account that authenticates using
mysql_no_login may be used as the
DEFINER for stored program and view
objects. If such an object definition also includes
SQL SECURITY DEFINER, it executes with that
account's privileges. DBAs can use this behavior to provide
access to confidential or sensitive data that is exposed only
through well-controlled interfaces.
The following example provides a simple illustration of these
principles. It defines an account that does not permit client
connections, and associates with it a view that exposes only
certain columns of the mysql.user table:
CREATE DATABASE nologindb; CREATE USER 'nologin'@'localhost' IDENTIFIED WITH mysql_no_login; GRANT ALL ON nologindb.* TO 'nologin'@'localhost'; GRANT SELECT ON mysql.user TO 'nologin'@'localhost'; CREATE DEFINER = 'nologin'@'localhost' SQL SECURITY DEFINER VIEW nologindb.myview AS SELECT User, Host FROM mysql.user;
To provide protected access to the view to an ordinary user, do this:
GRANT SELECT ON nologindb.myview TO 'ordinaryuser'@'localhost';
Now the ordinary user can use the view to access the limited information it presents:
SELECT * FROM nologindb.myview;
Attempts by the user to access columns other than those exposed by the view result in an error, as do all attempts to select from the view by users not granted access to it.
Because the nologin account cannot be
used directly, the operations required to set up objects
that it uses must be performed by root or
similar account with the privileges required to create the
objects and set DEFINER values.
An account that authenticates using
mysql_no_login may be used as a proxied
base user for proxy accounts:
-- create proxied account CREATE USER 'proxy_base'@'localhost' IDENTIFIED WITH mysql_no_login; -- grant privileges to proxied account GRANT ... TO 'proxy_base'@'localhost'; -- permit real_user to be proxy for proxied account GRANT PROXY ON 'proxy_base'@'localhost' TO 'real_user'@'localhost';
This enables clients to access MySQL through the proxy account
(real_user) but not to bypass the proxy
mechanism by connecting directly as the proxied user
(proxy_base).
The server-side auth_socket authentication
plugin authenticates clients that connect from the local host
through the Unix socket file. The plugin uses the
SO_PEERCRED socket option to obtain
information about the user running the client program. Thus, the
plugin can be used only on systems that support the
SO_PEERCRED option, such as Linux.
The source code for this plugin can be examined as a relatively simple example demonstrating how to write a loadable authentication plugin.
The following table shows the plugin and library file names. The
file must be located in the directory named by the
plugin_dir system variable.
Table 6.17 Plugin and Library Names for Socket Peer-Credential Authentication
| Plugin or File | Plugin or File Name |
|---|---|
| Server-side plugin | auth_socket |
| Client-side plugin | None, see discussion |
| Library file | auth_socket.so |
The following sections provide installation and usage information specific to socket pluggable authentication:
For general information about pluggable authentication in MySQL, see Section 6.3.9, “Pluggable Authentication”.
This section describes how to install the socket authentication plugin. For general information about installing plugins, see Section 5.5.1, “Installing and Uninstalling Plugins”.
To be usable by the server, the plugin library file must be
located in the MySQL plugin directory (the directory named by
the plugin_dir system
variable). If necessary, set the value of
plugin_dir at server startup
to tell the server the plugin directory location.
To load the plugin at server startup, use the
--plugin-load-add option to
name the library file that contains it. With this
plugin-loading method, the option must be given each time the
server starts. For example, put these lines in your
my.cnf file:
[mysqld] plugin-load-add=auth_socket.so
After modifying my.cnf, restart the
server to cause the new settings to take effect.
Alternatively, to register the plugin at runtime, use this statement:
INSTALL PLUGIN auth_socket SONAME 'auth_socket.so';
INSTALL PLUGIN loads a plugin,
and also registers it in the mysql.plugins
system table to cause the plugin to be loaded for each
subsequent normal server startup.
To verify plugin installation, examine the
INFORMATION_SCHEMA.PLUGINS table
or use the SHOW PLUGINS
statement (see
Section 5.5.2, “Obtaining Server Plugin Information”). For example:
mysql>SELECT PLUGIN_NAME, PLUGIN_STATUSFROM INFORMATION_SCHEMA.PLUGINSWHERE PLUGIN_NAME LIKE '%socket%';+-------------+---------------+ | PLUGIN_NAME | PLUGIN_STATUS | +-------------+---------------+ | auth_socket | ACTIVE | +-------------+---------------+
If the plugin fails to initialize, check the server error log for diagnostic messages.
To associate MySQL accounts with the socket plugin, see Using Socket Pluggable Authentication.
The method used to uninstall the socket authentication plugin depends on how you installed it:
If you installed the plugin at server startup using a
--plugin-load-addoption, restart the server without the option.If you installed the plugin at runtime using
INSTALL PLUGIN, it remains installed across server restarts. To uninstall it, useUNINSTALL PLUGIN:UNINSTALL PLUGIN auth_socket;
The socket plugin checks whether the socket user name matches
the MySQL user name specified by the client program to the
server. If the names do not match, the plugin also checks
whether the socket user name matches the name specified in the
authentication_string column of the
mysql.user table row. If a match is found,
the plugin permits the connection.
Suppose that a MySQL account is created for a user named
valerie who is to be authenticated by the
auth_socket plugin for connections from the
local host through the socket file:
CREATE USER 'valerie'@'localhost' IDENTIFIED WITH auth_socket;
If a user on the local host with a login name of
stefanie invokes mysql
with the option --user=valerie to connect
through the socket file, the server uses
auth_socket to authenticate the client. The
plugin determines that the --user option
value (valerie) differs from the client
user's name (stephanie) and refuses the
connection. If a user named valerie tries
the same thing, the plugin finds that the user name and the
MySQL user name are both valerie and
permits the connection. However, the plugin refuses the
connection even for valerie if the
connection is made using a different protocol, such as TCP/IP.
MySQL includes a test plugin that checks account credentials and logs success or failure to the server error log. This is a loadable plugin (not built in) and must be installed prior to use.
The test plugin source code is separate from the server source, unlike the built-in native plugin, so it can be examined as a relatively simple example demonstrating how to write a loadable authentication plugin.
This plugin is intended for testing and development purposes, and is not for use in production environments or on servers that are exposed to public networks.
The following table shows the plugin and library file names. The
file name suffix might differ on your system. The file must be
located in the directory named by the
plugin_dir system variable.
Table 6.18 Plugin and Library Names for Test Authentication
| Plugin or File | Plugin or File Name |
|---|---|
| Server-side plugin | test_plugin_server |
| Client-side plugin | auth_test_plugin |
| Library file | auth_test_plugin.so |
The following sections provide installation and usage information specific to test pluggable authentication:
For general information about pluggable authentication in MySQL, see Section 6.3.9, “Pluggable Authentication”.
This section describes how to install the test authentication plugin. For general information about installing plugins, see Section 5.5.1, “Installing and Uninstalling Plugins”.
To be usable by the server, the plugin library file must be
located in the MySQL plugin directory (the directory named by
the plugin_dir system
variable). If necessary, set the value of
plugin_dir at server startup
to tell the server the plugin directory location.
To load the plugin at server startup, use the
--plugin-load-add option to
name the library file that contains it. With this
plugin-loading method, the option must be given each time the
server starts. For example, put these lines in your
my.cnf file (adjust the
.so suffix for your platform as
necessary):
[mysqld] plugin-load-add=auth_test_plugin.so
After modifying my.cnf, restart the
server to cause the new settings to take effect.
Alternatively, to register the plugin at runtime, use this
statement (adjust the .so suffix as
necessary):
INSTALL PLUGIN test_plugin_server SONAME 'auth_test_plugin.so';
INSTALL PLUGIN loads a plugin,
and also registers it in the mysql.plugins
system table to cause the plugin to be loaded for each
subsequent normal server startup.
To verify plugin installation, examine the
INFORMATION_SCHEMA.PLUGINS table
or use the SHOW PLUGINS
statement (see
Section 5.5.2, “Obtaining Server Plugin Information”). For example:
mysql>SELECT PLUGIN_NAME, PLUGIN_STATUSFROM INFORMATION_SCHEMA.PLUGINSWHERE PLUGIN_NAME LIKE '%test_plugin%';+--------------------+---------------+ | PLUGIN_NAME | PLUGIN_STATUS | +--------------------+---------------+ | test_plugin_server | ACTIVE | +--------------------+---------------+
If the plugin fails to initialize, check the server error log for diagnostic messages.
To associate MySQL accounts with the test plugin, see Using Test Pluggable Authentication.
The method used to uninstall the test authentication plugin depends on how you installed it:
If you installed the plugin at server startup using a
--plugin-load-addoption, restart the server without the option.If you installed the plugin at runtime using
INSTALL PLUGIN, it remains installed across server restarts. To uninstall it, useUNINSTALL PLUGIN:UNINSTALL PLUGIN test_plugin_server;
To use the test authentication plugin, create an account and
name that plugin in the IDENTIFIED WITH
clause:
CREATE USER 'testuser'@'localhost' IDENTIFIED WITH test_plugin_server BY 'testpassword';
Then provide the --user and
--password options for that
account when you connect to the server. For example:
shell>mysql --user=testuser --passwordEnter password:testpassword
The plugin fetches the password as received from the client
and compares it with the value stored in the
authentication_string column of the account
row in the mysql.user table. If the two
values match, the plugin returns the
authentication_string value as the new
effective user ID.
You can look in the server error log for a message indicating whether authentication succeeded (notice that the password is reported as the “user”):
[Note] Plugin test_plugin_server reported: 'successfully authenticated user testpassword'
These variables are unavailable unless the appropriate server-side plugin is installed:
authentication_ldap_saslfor system variables with names of the formauthentication_ldap_sasl_xxxauthentication_ldap_simplefor system variables with names of the formauthentication_ldap_simple_xxx
Table 6.19 Authentication Plugin System Variable Summary
authentication_ldap_sasl_auth_method_nameProperty Value Command-Line Format --authentication-ldap-sasl-auth-method-name=valueIntroduced 5.7.19 System Variable authentication_ldap_sasl_auth_method_nameScope Global Dynamic Yes Type string Default SCRAM-SHA-1For SASL LDAP authentication, the authentication method name. Communication between the authentication plugin and the LDAP server occurs according to this authentication method. These authentication method values are permitted:
SCRAM-SHA-1: Authentication uses a SASL challenge-response mechanism to ensure password security.The client-side
authentication_ldap_sasl_clientplugin communicates with the SASL server, using the password to create a challenge and obtain a SASL request buffer, then passes this buffer to the server-sideauthentication_ldap_saslplugin. The client-side and server-side SASL LDAP plugins use SASL messages for secure transmission of credentials within the LDAP protocol, to avoid sending the clear-text password between the MySQL client and server.
authentication_ldap_sasl_bind_base_dnProperty Value Command-Line Format --authentication-ldap-sasl-bind-base-dn=valueIntroduced 5.7.19 System Variable authentication_ldap_sasl_bind_base_dnScope Global Dynamic Yes Type string Default NULLFor SASL LDAP authentication, the base distinguished name (DN). This variable can be used to limit the scope of searches by anchoring them at a certain location (the “base”) within the search tree.
Suppose that members of one set of LDAP user entries each have this form:
uid=
user_name,pwd=user_password,ou=People,dc=example,dc=comAnd that members of another set of LDAP user entries each have this form:
uid=
user_name,pwd=user_password,ou=Admin,dc=example,dc=comThen searches work like this for different base DN values:
If the base DN is
ou=People,dc=example,dc=com: Searches find user entries only in the first set.If the base DN is
ou=Admin,dc=example,dc=com: Searches find user entries only in the second set.If the base DN is
ou=dc=example,dc=com: Searches find user entries in the first or second set.
In general, more specific base DN values result in faster searches because they limit the search scope more.
authentication_ldap_sasl_bind_root_dnProperty Value Command-Line Format --authentication-ldap-sasl-bind-root-dn=valueIntroduced 5.7.19 System Variable authentication_ldap_sasl_bind_root_dnScope Global Dynamic Yes Type string Default NULLFor SASL LDAP authentication, the root distinguished name (DN). This variable is used in conjunction with
authentication_ldap_sasl_bind_root_pwdas the credentials for authenticating to the LDAP server for the purpose of performing searches. Authentication uses either one or two LDAP bind operations, depending on whether the the MySQL account names an LDAP user DN:If the account does not name a user DN:
authentication_ldap_saslperforms an initial LDAP binding usingauthentication_ldap_sasl_bind_root_dnandauthentication_ldap_sasl_bind_root_pwd. (These are both empty by default, so if they are not set, the LDAP server must permit anonymous connections.) The resulting bind LDAP handle is used to search for the user DN, based on the client user name.authentication_ldap_saslperforms a second bind using the user DN and client-supplied password.If the account does name a user DN: The first bind operation is unnecessary in this case.
authentication_ldap_saslperforms a single bind using the user DN and client-supplied password. This is faster than if the MySQL account does not specify an LDAP user DN.
authentication_ldap_sasl_bind_root_pwdProperty Value Command-Line Format --authentication-ldap-sasl-bind-root-pwd=valueIntroduced 5.7.19 System Variable authentication_ldap_sasl_bind_root_pwdScope Global Dynamic Yes Type string Default NULLFor SASL LDAP authentication, the password for the root distinguished name. This variable is used in conjunction with
authentication_ldap_sasl_bind_root_dn. See the description of that variable.authentication_ldap_sasl_ca_pathProperty Value Command-Line Format --authentication-ldap-sasl-ca-path=valueIntroduced 5.7.19 System Variable authentication_ldap_sasl_ca_pathScope Global Dynamic Yes Type string Default NULLFor SASL LDAP authentication, the absolute path of the certificate authority file. Specify this file if it is desired that the authentication plugin perform verification of the LDAP server certificate.
NoteIn addition to setting the
authentication_ldap_sasl_ca_pathvariable to the file name, you must add the appropriate certificate authority certificates to the file and enable theauthentication_ldap_sasl_tlssystem variable.authentication_ldap_sasl_group_search_attrProperty Value Command-Line Format --authentication-ldap-sasl-group-search-attr=valueIntroduced 5.7.19 System Variable authentication_ldap_sasl_group_search_attrScope Global Dynamic Yes Type string Default cnFor SASL LDAP authentication, the name of the attribute that specifies group names in LDAP directory entries. If
authentication_ldap_sasl_group_search_attrhas its default value ofcn, searches return thecnvalue as the group name. For example, if an LDAP entry with auidvalue ofuser1has acnattribute ofmygroup, searches foruser1returnmygroupas the group name.This variable should be the empty string if you want no group or proxy authentication.
As of MySQL 5.7.21, if the group search attribute is
isMemberOf, LDAP authentication directly retrieves the user attributeisMemberOfvalue and assign it as group information. If the group search attribute is notisMemberOf, LDAP authentication searches for all groups where the user is a member. (The latter is the default behavior.) This behavior is based on how LDAP group information can be stored two ways: 1) A group entry can have an attribute namedmemberUidormemberwith a value that is a user name; 2) A user entry can have an attribute namedisMemberOfwith values that are group names.authentication_ldap_sasl_group_search_filterProperty Value Command-Line Format --authentication-ldap-sasl-group-search-filter=valueIntroduced 5.7.21 System Variable authentication_ldap_sasl_group_search_filterScope Global Dynamic Yes Type string Default (|(&(objectClass=posixGroup)(memberUid=%s))(&(objectClass=group)(member=%s)))For SASL LDAP authentication, the custom group search filter.
As of MySQL 5.7.22, the search filter uses
{UA}and{UD}notation to represent the user name and the full user DN. For example,{UA}is replaced with a user name such as"admin", whereas{UD}is replaced with a use full DN such as"uid=admin,ou=People,dc=example,dc=com". The default filter uses&(objectClass=posixGroup)(memberUid={UA})for OpenLDAP and&(objectClass=group)(member={UD})for Active Directory.In MySQL 5.7.21, the search filter used
%snotation, expanding it to the user name for OpenLDAP (&(objectClass=posixGroup)(memberUid=%s)) and to the full user DN for Active Directory (&(objectClass=group)(member=%s)).authentication_ldap_sasl_init_pool_sizeProperty Value Command-Line Format --authentication-ldap-sasl-init-pool-size=valueIntroduced 5.7.19 System Variable authentication_ldap_sasl_init_pool_sizeScope Global Dynamic Yes Type integer Default 10Minimum 0Maximum 32767For SASL LDAP authentication, the initial size of the pool of connections to the LDAP server. Choose the value for this variable based on the average number of concurrent authentication requests to the LDAP server.
The plugin uses
authentication_ldap_sasl_init_pool_sizeandauthentication_ldap_sasl_max_pool_sizetogether for connection-pool management:When the authentication plugin initializes, it creates
authentication_ldap_sasl_init_pool_sizeconnections, unlessauthentication_ldap_sasl_max_pool_size=0to disable pooling.If the plugin receives an anthentication request when there are no free connections in the current connection pool, the plugin can create a new connection, up to the maximum connection pool size given by
authentication_ldap_sasl_max_pool_size.If the plugin receives a request when the pool size is already at its maximum and there are no free connections, authentication fails.
When the plugin unloads, it closes all pooled connections.
Changes to plugin system variable settings may have no effect on connections already in the pool. For example, modifying the LDAP server host, port, or TLS settings does not affect existing connections. However, if the original variable values were invalid and the connection pool could not be initialized, the plugin attempts to reinitialize the pool for the next LDAP request. In this case, the new system variable values are used for the reinitialization attempt.
If
authentication_ldap_sasl_max_pool_size=0to disable pooling, each LDAP connection opened by the plugin uses the values the system variables have at that time.authentication_ldap_sasl_log_statusProperty Value Command-Line Format --authentication-ldap-sasl-log-status=valueIntroduced 5.7.19 System Variable authentication_ldap_sasl_log_statusScope Global Dynamic Yes Type integer Default 1Minimum 1Maximum 5For SASL LDAP authentication, the logging level. The following table shows the permitted level values and their meanings.
Table 6.20 Log Levels for authentication_ldap_sasl_log_status
Option Value Types of Messages Logged 1No messages 2Error messages 3Error and warning messages 4Error, warning, and information messages 5All messages On the client side, messages can be logged to the standard output by setting the
AUTHENTICATION_LDAP_CLIENT_LOGenvironment variable. The permitted and default values are the same as forauthentication_ldap_sasl_log_status.The
AUTHENTICATION_LDAP_CLIENT_LOGenvironment variable applies only to SASL LDAP authentication. It has no effect for simple LDAP authentication because the client plugin in that case ismysql_clear_password, which knows nothing about LDAP operations.authentication_ldap_sasl_max_pool_sizeProperty Value Command-Line Format --authentication-ldap-sasl-max-pool-size=valueIntroduced 5.7.19 System Variable authentication_ldap_sasl_max_pool_sizeScope Global Dynamic Yes Type integer Default 1000Minimum 0Maximum 32767For SASL LDAP authentication, the maximum size of the pool of connections to the LDAP server. To disable connection pooling, set this variable to 0.
This variable is used in conjunction with
authentication_ldap_sasl_init_pool_size. See the description of that variable.authentication_ldap_sasl_server_hostProperty Value Command-Line Format --authentication-ldap-sasl-server-host=valueIntroduced 5.7.19 System Variable authentication_ldap_sasl_server_hostScope Global Dynamic Yes Type string For SASL LDAP authentication, the LDAP server host. The permitted values for this variable depend on the authentication method:
For
authentication_ldap_sasl_auth_method_name=SCRAM-SHA-1: The LDAP server host can be a host name or IP address.
authentication_ldap_sasl_server_portProperty Value Command-Line Format --authentication-ldap-sasl-server-port=valueIntroduced 5.7.19 System Variable authentication_ldap_sasl_server_portScope Global Dynamic Yes Type integer Default 389Minimum 1Maximum 32376For SASL LDAP authentication, the LDAP server TCP/IP port number.
-
Property Value Command-Line Format --authentication-ldap-sasl-tls=valueIntroduced 5.7.19 System Variable authentication_ldap_sasl_tlsScope Global Dynamic Yes Type boolean Default OFFFor SASL LDAP authentication, whether connections by the plugin to the LDAP server are secure. If this variable is enabled, the plugin uses TLS to connect securely to the LDAP server. If you enable this variable, you may also wish to set the
authentication_ldap_sasl_ca_pathvariable.MySQL LDAP plugins support the StartTLS method, which initializes TLS on top of a plain LDAP connection. The
ldapsmethod is deprecated and MySQL does not support it. authentication_ldap_sasl_user_search_attrProperty Value Command-Line Format --authentication-ldap-sasl-user-search-attr=valueIntroduced 5.7.19 System Variable authentication_ldap_sasl_user_search_attrScope Global Dynamic Yes Type string Default uidFor SASL LDAP authentication, the name of the attribute that specifies user names in LDAP directory entries. If a user distinguished name is not provided, the authentication plugin searches for the name using this attribute. For example, if the
authentication_ldap_sasl_user_search_attrvalue isuid, a search for the user nameuser1finds entries with auidvalue ofuser1.authentication_ldap_simple_auth_method_nameProperty Value Command-Line Format --authentication-ldap-simple-auth-method-name=valueIntroduced 5.7.19 System Variable authentication_ldap_simple_auth_method_nameScope Global Dynamic Yes Type string Default SIMPLEFor simple LDAP authentication, the authentication method name. Communication between the authentication plugin and the LDAP server occurs according to this authentication method. These authentication method values are permitted:
SIMPLE: This authentication method uses either one or two LDAP bind operations, depending on whether the the MySQL account names an LDAP user distinguished name. See the description ofauthentication_ldap_simple_bind_root_dn.AD-FOREST:authentication_ldap_simplesearches all the domains in the Active Directory forest, performing an LDAP bind to each Active Directory domain until the user is found in some domain.
NoteFor simple LDAP authentication, it is recommended to also set TLS parameters to require that communication with the LDAP server take place over secure connections.
authentication_ldap_simple_bind_base_dnProperty Value Command-Line Format --authentication-ldap-simple-bind-base-dn=valueIntroduced 5.7.19 System Variable authentication_ldap_simple_bind_base_dnScope Global Dynamic Yes Type string Default NULLFor simple LDAP authentication, the base distinguished name (DN). This variable can be used to limit the scope of searches by anchoring them at a certain location (the “base”) within the search tree.
Suppose that members of one set of LDAP user entries each have this form:
uid=
user_name,pwd=user_password,ou=People,dc=example,dc=comAnd that members of another set of LDAP user entries each have this form:
uid=
user_name,pwd=user_password,ou=Admin,dc=example,dc=comThen searches work like this for different base DN values:
If the base DN is
ou=People,dc=example,dc=com: Searches find user entries only in the first set.If the base DN is
ou=Admin,dc=example,dc=com: Searches find user entries only in the second set.If the base DN is
ou=dc=example,dc=com: Searches find user entries in the first or second set.
In general, more specific base DN values result in faster searches because they limit the search scope more.
authentication_ldap_simple_bind_root_dnProperty Value Command-Line Format --authentication-ldap-simple-bind-root-dn=valueIntroduced 5.7.19 System Variable authentication_ldap_simple_bind_root_dnScope Global Dynamic Yes Type string Default NULLFor simple LDAP authentication, the root distinguished name (DN). This variable is used in conjunction with
authentication_ldap_simple_bind_root_pwdas the credentials for authenticating to the LDAP server for the purpose of performing searches. Authentication uses either one or two LDAP bind operations, depending on whether the the MySQL account names an LDAP user DN:If the account does not name a user DN:
authentication_ldap_simpleperforms an initial LDAP binding usingauthentication_ldap_simple_bind_root_dnandauthentication_ldap_simple_bind_root_pwd. (These are both empty by default, so if they are not set, the LDAP server must permit anonymous connections.) The resulting bind LDAP handle is used to search for the user DN, based on the client user name.authentication_ldap_simpleperforms a second bind using the user DN and client-supplied password.If the account does name a user DN: The first bind operation is unnecessary in this case.
authentication_ldap_simpleperforms a single bind using the user DN and client-supplied password. This is faster than if the MySQL account does not specify an LDAP user DN.
authentication_ldap_simple_bind_root_pwdProperty Value Command-Line Format --authentication-ldap-simple-bind-root-pwd=valueIntroduced 5.7.19 System Variable authentication_ldap_simple_bind_root_pwdScope Global Dynamic Yes Type string Default NULLFor simple LDAP authentication, the password for the root distinguished name. This variable is used in conjunction with
authentication_ldap_simple_bind_root_dn. See the description of that variable.authentication_ldap_simple_ca_pathProperty Value Command-Line Format --authentication-ldap-simple-ca-path=valueIntroduced 5.7.19 System Variable authentication_ldap_simple_ca_pathScope Global Dynamic Yes Type string Default NULLFor simple LDAP authentication, the absolute path of the certificate authority file. Specify this file if it is desired that the authentication plugin perform verification of the LDAP server certificate.
NoteIn addition to setting the
authentication_ldap_simple_ca_pathvariable to the file name, you must add the appropriate certificate authority certificates to the file and enable theauthentication_ldap_simple_tlssystem variable.authentication_ldap_simple_group_search_attrProperty Value Command-Line Format --authentication-ldap-simple-group-search-attr=valueIntroduced 5.7.19 System Variable authentication_ldap_simple_group_search_attrScope Global Dynamic Yes Type string Default cnFor simple LDAP authentication, the name of the attribute that specifies group names in LDAP directory entries. If
authentication_ldap_simple_group_search_attrhas its default value ofcn, searches return thecnvalue as the group name. For example, if an LDAP entry with auidvalue ofuser1has acnattribute ofmygroup, searches foruser1returnmygroupas the group name.As of MySQL 5.7.21, if the group search attribute is
isMemberOf, LDAP authentication directly retrieves the user attributeisMemberOfvalue and assign it as group information. If the group search attribute is notisMemberOf, LDAP authentication searches for all groups where the user is a member. (The latter is the default behavior.) This behavior is based on how LDAP group information can be stored two ways: 1) A group entry can have an attribute namedmemberUidormemberwith a value that is a user name; 2) A user entry can have an attribute namedisMemberOfwith values that are group names.authentication_ldap_simple_group_search_filterProperty Value Command-Line Format --authentication-ldap-simple-group-search-filter=valueIntroduced 5.7.21 System Variable authentication_ldap_simple_group_search_filterScope Global Dynamic Yes Type string Default (|(&(objectClass=posixGroup)(memberUid=%s))(&(objectClass=group)(member=%s)))For simple LDAP authentication, the custom group search filter.
As of MySQL 5.7.22, the search filter uses
{UA}and{UD}notation to represent the user name and the full user DN. For example,{UA}is replaced with a user name such as"admin", whereas{UD}is replaced with a use full DN such as"uid=admin,ou=People,dc=example,dc=com". The default filter uses&(objectClass=posixGroup)(memberUid={UA})for OpenLDAP and&(objectClass=group)(member={UD})for Active Directory.In MySQL 5.7.21, the search filter used
%snotation, expanding it to the user name for OpenLDAP (&(objectClass=posixGroup)(memberUid=%s)) and to the full user DN for Active Directory (&(objectClass=group)(member=%s)).authentication_ldap_simple_init_pool_sizeProperty Value Command-Line Format --authentication-ldap-simple-init-pool-size=valueIntroduced 5.7.19 System Variable authentication_ldap_simple_init_pool_sizeScope Global Dynamic Yes Type integer Default 10Minimum 0Maximum 32767For simple LDAP authentication, the initial size of the pool of connections to the LDAP server. Choose the value for this variable based on the average number of concurrent authentication requests to the LDAP server.
The plugin uses
authentication_ldap_simple_init_pool_sizeandauthentication_ldap_simple_max_pool_sizetogether for connection-pool management:When the authentication plugin initializes, it creates
authentication_ldap_simple_init_pool_sizeconnections, unlessauthentication_ldap_simple_max_pool_size=0to disable pooling.If the plugin receives an anthentication request when there are no free connections in the current connection pool, the plugin can create a new connection, up to the maximum connection pool size given by
authentication_ldap_simple_max_pool_size.If the plugin receives a request when the pool size is already at its maximum and there are no free connections, authentication fails.
When the plugin unloads, it closes all pooled connections.
Changes to plugin system variable settings may have no effect on connections already in the pool. For example, modifying the LDAP server host, port, or TLS settings does not affect existing connections. However, if the original variable values were invalid and the connection pool could not be initialized, the plugin attempts to reinitialize the pool for the next LDAP request. In this case, the new system variable values are used for the reinitialization attempt.
If
authentication_ldap_simple_max_pool_size=0to disable pooling, each LDAP connection opened by the plugin uses the values the system variables have at that time.authentication_ldap_simple_log_statusProperty Value Command-Line Format --authentication-ldap-simple-log-status=valueIntroduced 5.7.19 System Variable authentication_ldap_simple_log_statusScope Global Dynamic Yes Type integer Default 1Minimum 1Maximum 5For simple LDAP authentication, the logging level. The following table shows the permitted level values and their meanings.
Table 6.21 Log Levels for authentication_ldap_simple_log_status
Option Value Types of Messages Logged 1No messages 2Error messages 3Error and warning messages 4Error, warning, and information messages 5All messages authentication_ldap_simple_max_pool_sizeProperty Value Command-Line Format --authentication-ldap-simple-max-pool-size=valueIntroduced 5.7.19 System Variable authentication_ldap_simple_max_pool_sizeScope Global Dynamic Yes Type integer Default 1000Minimum 0Maximum 32767For simple LDAP authentication, the maximum size of the pool of connections to the LDAP server. To disable connection pooling, set this variable to 0.
This variable is used in conjunction with
authentication_ldap_simple_init_pool_size. See the description of that variable.authentication_ldap_simple_server_hostProperty Value Command-Line Format --authentication-ldap-simple-server-host=valueIntroduced 5.7.19 System Variable authentication_ldap_simple_server_hostScope Global Dynamic Yes Type string For simple LDAP authentication, the LDAP server host. The permitted values for this variable depend on the authentication method:
For
authentication_ldap_simple_auth_method_name=SIMPLE: The LDAP server host can be a host name or IP address.For
authentication_ldap_simple_auth_method_name=AD-FOREST. The LDAP server host can be an Active Directory domain name. For example, for an LDAP server URL ofldap://example.mem.local:389, the server name can bemem.local.An Active Directory forest setup can have multiple domains (LDAP server IPs), which can be discovered using DNS. On Unix and Unix-like systems, some additional setup may be required to configure your DNS server with SRV records that specify the LDAP servers for the Active Directory domain. Suppose that your configuration has these properties:
The name server that provides information about Active Directory domains has IP address
10.172.166.100.The LDAP servers have names
ldap1.mem.localthroughldap3.mem.localand IP addresses10.172.166.101through10.172.166.103.
You want the LDAP servers to be discoverable using SRV searches. For example, at the command line, a command like this should list the LDAP servers:
host -t SRV _ldap._tcp.mem.local
Perform the DNS configuration as follows:
Add a line to
/etc/resolv.confto specify the name server that provides information about Active Directory domains:nameserver 10.172.166.100
Configure the appropriate zone file for the name server with SRV records for the LDAP servers:
_ldap._tcp.mem.local. 86400 IN SRV 0 100 389 ldap1.mem.local. _ldap._tcp.mem.local. 86400 IN SRV 0 100 389 ldap2.mem.local. _ldap._tcp.mem.local. 86400 IN SRV 0 100 389 ldap3.mem.local.
It may also be necessary to specify the IP address for the LDAP servers in
/etc/hostsif the server host cannot be resolved. For example, add lines like this to the file:10.172.166.101 ldap1.mem.local 10.172.166.102 ldap2.mem.local 10.172.166.103 ldap3.mem.local
With the DNS configured as just described, the server-side LDAP plugin can discover the LDAP servers and will try to authenticate in all domains until authentication succeeds or there are no more servers.
Windows needs no such settings as just described. Given the LDAP server host in the
authentication_ldap_simple_server_hostvalue, the Windows LDAP library searches all domains and attempts to authenticate.
authentication_ldap_simple_server_portProperty Value Command-Line Format --authentication-ldap-simple-server-port=valueIntroduced 5.7.19 System Variable authentication_ldap_simple_server_portScope Global Dynamic Yes Type integer Default 389Minimum 1Maximum 32376For simple LDAP authentication, the LDAP server TCP/IP port number.
authentication_ldap_simple_tlsProperty Value Command-Line Format --authentication-ldap-simple-tls=valueIntroduced 5.7.19 System Variable authentication_ldap_simple_tlsScope Global Dynamic Yes Type boolean Default OFFFor simple LDAP authentication, whether connections by the plugin to the LDAP server are secure. If this variable is enabled, the plugin uses TLS to connect securely to the LDAP server. If you enable this variable, you may also wish to set the
authentication_ldap_simple_ca_pathvariable.MySQL LDAP plugins support the StartTLS method, which initializes TLS on top of a plain LDAP connection. The
ldapsmethod is deprecated and MySQL does not support it.authentication_ldap_simple_user_search_attrProperty Value Command-Line Format --authentication-ldap-simple-user-search-attr=valueIntroduced 5.7.19 System Variable authentication_ldap_simple_user_search_attrScope Global Dynamic Yes Type string Default uidFor simple LDAP authentication, the name of the attribute that specifies user names in LDAP directory entries. If a user distinguished name is not provided, the authentication plugin searches for the name using this attribute. For example, if the
authentication_ldap_simple_user_search_attrvalue isuid, a search for the user nameuser1finds entries with auidvalue ofuser1.
As of MySQL 5.7.17, MySQL Server includes a plugin library that enables administrators to introduce an increasing delay in server response to clients after a certain number of consecutive failed connection attempts. This capability provides a deterrent that slows down brute force attacks that attempt to access MySQL user accounts. The plugin library contains two plugins:
CONNECTION_CONTROLchecks incoming connections and adds a delay to server responses as necessary. This plugin also exposes system variables that enable its operation to be configured and a status variable that provides rudimentary monitoring information.The
CONNECTION_CONTROLplugin uses the audit plugin interface (see Section 28.2.4.8, “Writing Audit Plugins”). To collect information, it subscribes to theMYSQL_AUDIT_CONNECTION_CLASSMASKevent class, and processesMYSQL_AUDIT_CONNECTION_CONNECTandMYSQL_AUDIT_CONNECTION_CHANGE_USERsubevents to check whether the server should introduce a delay before responding to client connection attempts.CONNECTION_CONTROL_FAILED_LOGIN_ATTEMPTSimplements anINFORMATION_SCHEMAtable that exposes more detailed monitoring information for failed connection attempts.
The following sections provide information about
connection-control plugin installation and configuration. For
information about the
CONNECTION_CONTROL_FAILED_LOGIN_ATTEMPTS
table, see
Section 24.33.1, “The INFORMATION_SCHEMA CONNECTION_CONTROL_FAILED_LOGIN_ATTEMPTS Table”.
This section describes how to install the connection-control
plugins, CONNECTION_CONTROL and
CONNECTION_CONTROL_FAILED_LOGIN_ATTEMPTS. For
general information about installing plugins, see
Section 5.5.1, “Installing and Uninstalling Plugins”.
If you intend to use keyring user-defined functions (UDFs) in conjunction with the keyring plugin, install the UDFs following keyring installation using the instructions in Section 6.5.4.8, “General-Purpose Keyring Key-Management Functions”.
To be usable by the server, the plugin library file must be
located in the MySQL plugin directory (the directory named by
the plugin_dir system
variable). If necessary, set the value of
plugin_dir at server startup to
tell the server the plugin directory location.
The plugin library file base name is
connection_control. The file name suffix
differs per platform (for example, .so for
Unix and Unix-like systems, .dll for
Windows).
To load the plugins at server startup, use the
--plugin-load-add option to name
the library file that contains them. With this plugin-loading
method, the option must be given each time the server starts.
For example, put these lines in your my.cnf
file (adjust the .so suffix for your
platform as necessary):
[mysqld] plugin-load-add=connection_control.so
After modifying my.cnf, restart the server
to cause the new settings to take effect.
Alternatively, to register the plugins at runtime, use these
statements (adjust the .so suffix as
necessary):
INSTALL PLUGIN CONNECTION_CONTROL SONAME 'connection_control.so'; INSTALL PLUGIN CONNECTION_CONTROL_FAILED_LOGIN_ATTEMPTS SONAME 'connection_control.so';
INSTALL PLUGIN loads a plugin,
and also registers it in the mysql.plugins
system table to cause the plugin to be loaded for each
subsequent normal server startup.
To verify plugin installation, examine the
INFORMATION_SCHEMA.PLUGINS table or
use the SHOW PLUGINS statement
(see Section 5.5.2, “Obtaining Server Plugin Information”). For
example:
mysql>SELECT PLUGIN_NAME, PLUGIN_STATUSFROM INFORMATION_SCHEMA.PLUGINSWHERE PLUGIN_NAME LIKE 'connection%';+------------------------------------------+---------------+ | PLUGIN_NAME | PLUGIN_STATUS | +------------------------------------------+---------------+ | CONNECTION_CONTROL | ACTIVE | | CONNECTION_CONTROL_FAILED_LOGIN_ATTEMPTS | ACTIVE | +------------------------------------------+---------------+
If a plugin fails to initialize, check the server error log for diagnostic messages.
If the plugins have been previously registered with
INSTALL PLUGIN or are loaded with
--plugin-load-add, you can use
the --connection-control and
--connection-control-failed-login-attempts
options at server startup to control plugin activation. For
example, to load the plugins at startup and prevent them from
being removed at runtime, use these options:
[mysqld] plugin-load-add=connection_control.so connection-control=FORCE_PLUS_PERMANENT connection-control-failed-login-attempts=FORCE_PLUS_PERMANENT
If it is desired to prevent the server from running without a
given connection-control plugin, use an option value of
FORCE or
FORCE_PLUS_PERMANENT to force server startup
to fail if the plugin does not initialize successfully.
It is possible to install one plugin without the other, but
both must be installed for full connection-control capability.
In particular, installing only the
CONNECTION_CONTROL_FAILED_LOGIN_ATTEMPTS
plugin is of little use because without the
CONNECTION_CONTROL plugin to provide the
data that populates the
CONNECTION_CONTROL_FAILED_LOGIN_ATTEMPTS
table, retrievals from the table will always be empty.
To enable you to configure its operation, the
CONNECTION_CONTROL plugin exposes several
system variables:
connection_control_failed_connections_threshold: The number of consecutive failed connection attempts permitted to clients before the server adds a delay for subsequent connection attempts.connection_control_min_connection_delay: The amount of delay to add for each consecutive connection failure above the threshold.connection_control_max_connection_delay: The maximum delay to add.
To entirely disable checking for failed connection attempts,
set
connection_control_failed_connections_threshold
to zero. If
connection_control_failed_connections_threshold
is nonzero, the amount of delay is zero up through that many
consecutive failed connection attempts. Thereafter, the amount
of delay is the number of failed attempts above the threshold,
multiplied by
connection_control_min_connection_delay
milliseconds. For example, with the default
connection_control_failed_connections_threshold
and
connection_control_min_connection_delay
values of 3 and 1000, respectively, there is no delay for the
first three consecutive failed connection attempts by a
client, a delay of 1000 milliseconds for the fourth failed
attempt, 2000 milliseconds for the fifth failed attempt, and
so on, up to the maximum delay permitted by
connection_control_max_connection_delay.
You can set the CONNECTION_CONTROL system
variables at server startup or runtime. Suppose that you want
to permit four consecutive failed connection attempts before
the server starts delaying its responses, and to increase the
delay by 1500 milliseconds for each additional failure after
that. To set the relevant variables at server startup, put
these lines in your my.cnf file:
[mysqld] plugin-load-add=connection_control.so connection_control_failed_connections_threshold=4 connection_control_min_connection_delay=1500
To set the variables at runtime, use these statements:
SET GLOBAL connection_control_failed_connections_threshold = 4; SET GLOBAL connection_control_min_connection_delay = 1500;
SET
GLOBAL sets the value for the running MySQL
instance. To make the change permanent, add a line in your
my.cnf file, as shown previously.
The
connection_control_min_connection_delay
and
connection_control_max_connection_delay
system variables have fixed minimum and maximum values of 1000
and 2147483647, respectively. In addition, the permitted range
of values of each variable also depends on the current value
of the other:
connection_control_min_connection_delaycannot be set greater than the current value ofconnection_control_max_connection_delay.connection_control_max_connection_delaycannot be set less than the current value ofconnection_control_min_connection_delay.
Thus, to make the changes required for some configurations,
you might need to set the variables in a specific order.
Suppose that the current minimum and maximum delays are 1000
and 2000, and that you want to set them to 3000 and 5000. You
cannot first set
connection_control_min_connection_delay
to 3000 because that is greater than the current
connection_control_max_connection_delay
value of 2000. Instead, set
connection_control_max_connection_delay
to 5000, then set
connection_control_min_connection_delay
to 3000.
When the CONNECTION_CONTROL plugin is
installed, it checks connection attempts and tracks whether
they fail or succeed. For this purpose, a failed connection
attempt is one for which the client user and host match a
known MySQL account but the provided credentials are
incorrect, or do not match any known account.
Failed-connection counting is based on the user/host combination for each connection attempt. Determination of the applicable user name and host name takes proxying into account and occurs as follows:
If the client user proxies another user, the proxying user's information is used. For example, if
external_user@example.comproxiesproxy_user@example.com, connection counting uses the proxying user,external_user@example.com, rather than the proxied user,proxy_user@example.com. Bothexternal_user@example.comandproxy_user@example.commust have valid entries in themysql.usersystem table and a proxy relationship between them must be defined in themysql.proxies_privsystem table (see Section 6.3.10, “Proxy Users”).If the client user does not proxy another user, but does match a
mysql.userentry, counting uses theCURRENT_USER()value corresponding to that entry. For example, if a useruser1connecting from a hosthost1.example.commatches auser1@host1.example.comentry, counting usesuser1@host1.example.com. If the user matches auser1@%.example.com,user1@%.com, oruser1@%entry instead, counting usesuser1@%.example.com,user1@%.com, oruser1@%, respectively.
For the cases just described, the connection attempt matches
some mysql.user entry, and whether the
request succeeds or fails depends on whether the client
provides the correct authentication credentials. For example,
if the client presents an incorrect password, the connection
attempt fails.
If the connection attempt matches no
mysql.user entry, the attempt fails. In
this case, no CURRENT_USER()
value is available and connection-failure counting uses the
user name provided by the client and the client host as
determined by the server. For example, if a client attempts to
connect as user user2 from host
host2.example.com, the user name part is
available in the client request and the server determines the
host information. The user/host combination used for counting
is user2@host2.example.com.
The server maintains information about which client hosts
can possibly connect to the server (essentially the union of
host values for mysql.user entries). If a
client attempts to connect from any other host, the server
rejects the attempt at an early stage of connection setup:
ERROR 1130 (HY000): Host 'host_name' is not
allowed to connect to this MySQL server
Because this type of rejection occurs so early,
CONNECTION_CONTROL does not see it, and
does not count it.
To monitor failed connections, use these information sources:
The
Connection_control_delay_generatedstatus variable indicates the number of times the server added a delay to its response to a failed connection attempt. This does not count attempts that occur before reaching the threshold defined by theconnection_control_failed_connections_thresholdsystem variable.The
INFORMATION_SCHEMACONNECTION_CONTROL_FAILED_LOGIN_ATTEMPTStable provides information about the current number of consecutive failed connection attempts per client user/host combination. This counts all failed attempts, regardless of whether they were delayed.
Assigning a value to
connection_control_failed_connections_threshold
at runtime resets all accumulated failed-connection counters
to zero, which has these visible effects:
The
Connection_control_delay_generatedstatus variable is reset to zero.The
CONNECTION_CONTROL_FAILED_LOGIN_ATTEMPTStable becomes empty.
This section describes the system and status variables that the
CONNECTION_CONTROL plugin provides to enable
its operation to be configured and monitored.
If the CONNECTION_CONTROL plugin is
installed, it exposes these system variables:
connection_control_failed_connections_thresholdProperty Value Command-Line Format --connection-control-failed-connections-threshold=#Introduced 5.7.17 System Variable connection_control_failed_connections_thresholdScope Global Dynamic Yes Type integer Default 3Minimum 0Maximum 2147483647The number of consecutive failed connection attempts permitted to clients before the server adds a delay for subsequent connection attempts:
If the variable has a nonzero value
N, the server adds a delay beginning with consecutive failed attemptN+1. If a client has reached the point where connection responses are delayed, the delay also occurs for the next subsequent successful connection.Setting this variable to zero disables failed-connection counting. In this case, the server never adds delays.
For information about how
connection_control_failed_connections_thresholdinteracts with other connection-control system and status variables, see Section 6.5.2.1, “Connection-Control Plugin Installation”.connection_control_max_connection_delayProperty Value Command-Line Format --connection-control-max-connection-delay=#Introduced 5.7.17 System Variable connection_control_max_connection_delayScope Global Dynamic Yes Type integer Default 2147483647Minimum 1000Maximum 2147483647The maximum delay in milliseconds for server response to failed connection attempts, if
connection_control_failed_connections_thresholdis greater than zero.For information about how
connection_control_max_connection_delayinteracts with other connection-control system and status variables, see Section 6.5.2.1, “Connection-Control Plugin Installation”.connection_control_min_connection_delayProperty Value Command-Line Format --connection-control-min-connection-delay=#Introduced 5.7.17 System Variable connection_control_min_connection_delayScope Global Dynamic Yes Type integer Default 1000Minimum 1000Maximum 2147483647The minimum delay in milliseconds for server response to failed connection attempts, if
connection_control_failed_connections_thresholdis greater than zero. This is also the amount by which the server increases the delay for additional successive failures once it begins delaying.For information about how
connection_control_min_connection_delayinteracts with other connection-control system and status variables, see Section 6.5.2.1, “Connection-Control Plugin Installation”.
If the CONNECTION_CONTROL plugin is
installed, it exposes this status variable:
Connection_control_delay_generatedThe number of times the server added a delay to its response to a failed connection attempt. This does not count attempts that occur before reaching the threshold defined by the
connection_control_failed_connections_thresholdsystem variable.This variable provides a simple counter. For more detailed connection-control monitoring information, examine the
INFORMATION_SCHEMACONNECTION_CONTROL_FAILED_LOGIN_ATTEMPTStable; see Section 24.33.1, “The INFORMATION_SCHEMA CONNECTION_CONTROL_FAILED_LOGIN_ATTEMPTS Table”.Assigning a value to
connection_control_failed_connections_thresholdat runtime resetsConnection_control_delay_generatedto zero.This variable was added in MySQL 5.7.17.
The validate_password plugin serves to test
passwords and improve security. The plugin exposes a set of system
variables that enable you to define password policy.
The validate_password plugin implements these
capabilities:
In SQL statements that assign a password supplied as a cleartext value, the plugin checks the password against the current password policy and rejects the password if it is weak (the statement returns an
ER_NOT_VALID_PASSWORDerror). This applies to theALTER USER,CREATE USER,GRANT, andSET PASSWORDstatements, and passwords given as arguments to thePASSWORD()andOLD_PASSWORD()functions.The
VALIDATE_PASSWORD_STRENGTH()SQL function assesses the strength of potential passwords. The function takes a password argument and returns an integer from 0 (weak) to 100 (strong).
For example, validate_password checks the
cleartext password in the following statement. Under the default
password policy, which requires passwords to be at least 8
characters long, the password is weak and the statement produces
an error:
mysql> ALTER USER USER() IDENTIFIED BY 'abc';
ERROR 1819 (HY000): Your password does not satisfy the current
policy requirements
Passwords specified as hashed values are not checked because the original password value is not available for checking:
mysql>ALTER USER 'jeffrey'@'localhost'IDENTIFIED WITH mysql_native_passwordAS '*0D3CED9BEC10A777AEC23CCC353A8C08A633045E';Query OK, 0 rows affected (0.01 sec)
To configure password checking, modify the system variables having
names of the form
validate_password_;
these are the parameters that control password policy. See
Section 6.5.3.2, “Password Validation Plugin Options and Variables”.
xxx
If validate_password is not installed, the
validate_password_
system variables are not available, passwords in statements are
not checked, and the
xxxVALIDATE_PASSWORD_STRENGTH()
function always returns 0. For example, without the plugin
installed, accounts can be assigned passwords shorter than 8
characters.
Assuming that validate_password is installed,
it implements three levels of password checking:
LOW, MEDIUM, and
STRONG. The default is
MEDIUM; to change this, modify the value of
validate_password_policy. The
policies implement increasingly strict password tests. The
following descriptions refer to default parameter values, which
can be modified by changing the appropriate system variables.
LOWpolicy tests password length only. Passwords must be at least 8 characters long. To change this length, modifyvalidate_password_length.MEDIUMpolicy adds the conditions that passwords must contain at least 1 numeric character, 1 lowercase character, 1 uppercase character, and 1 special (nonalphanumeric) character. To change these values, modifyvalidate_password_number_count,validate_password_mixed_case_count, andvalidate_password_special_char_count.STRONGpolicy adds the condition that password substrings of length 4 or longer must not match words in the dictionary file, if one has been specified. To specify the dictionary file, modifyvalidate_password_dictionary_file.
In addition, as of MySQL 5.7.15,
validate_password supports the capability of
rejecting passwords that match the user name part of the effective
user account for the current session, either forward or in
reverse. To provide control over this capability,
validate_password exposes a
validate_password_check_user_name
system variable, which is enabled by default.
This section describes how to install the
validate_password password-validation plugin.
For general information about installing plugins, see
Section 5.5.1, “Installing and Uninstalling Plugins”.
If you installed MySQL 5.7 using the
MySQL Yum
repository,
MySQL SLES
Repository, or
RPM packages provided
by Oracle, validate_password is
enabled by default after you started your MySQL Server for the
first time.
To be usable by the server, the plugin library file must be
located in the MySQL plugin directory (the directory named by
the plugin_dir system
variable). If necessary, set the value of
plugin_dir at server startup to
tell the server the plugin directory location.
The plugin library file base name is
validate_password. The file name suffix
differs per platform (for example, .so for
Unix and Unix-like systems, .dll for
Windows).
To load the plugin at server startup, use the
--plugin-load-add option to name
the library file that contains it. With this plugin-loading
method, the option must be given each time the server starts.
For example, put these lines in your my.cnf
file (adjust the .so suffix for your
platform as necessary):
[mysqld] plugin-load-add=validate_password.so
After modifying my.cnf, restart the server
to cause the new settings to take effect.
Alternatively, to register the plugin at runtime, use this
statement (adjust the .so suffix as
necessary):
INSTALL PLUGIN validate_password SONAME 'validate_password.so';
INSTALL PLUGIN loads the plugin,
and also registers it in the mysql.plugins
system table to cause the plugin to be loaded for each
subsequent normal server startup.
To verify plugin installation, examine the
INFORMATION_SCHEMA.PLUGINS table or
use the SHOW PLUGINS statement
(see Section 5.5.2, “Obtaining Server Plugin Information”). For
example:
mysql>SELECT PLUGIN_NAME, PLUGIN_STATUSFROM INFORMATION_SCHEMA.PLUGINSWHERE PLUGIN_NAME LIKE 'validate%';+-------------------+---------------+ | PLUGIN_NAME | PLUGIN_STATUS | +-------------------+---------------+ | validate_password | ACTIVE | +-------------------+---------------+
If the plugin fails to initialize, check the server error log for diagnostic messages.
If the plugin has been previously registered with
INSTALL PLUGIN or is loaded with
--plugin-load-add, you can use
the --validate-password option at server
startup to control plugin activation. For example, to load the
plugin at startup and prevent it from being removed at runtime,
use these options:
[mysqld] plugin-load-add=validate_password.so validate-password=FORCE_PLUS_PERMANENT
If it is desired to prevent the server from running without the
password-validation plugin, use
--validate-password with a value
of FORCE or
FORCE_PLUS_PERMANENT to force server startup
to fail if the plugin does not initialize successfully.
This section describes the options, system variables, and status
variables that validate_password provides to
enable its operation to be configured and monitored.
To control the activation of the
validate_password plugin, use this option:
-
Property Value Command-Line Format --validate-password[=value]Type enumeration Default ONValid Values ONOFFFORCEFORCE_PLUS_PERMANENTThis option controls how the server loads the
validate_passwordplugin at startup. The value should be one of those available for plugin-loading options, as described in Section 5.5.1, “Installing and Uninstalling Plugins”. For example,--validate-password=FORCE_PLUS_PERMANENTtells the server to load the plugin at startup and prevents it from being removed while the server is running.This option is available only if the
validate_passwordplugin has been previously registered withINSTALL PLUGINor is loaded with--plugin-load-add. See Section 6.5.3.1, “Password Validation Plugin Installation”.
If the validate_password plugin is enabled,
it exposes several system variables that enable configuration
of password checking:
mysql> SHOW VARIABLES LIKE 'validate_password%';
+--------------------------------------+--------+
| Variable_name | Value |
+--------------------------------------+--------+
| validate_password_check_user_name | OFF |
| validate_password_dictionary_file | |
| validate_password_length | 8 |
| validate_password_mixed_case_count | 1 |
| validate_password_number_count | 1 |
| validate_password_policy | MEDIUM |
| validate_password_special_char_count | 1 |
+--------------------------------------+--------+
To change how passwords are checked, you can set these system variables at server startup or at runtime. The following list describes the meaning of each variable.
validate_password_check_user_nameProperty Value Command-Line Format --validate-password-check-user-nameIntroduced 5.7.15 System Variable validate_password_check_user_nameScope Global Dynamic Yes Type boolean Default OFFWhether
validate_passwordcompares passwords to the user name part of the effective user account for the current session and rejects them if they match. This variable is unavailable unlessvalidate_passwordis installed.By default,
validate_password_check_user_nameis disabled. This variable controls user name matching independent of the value ofvalidate_password_policy.When
validate_password_check_user_nameis enabled, it has these effects:Checking occurs in all contexts for which
validate_passwordis invoked, which includes use of statements such asALTER USERorSET PASSWORDto change the current user's password, and invocation of functions such asPASSWORD()andVALIDATE_PASSWORD_STRENGTH().The user names used for comparison are taken from the values of the
USER()andCURRENT_USER()functions for the current session. An implication is that a user who has sufficient privileges to set another user's password can set the password to that user's name, and cannot set that user's password to the name of the user executing the statement. For example,'root'@'localhost'can set the password for'jeffrey'@'localhost'to'jeffrey', but cannot set the password to'root.Only the user name part of the
USER()andCURRENT_USER()function values is used, not the host name part. If a user name is empty, no comparison occurs.If a password is the same as the user name or its reverse, a match occurs and the password is rejected.
User-name matching is case sensitive. The password and user name values are compared as binary strings on a byte-by-byte basis.
If a password matches the user name,
VALIDATE_PASSWORD_STRENGTH()returns 0 regardless of how othervalidate_passwordsystem variables are set.
validate_password_dictionary_fileProperty Value System Variable validate_password_dictionary_fileScope Global Dynamic (>= 5.7.8) Yes Dynamic (<= 5.7.7) No Type file name The path name of the dictionary file that
validate_passworduses for checking passwords. This variable is unavailable unlessvalidate_passwordis installed.By default, this variable has an empty value and dictionary checks are not performed. For dictionary checks to occur, the variable value must be nonempty. If the file is named as a relative path, it is interpreted relative to the server data directory. File contents should be lowercase, one word per line. Contents are treated as having a character set of
utf8. The maximum permitted file size is 1MB.For the dictionary file to be used during password checking, the password policy must be set to 2 (
STRONG); see the description of thevalidate_password_policysystem variable. Assuming that is true, each substring of the password of length 4 up to 100 is compared to the words in the dictionary file. Any match causes the password to be rejected. Comparisons are not case sensitive.For
VALIDATE_PASSWORD_STRENGTH(), the password is checked against all policies, includingSTRONG, so the strength assessment includes the dictionary check regardless of thevalidate_password_policyvalue.validate_password_dictionary_filecan be set at runtime and assigning a value causes the named file to be read without a server restart.-
Property Value System Variable validate_password_lengthScope Global Dynamic Yes Type integer Default 8Minimum 0The minimum number of characters that
validate_passwordrequires passwords to have. This variable is unavailable unlessvalidate_passwordis installed.The
validate_password_lengthminimum value is a function of several other related system variables. The value cannot be set less than the value of this expression:validate_password_number_count + validate_password_special_char_count + (2 * validate_password_mixed_case_count)
If
validate_passwordadjusts the value ofvalidate_password_lengthdue to the preceding constraint, it writes a message to the error log. validate_password_mixed_case_countProperty Value System Variable validate_password_mixed_case_countScope Global Dynamic Yes Type integer Default 1Minimum 0The minimum number of lowercase and uppercase characters that
validate_passwordrequires passwords to have if the password policy isMEDIUMor stronger. This variable is unavailable unlessvalidate_passwordis installed.For a given
validate_password_mixed_case_countvalue, the password must have that many lowercase characters, and that many uppercase characters.validate_password_number_countProperty Value System Variable validate_password_number_countScope Global Dynamic Yes Type integer Default 1Minimum 0The minimum number of numeric (digit) characters that
validate_passwordrequires passwords to have if the password policy isMEDIUMor stronger. This variable is unavailable unlessvalidate_passwordis installed.-
Property Value System Variable validate_password_policyScope Global Dynamic Yes Type enumeration Default 1Valid Values 012The password policy enforced by
validate_password. This variable is unavailable unlessvalidate_passwordis installed.validate_password_policyaffects howvalidate_passworduses its other policy-setting system variables, except for checking passwords against user names, which is controlled independently byvalidate_password_check_user_name.The
validate_password_policyvalue can be specified using numeric values 0, 1, 2, or the corresponding symbolic valuesLOW,MEDIUM,STRONG. The following table describes the tests performed for each policy. For the length test, the required length is the value of thevalidate_password_lengthsystem variable. Similarly, the required values for the other tests are given by othervalidate_password_variables.xxxPolicy Tests Performed 0orLOWLength 1orMEDIUMLength; numeric, lowercase/uppercase, and special characters 2orSTRONGLength; numeric, lowercase/uppercase, and special characters; dictionary file validate_password_special_char_countProperty Value System Variable validate_password_special_char_countScope Global Dynamic Yes Type integer Default 1Minimum 0The minimum number of nonalphanumeric characters that
validate_passwordrequires passwords to have if the password policy isMEDIUMor stronger. This variable is unavailable unlessvalidate_passwordis installed.
If the validate_password plugin is enabled,
it exposes status variables that provide operational
information:
mysql> SHOW STATUS LIKE 'validate_password%';
+-----------------------------------------------+---------------------+
| Variable_name | Value |
+-----------------------------------------------+---------------------+
| validate_password_dictionary_file_last_parsed | 2015-06-29 11:08:51 |
| validate_password_dictionary_file_words_count | 1902 |
+-----------------------------------------------+---------------------+
The following list describes the meaning of each status variable.
validate_password_dictionary_file_last_parsedWhen the dictionary file was last parsed.
validate_password_dictionary_file_words_countThe number of words read from the dictionary file.
- 6.5.4.1 Keyring Plugin Installation
- 6.5.4.2 Using the keyring_file File-Based Plugin
- 6.5.4.3 Using the keyring_encrypted_file Keyring Plugin
- 6.5.4.4 Using the keyring_okv KMIP Plugin
- 6.5.4.5 Using the keyring_aws Amazon Web Services Keyring Plugin
- 6.5.4.6 Migrating Keys Between Keyring Keystores
- 6.5.4.7 Supported Keyring Key Types
- 6.5.4.8 General-Purpose Keyring Key-Management Functions
- 6.5.4.9 Plugin-Specific Keyring Key-Management Functions
- 6.5.4.10 Keyring Command Options
- 6.5.4.11 Keyring System Variables
MySQL Server supports a keyring service that enables internal server components and plugins to securely store sensitive information for later retrieval. The implementation is plugin-based:
MySQL 5.7.11 and higher includes a keyring plugin,
keyring_file, that stores keyring data in a file local to the server host. This plugin is available in all MySQL distributions, Community Edition and Enterprise Edition included. See Section 6.5.4.2, “Using the keyring_file File-Based Plugin”.MySQL 5.7.21 and higher includes a keyring plugin,
keyring_encrypted_file, that stores keyring data in an encrypted file local to the server host. This plugin is available in MySQL Enterprise Edition distributions. See Section 6.5.4.3, “Using the keyring_encrypted_file Keyring Plugin”.MySQL 5.7.12 and higher includes
keyring_okv, a KMIP 1.1 plugin for use with KMIP-compatible back end keyring storage products such as Oracle Key Vault and Gemalto SafeNet KeySecure Appliance. This plugin is available in MySQL Enterprise Edition distributions. See Section 6.5.4.4, “Using the keyring_okv KMIP Plugin”.MySQL 5.7.19 and higher includes
keyring_aws, a plugin that communicates with the Amazon Web Services Key Management Service for key generation and uses a local file for key storage. This plugin is available in MySQL Enterprise Edition distributions. See Section 6.5.4.5, “Using the keyring_aws Amazon Web Services Keyring Plugin”.MySQL 5.7.21 and higher supports a server operational mode that enables migration of keys between underlying keyring keystores. This enables DBAs to switch a MySQL installation from one keyring plugin to another. See Section 6.5.4.6, “Migrating Keys Between Keyring Keystores”.
MySQL 5.7.13 and higher includes an SQL interface for keyring key management, implemented as a set of user-defined functions (UDFs). See Section 6.5.4.8, “General-Purpose Keyring Key-Management Functions”.
The keyring_file and
keyring_encrypted_file plugins for encryption
key management are not intended as a regulatory compliance
solution. Security standards such as PCI, FIPS, and others
require use of key management systems to secure, manage, and
protect encryption keys in key vaults or hardware security
modules (HSMs).
Uses for the keyring within MySQL include:
The
InnoDBstorage engine uses the keyring to store its key for tablespace encryption.InnoDBcan use any supported keyring plugin.MySQL Enterprise Audit uses the keyring to store the audit log file encryption password. The audit log plugin can use any supported keyring plugin.
For general keyring installation instructions, see Section 6.5.4.1, “Keyring Plugin Installation”. For information specific to a given keyring plugin, see the section describing that plugin.
For information about using the keyring UDFs, see Section 6.5.4.8, “General-Purpose Keyring Key-Management Functions”.
Keyring plugins and UDFs access a keyring service that provides the interface for server components to the keyring. For information about accessing the keyring plugin service and writing keyring plugins, see Section 28.3.2, “The Keyring Service”, and Section 28.2.4.12, “Writing Keyring Plugins”.
Keyring service consumers require a keyring plugin to be installed. MySQL provides these plugin choices:
keyring_file: A plugin that stores keyring data in a file local to the server host. Available in all MySQL distributions as of MySQL 5.7.11.keyring_okv: A plugin that uses KMIP-compatible back end keyring storage products such as Oracle Key Vault and Gemalto SafeNet KeySecure Appliance. Available in MySQL Enterprise Edition distributions as of MySQL 5.7.12.keyring_aws: A plugin that communicates with the Amazon Web Services Key Management Service as a back end for key generation and uses a local file for key storage. Available in MySQL Enterprise Edition distributions as of MySQL 5.7.19.
This section describes how to install the keyring plugin of your choosing. For general information about installing plugins, see Section 5.5.1, “Installing and Uninstalling Plugins”.
To be usable by the server, the plugin library file must be
located in the MySQL plugin directory (the directory named by
the plugin_dir system
variable). If necessary, set the value of
plugin_dir at server startup to
tell the server the plugin directory location.
Installation for each keyring plugin is similar. The following
instructions use keyring_file. Users of a
different keyring plugin can substitute its name for
keyring_file.
The keyring_file plugin library file base
name is keyring_file. The file name suffix
differs per platform (for example, .so for
Unix and Unix-like systems, .dll for
Windows).
Only one keyring plugin should be enabled at a time. Enabling multiple keyring plugins is unsupported and results may not be as anticipated.
The keyring plugin must be loaded early during the server
startup sequence so that server components can access it as
necessary during their own initialization. For example, the
InnoDB storage engine uses the keyring for
tablespace encryption, so the keyring plugin must be loaded and
available prior to InnoDB initialization.
To load the plugin, use the
--early-plugin-load option to
name the plugin library file that contains it. For example, on
platforms where the plugin library file suffix is
.so, use these lines in the server
my.cnf file (adjust the
.so suffix for your platform as necessary):
[mysqld] early-plugin-load=keyring_file.so
As of MySQL 5.7.12, the default
--early-plugin-load value is
empty. To load a keyring plugin, you must use an explicit
--early-plugin-load option with a
nonempty value.
In MySQL 5.7.11, the default
--early-plugin-load value was
the name of the keyring_file plugin library
file, so that plugin was loaded by default.
InnoDB tablespace encryption requires the
keyring_file plugin to be loaded prior to
InnoDB initialization, so this change of
default --early-plugin-load
value introduces an incompatibility for upgrades from 5.7.11
to 5.7.12 or higher. Administrators who have encrypted
InnoDB tablespaces must take explicit
action to ensure continued loading of the
keyring_file plugin: Start the server with
an --early-plugin-load option
that names the plugin library file.
Before starting the server, check the notes for your chosen keyring plugin to see whether it permits or requires additional configuration:
For
keyring_file: Section 6.5.4.2, “Using the keyring_file File-Based Plugin”.For
keyring_okv: Section 6.5.4.4, “Using the keyring_okv KMIP Plugin”.For
keyring_aws: Section 6.5.4.5, “Using the keyring_aws Amazon Web Services Keyring Plugin”
After performing any plugin-specific configuration, verify
plugin installation. With the MySQL server running, examine the
INFORMATION_SCHEMA.PLUGINS table or
use the SHOW PLUGINS statement
(see Section 5.5.2, “Obtaining Server Plugin Information”). For
example:
mysql>SELECT PLUGIN_NAME, PLUGIN_STATUSFROM INFORMATION_SCHEMA.PLUGINSWHERE PLUGIN_NAME LIKE 'keyring%';+--------------+---------------+ | PLUGIN_NAME | PLUGIN_STATUS | +--------------+---------------+ | keyring_file | ACTIVE | +--------------+---------------+
If the plugin fails to initialize, check the server error log for diagnostic messages.
If no keyring plugin is available when a server component tries
to access the keyring service, the service cannot be used by
that component. As a result, the component may fail to
initialize or may initialize with limited functionality. For
example, if InnoDB finds that there are
encrypted tablespaces when it initializes, it attempts to access
the keyring. If the keyring is unavailable,
InnoDB can access only unencrypted
tablespaces. To ensure that InnoDB can access
encrypted tablespaces as well, use
--early-plugin-load to load the
keyring plugin.
Plugins can be loaded by other methods, such as the
--plugin-load or
--plugin-load-add option or the
INSTALL PLUGIN statement.
However, keyring plugins loaded using those methods may be
available too late in the server startup sequence for certain
server components, such as InnoDB:
Plugin loading using
--plugin-loador--plugin-load-addoccurs afterInnoDBinitialization.Plugins installed using
INSTALL PLUGINare registered in themysql.pluginsystem table and loaded automatically for subsequent server restarts. However, becausemysql.pluginis anInnoDBtable, any plugins named in it can be loaded during startup only afterInnoDBinitialization.
The keyring_file plugin is a keyring plugin
that stores keyring data in a file local to the server host.
The keyring_file plugin for encryption key
management is not intended as a regulatory compliance
solution. Security standards such as PCI, FIPS, and others
require use of key management systems to secure, manage, and
protect encryption keys in key vaults or hardware security
modules (HSMs).
To install the keyring_file plugin, use the
general keyring installation instructions found in
Section 6.5.4.1, “Keyring Plugin Installation”, together with the
configuration information specific to
keyring_file found here.
To be usable during the server startup process,
keyring_file must be loaded using the
--early-plugin-load option. The
keyring_file_data system
variable optionally configures the location of the file used by
the keyring_file plugin for data storage. The
default value is platform specific. To configure the file
location explicitly, set the variable value at startup. For
example, use these lines in the server
my.cnf file (adjust the
.so suffix and file location for your
platform as necessary):
[mysqld] early-plugin-load=keyring_file.so keyring_file_data=/usr/local/mysql/mysql-keyring/keyring
Keyring operations are transactional: The
keyring_file plugin uses a backup file during
write operations to ensure that it can roll back to the original
file if an operation fails. The backup file has the same name as
the value of the
keyring_file_data system
variable with a suffix of .backup.
For additional information about
keyring_file_data, see
Section 6.5.4.11, “Keyring System Variables”.
As of MySQL 5.7.17, to ensure that keys are flushed only when
the correct keyring storage file exists,
keyring_file stores a SHA-256 checksum of the
keyring in the file. Before updating the file, the plugin
verifies that it contains the expected checksum.
The keyring_file plugin supports the
functions that comprise the standard keyring service interface.
Keyring operations performed by those functions are accessible
at two levels:
SQL interface: In SQL statements, call the user-defined functions (UDFs) described in Section 6.5.4.8, “General-Purpose Keyring Key-Management Functions”.
C interface: In C-language code, call the keyring service functions described in Section 28.3.2, “The Keyring Service”.
Example (using UDFs):
SELECT keyring_key_generate('MyKey', 'AES', 32);
SELECT keyring_key_remove('MyKey');
The key types permitted by keyring_file are
described in Section 6.5.4.7, “Supported Keyring Key Types”.
The keyring_encrypted_file plugin is an
extension included in MySQL Enterprise Edition, a commercial product. To learn
more about commercial products, see
http://www.mysql.com/products/.
The keyring_encrypted_file plugin is a
keyring plugin that stores keyring data in an encrypted file
local to the server host. This plugin is available as of MySQL
5.7.21.
The keyring_encrypted_file plugin for
encryption key management is not intended as a regulatory
compliance solution. Security standards such as PCI, FIPS, and
others require use of key management systems to secure,
manage, and protect encryption keys in key vaults or hardware
security modules (HSMs).
To install the keyring_encrypted_file plugin,
use the general keyring installation instructions found in
Section 6.5.4.1, “Keyring Plugin Installation”, together with the
configuration information specific to
keyring_encrypted_file found here.
To be usable during the server startup process,
keyring_encrypted_file must be loaded using
the --early-plugin-load option.
To specify the password for encrypting the keyring data file,
set the
keyring_encrypted_file_password
system variable. (The password is mandatory; if not specified at
server startup, keyring_encrypted_file
initialization fails.) The
keyring_encrypted_file_data
system variable optionally configures the location of the file
used by the keyring_encrypted_file plugin for
data storage. The default value is platform specific. To
configure the file location explicitly, set the variable value
at startup. For example, use these lines in the server
my.cnf file (adjust the
.so suffix and file location for your
platform as necessary and substitute your chosen password):
[mysqld]
early-plugin-load=keyring_encrypted_file.so
keyring_encrypted_file_data=/usr/local/mysql/mysql-keyring/keyring-encrypted
keyring_encrypted_file_password=password
Because the my.cnf file stores a password
when written as shown, it should have a restrictive mode and be
accessible only to the account used to run the MySQL server.
Keyring operations are transactional: The
keyring_encrypted_file plugin uses a backup
file during write operations to ensure that it can roll back to
the original file if an operation fails. The backup file has the
same name as the value of the
keyring_encrypted_file_data
system variable with a suffix of .backup.
For additional information about the system variables used to
configure the keyring_encrypted_file plugin,
see Section 6.5.4.11, “Keyring System Variables”.
To ensure that keys are flushed only when the correct keyring
storage file exists, keyring_encrypted_file
stores a SHA-256 checksum of the keyring in the file. Before
updating the file, the plugin verifies that it contains the
expected checksum. In addition,
keyring_encrypted_file encrypts file contents
using AES before writing the file, and decrypts file contents
after reading the file.
The keyring_encrypted_file plugin supports
the functions that comprise the standard keyring service
interface. Keyring operations performed by those functions are
accessible at two levels:
SQL interface: In SQL statements, call the user-defined functions (UDFs) described in Section 6.5.4.8, “General-Purpose Keyring Key-Management Functions”.
C interface: In C-language code, call the keyring service functions described in Section 28.3.2, “The Keyring Service”.
Example (using UDFs):
SELECT keyring_key_generate('MyKey', 'AES', 32);
SELECT keyring_key_remove('MyKey');
The key types permitted by
keyring_encrypted_file are described in
Section 6.5.4.7, “Supported Keyring Key Types”.
The keyring_okv plugin is an extension
included in MySQL Enterprise Edition, a commercial product. To learn more about
commercial products, see http://www.mysql.com/products/.
The Key Management Interoperability Protocol (KMIP) enables
communication of cryptographic keys between a key management
server and its clients. The keyring_okv
keyring plugin uses the KMIP 1.1 protocol to communicate
securely as a client of a KMIP back end. Keyring material is
generated exclusively by the back end, not by
keyring_okv. The plugin works with these
KMIP-compatible products:
Oracle Key Vault
Gemalto SafeNet KeySecure Appliance
The keyring_okv plugin supports the functions
that comprise the standard keyring service interface. Keyring
operations performed by those functions are accessible at two
levels:
SQL interface: In SQL statements, call the user-defined functions (UDFs) described in Section 6.5.4.8, “General-Purpose Keyring Key-Management Functions”.
C interface: In C-language code, call the keyring service functions described in Section 28.3.2, “The Keyring Service”.
Example (using UDFs):
SELECT keyring_key_generate('MyKey', 'AES', 32);
SELECT keyring_key_remove('MyKey');
The key types permitted by keyring_okv are
described in Section 6.5.4.7, “Supported Keyring Key Types”.
To install the keyring_okv plugin, use the
general keyring installation instructions found in
Section 6.5.4.1, “Keyring Plugin Installation”, together with the
configuration information specific to
keyring_okv found here.
Regardless of which KMIP back end the
keyring_okv plugin uses for keyring
storage, the
keyring_okv_conf_dir system
variable configures the location of the directory used by
keyring_okv for its support files. The
default value is empty, so you must set the variable to name a
properly configured directory before the plugin can
communicate with the KMIP back end. Unless you do so,
keyring_okv writes a message to the error
log during server startup that it cannot communicate:
[Warning] Plugin keyring_okv reported: 'For keyring_okv to be initialized, please point the keyring_okv_conf_dir variable to a directory containing Oracle Key Vault configuration file and ssl materials'
The keyring_okv_conf_dir
variable must name a directory that that contains the
following items:
okvclient.ora: A file that contains details of the KMIP back end with whichkeyring_okvwill communicate.ssl: A directory that contains the certificate and key files required to establish a secure connection with the KMIP back end:CA.pem,cert.pem, andkey.pem. As of MySQL 5.7.20, if the key file is password-protected, thessldirectory can contain a single-line text file namedpassword.txtcontaining the password needed to decrypt the key file.
Both the okvclient.ora file and
ssl directory with the certificate and
key files are required for keyring_okv to
work properly. The procedure used to populate the
configuration directory with these files depends on the KMIP
back end used with keyring_okv, as
described elsewhere.
The configuration directory used by
keyring_okv as the location for its support
files should have a restrictive mode and be accessible only to
the account used to run the MySQL server. For example, on Unix
and Unix-like systems, to use the
/usr/local/mysql/mysql-keyring-okv
directory, the following commands (executed as
root) create the directory and set its mode
and ownership:
cd /usr/local/mysql mkdir mysql-keyring-okv chmod 750 mysql-keyring-okv chown mysql mysql-keyring-okv chgrp mysql mysql-keyring-okv
To be usable during the server startup process,
keyring_okv must be loaded using the
--early-plugin-load option.
Also, set the
keyring_okv_conf_dir system
variable to tell keyring_okv where to find
its configuration directory. For example, use these lines in
the server my.cnf file (adjust the
.so suffix and directory location for
your platform as necessary):
[mysqld] early-plugin-load=keyring_okv.so keyring_okv_conf_dir=/usr/local/mysql/mysql-keyring-okv
For additional information about
keyring_okv_conf_dir, see
Section 6.5.4.11, “Keyring System Variables”.
The discussion here assumes that you are familiar with Oracle Key Vault. Some pertinent information sources:
In Oracle Key Vault terminology, clients that use Oracle Key Vault to store and retrieve security objects are called endpoints. To communicate with Oracle Key Vault, it is necessary to register as an endpoint and enroll by downloading and installing endpoint support files.
The following procedure briefly summarizes the process of
setting up keyring_okv for use with Oracle
Key Vault:
Create the configuration directory for the
keyring_okvplugin to use.Register an endpoint with Oracle Key Vault to obtain an enrollment token.
Use the enrollment token to obtain the
okvclient.jarclient software download.Install the client software to populate the
keyring_okvconfiguration directory that contains the Oracle Key Vault support files.
Use the following procedure to configure
keyring_okv and Oracle Key Vault to work
together. This description only summarizes how to interact
with Oracle Key Vault. For details, visit the
Oracle
Key Vault site and consult the Oracle Key Vault
Administrator's Guide.
Create the configuration directory that will contain the Oracle Key Vault support files, and make sure that the
keyring_okv_conf_dirsystem variable is set to name that directory (for details, see General keyring_okv Configuration).Log in to the Oracle Key Vault management console as a user who has the System Administrator role.
Select the Endpoints tab to arrive at the Endpoints page. On the Endpoints page, click Add.
Provide the required endpoint information and click Register. The endpoint type should be Other. Successful registration results in an enrollment token.
Log out from the Oracle Key Vault server.
Connect again to the Oracle Key Vault server, this time without logging in. Use the endpoint enrollment token to enroll and request the
okvclient.jarsoftware download. Save this file to your system.Install the
okvclient.jarfile using the following command (you must have JDK 1.4 or higher):java -jar okvclient.jar -d
dir_name[-v]The directory name following the
-doption is the location in which to install extracted files. The-voption, if given, causes log information to be produced that may be useful if the command fails.When the command asks for an Oracle Key Vault endpoint password, do not provide one. Instead, press Enter. (The result is that no password will be required when the endpoint connects to Oracle Key Vault.)
The preceding command produces an
okvclient.orafile, which should be in this location under the directory named by the-doption in the preceding java -jar command:install_dir/conf/okvclient.ora
The file contents include lines that look something like this:
SERVER=
host_ip:port_numSTANDBY_SERVER=host_ip:port_numThe
keyring_okvplugin attempts to communicate with the server running on the host named by theSERVERvariable and falls back toSTANDBY_SERVERif that fails:For the
SERVERvariable, a setting in theokvclient.orafile is mandatory.For the
STANDBY_SERVERvariable, a setting in theokvclient.orafile is optional, as of MySQL 5.7.19. Prior to MySQL 5.7.19, a setting forSTANDBY_SERVERis mandatory; ifokvclient.orais generated with no setting forSTANDBY_SERVER,keyring_okvfails to initialize. The workaround is to checkoraclient.oraand add a “dummy” setting forSTANDBY_SERVER, if one is missing. For example:STANDBY_SERVER=127.0.0.1:5696
Go to the Oracle Key Vault installer directory and test the setup by running this command:
okvutil/bin/okvutil list
The output should look something like this:
Unique ID Type Identifier 255AB8DE-C97F-482C-E053-0100007F28B9 Symmetric Key - 264BF6E0-A20E-7C42-E053-0100007FB29C Symmetric Key -
For a fresh Oracle Key Vault server (a server without any key in it), the output looks like this instead, to indicate that there are no keys in the vault:
no objects found
Use this command to extract the
ssldirectory containing SSL materials from theokvclient.jarfile:jar xf okvclient.jar ssl
Copy the Oracle Key Vault support files (the
okvclient.orafile and thessldirectory) into the configuration directory.(Optional) If you wish to password-protect the key file, use the instructions in Password-Protecting the keyring_okv Key File.
After completing the preceding procedure, restart the MySQL
server. It loads the keyring_okv plugin and
keyring_okv uses the files in its
configuration directory to communicate with Oracle Key Vault.
Gemalto SafeNet KeySecure Appliance uses the KMIP protocol
(version 1.1 or 1.2). As of MySQL 5.7.18, the
keyring_okv keyring plugin (which supports
KMIP 1.1) can use KeySecure as its KMIP back end for keyring
storage.
Use the following procedure to configure
keyring_okv and KeySecure to work together.
The description only summarizes how to interact with
KeySecure. For details, consult the section named Add a KMIP
Server in the
KeySecure
User Guide.
Create the configuration directory that will contain the KeySecure support files, and make sure that the
keyring_okv_conf_dirsystem variable is set to name that directory (for details, see General keyring_okv Configuration).In the configuration directory, create a subdirectory named
sslto use for storing the required SSL certificate and key files.In the configuration directory, create a file named
okvclient.ora. It should have following format:SERVER=
host_ip:port_numSTANDBY_SERVER=host_ip:port_numFor example, if KeySecure is running on host 198.51.100.20 and listening on port 9002, the
okvclient.orafile looks like this:SERVER=198.51.100.20:9002 STANDBY_SERVER=198.51.100.20:9002
Connect to the KeySecure Management Console as an administrator with credentials for Certificate Authorities access.
Navigate to Security >> Local CAs and create a local certificate authority (CA).
Go to Trusted CA Lists. Select Default and click on Properties. Then select Edit for Trusted Certificate Authority List and add the CA just created.
Download the CA and save it in the
ssldirectory as a file namedCA.pem.Navigate to Security >> Certificate Requests and create a certificate. Then you will be able to download a compressed tar file containing certificate PEM files.
Extract the PEM files from in the downloaded file. For example, if the file name is
csr_w_pk_pkcs8.gz, decompress and unpack it using this command:tar zxvf csr_w_pk_pkcs8.gz
Two files result from the extraction operation:
certificate_request.pemandprivate_key_pkcs8.pem.Use this openssl command to decrypt the private key and create a file named
key.pem:openssl pkcs8 -in private_key_pkcs8.pem -out key.pem
Copy the
key.pemfile into thessldirectory.Copy the certificate request in
certificate_request.peminto the clipboard.Navigate to Security >> Local CAs. Select the same CA that you created earlier (the one you downloaded to create the
CA.pemfile), and click Sign Request. Paste the Certificate Request from the clipboard, choose a certificate purpose of Client (the keyring is a client of KeySecure), and click Sign Request. The result is a certificate signed with the selected CA in a new page.Copy the signed certificate to the clipboard, then save the clipboard contents as a file named
cert.pemin thessldirectory.(Optional) If you wish to password-protect the key file, use the instructions in Password-Protecting the keyring_okv Key File.
After completing the preceding procedure, restart the MySQL
server. It loads the keyring_okv plugin and
keyring_okv uses the files in its
configuration directory to communicate with KeySecure.
As of MySQL 5.7.20, you can optionally protect the key file
with a password and supply a file containing the password to
enable the key file to be decrypted. To so do, change location
to the ssl directory and perform these
steps:
Encrypt the
key.pemkey file. For example, use a command like this, and enter the encryption password at the prompts:shell>
openssl rsa -des3 -in key.pem -out key.pem.newEnter PEM pass phrase: Verifying - Enter PEM pass phrase:Save the encryption password in a single-line text file named
password.txtin thessldirectory.Verify that the encrypted key file can be decrypted using the following command. The decrypted file should display on the console:
shell>
openssl rsa -in key.pem.new -passin file:password.txtRemove the original
key.pemfile and renamekey.pem.newtokey.pem.Change the ownership and access mode of new
key.pemfile andpassword.txtfile as necessary to ensure that they have the same restrictions as other files in thessldirectory.
The keyring_aws plugin is an extension
included in MySQL Enterprise Edition, a commercial product. To learn more about
commercial products, see http://www.mysql.com/products/.
The keyring_aws plugin is a keyring plugin
that communicates with the Amazon Web Services Key Management
Service (AWS KMS) as a back end for key generation and uses a
local file for key storage. All keyring material is generated
exclusively by the AWS server, not by
keyring_aws.
keyring_aws is available on these platforms:
Debian 8
EL7
macOS 10.12
OS X 10.10 and 10.11
SLES 12
Ubuntu 14.04 and 16.04
Windows
The discussion here assumes that you are familiar with AWS in general and KMS in particular. Some pertinent information sources:
The following sections provide configuration and usage
information for the keyring_aws keyring
plugin:
To install the keyring_aws plugin, use the
general installation instructions found in
Section 6.5.4.1, “Keyring Plugin Installation”, together with the
plugin-specific configuration information found here.
The plugin library file contains the
keyring_aws plugin and two user-defined
functions (UDFs), keyring_aws_rotate_cmk()
and keyring_aws_rotate_keys().
To configure keyring_aws, you must obtain a
secret access key that provides credentials for communicating
with AWS KMS and write it to a configuration file:
Create an AWS KMS account.
Use AWS KMS to create a secret access key ID and secret access key. The access key serves to verify your identity and that of your applications.
Use the AWS KMS account to create a customer master key (CMK) ID. At MySQL startup, set the
keyring_aws_cmk_idsystem variable to the CMK ID value. This variable is mandatory and there is no default. (Its value can be changed at runtime if desired usingSET GLOBAL.)If necessary, create the directory in which the configuration file will be located. The directory should have a restrictive mode and be accessible only to the account used to run the MySQL server. For example, on Unix and Unix-like systems, to use
/usr/local/mysql/mysql-keyring/keyring_aws_confas the file name, the following commands (executed asroot) create its parent directory and set the directory mode and ownership:shell>
cd /usr/local/mysqlshell>mkdir mysql-keyringshell>chmod 750 mysql-keyringshell>chown mysql mysql-keyringshell>chgrp mysql mysql-keyringAt MySQL startup, set the
keyring_aws_conf_filesystem variable to/usr/local/mysql/mysql-keyring/keyring_aws_confto indicate the configuration file location to the server.Prepare the
keyring_awsconfiguration file, which should contain two lines:Line 1: The secret access key ID
Line 2: The secret access key
For example, if the key ID is
wwwwwwwwwwwwwEXAMPLEand the key isxxxxxxxxxxxxx/yyyyyyy/zzzzzzzzEXAMPLEKEY, the configuration file looks like this:wwwwwwwwwwwwwEXAMPLE xxxxxxxxxxxxx/yyyyyyy/zzzzzzzzEXAMPLEKEY
To be usable during the server startup process,
keyring_aws must be loaded using the
--early-plugin-load option. The
keyring_aws_cmk_id system
variable is mandatory and configures the customer master key
(CMK) ID obtained from the AWS KMS server. The
keyring_aws_conf_file and
keyring_aws_data_file system
variables optionally configure the locations of the files used
by the keyring_aws plugin for configuration
information and data storage. The file location variable
default values are platform specific. To configure the
locations explicitly, set the variable values at startup. For
example, use these lines in the server
my.cnf file (adjust the
.so suffix and file locations for your
platform as necessary):
[mysqld] early-plugin-load=keyring_aws.so keyring_aws_cmk_id='arn:aws:kms:us-west-2:111122223333:key/abcd1234-ef56-ab12-cd34-ef56abcd1234' keyring_aws_conf_file=/usr/local/mysql/mysql-keyring/keyring_aws_conf keyring_aws_data_file=/usr/local/mysql/mysql-keyring/keyring_aws_data
For the keyring_aws plugin to start
successfully, the configuration file must exist and contain
valid secret access key information, initialized as described
previously. The storage file need not exist. If it does not,
keyring_aws attempts to create it (as well
as its parent directory, if necessary).
For additional information about the system variables used to
configure the keyring_aws plugin, see
Section 6.5.4.11, “Keyring System Variables”.
Start the MySQL server and install the UDFs associated with
the keyring_aws plugin. This is a one-time
operation, performed by executing the following statements
(adjust the .so suffix for your platform
as necessary):
CREATE FUNCTION keyring_aws_rotate_cmk RETURNS INTEGER SONAME 'keyring_aws.so'; CREATE FUNCTION keyring_aws_rotate_keys RETURNS INTEGER SONAME 'keyring_aws.so';
At plugin startup, the keyring_aws plugin
reads the AWS secret access key ID and key from its
configuration file. It also reads any encrypted keys contained
in its storage file into its in-memory cache.
During operation, keyring_aws maintains
encrypted keys in the in-memory cache and uses the storage
file as local persistent storage. Each keyring operation is
transactional: keyring_aws either
successfully changes both the in-memory key cache and the
keyring storage file, or the operation fails and the keyring
state remains unchanged.
To ensure that keys are flushed only when the correct keyring
storage file exists, keyring_aws stores a
SHA-256 checksum of the keyring in the file. Before updating
the file, the plugin verifies that it contains the expected
checksum.
The keyring_aws plugin supports the
functions that comprise the standard keyring service
interface. Keyring operations performed by these functions are
accessible at two levels:
C interface: In C-language code, call the keyring service functions described in Section 28.3.2, “The Keyring Service”.
SQL interface: In SQL statements, call the user-defined functions (UDFs) described in Section 6.5.4.8, “General-Purpose Keyring Key-Management Functions”.
Example (using UDFs):
SELECT keyring_key_generate('MyKey', 'AES', 32);
SELECT keyring_key_remove('MyKey');
In addition, the keyring_aws_rotate_cmk()
and keyring_aws_rotate_keys() UDFs
“extend” the keyring plugin interface to provide
AWS-related capabilities not covered by the standard keyring
service interface. These capabilities are accessible only by
calling the UDFs. There are no corresponding C-languge key
service functions.
The key types permitted by keyring_aws are
described in Section 6.5.4.7, “Supported Keyring Key Types”.
Assuming that the keyring_aws plugin has
initialized properly at server startup, it is possible to
change the credentials used for communicating with AWS KMS:
Use AWS KMS to create a new secret access key ID and secret access key.
Store the new credentials in the configuration file (the file named by the
keyring_aws_conf_filesystem variable). The file format is as described previously.Reinitialize the
keyring_awsplugin so that it rereads the configuration file. Assuming that the new credentials are valid, the plugin should initialize successfully.There are two ways to reinitialize the plugin:
Restart the server. This is simpler and has has no side effects, but is not suitable for installations that require minimal server downtime with as few restarts as possible.
Reinitialize the plugin without restarting the server by executing the following statements (adjust the
.sosuffix for your platform as necessary):UNINSTALL PLUGIN keyring_aws; INSTALL PLUGIN keyring_aws SONAME 'keyring_aws.so';
NoteIn addition to loading a plugin at runtime,
INSTALL PLUGINhas the side effect of registering the plugin it in themysql.pluginsystem table. Because of this, if you decide to stop usingkeyring_aws, it is not sufficient to remove the--early-plugin-loadoption from the set of options used to start the server. That stops the plugin from loading early, but the server still attempts to load it when it gets to the point in the startup sequence where it loads the plugins registered inmysql.plugin.Consequently, if you execute the
UNINSTALL PLUGINplusINSTALL PLUGINsequence just described to change the AWS KMS credentials, then to stop usingkeyring_aws, it is necessary to executeUNINSTALL PLUGINagain to unregister the plugin in addition to removing the--early-plugin-loadoption.
As of MySQL 5.7.21, the MySQL server supports an operational mode that enables migration of keys between underlying keyring keystores. This enables DBAs to switch a MySQL installation from one keyring plugin to another. A migration server (that is, a server started in key migration mode) does not accept client connections. Instead, it runs only long enough to migrate keys, then exits. A migration server reports errors to the console (the standard error output).
It is possible to perform offline or online key migration:
If you are sure that no running server on the local host is using the source or destination keystore, an offline migration is possible. In this case, the migration server can modify the keystores without possibility of a running server modifying keystore content during the migration.
If a running server on the local host is using the source or destination keystore, an online migration must be performed. In this case, the migration server connects to the running server and instructs it to pause keyring operations while key migration is in progress.
The result of a key migration operation is that the destination keystore contains the keys it had prior to the migration, plus the keys from the source keystore. The source keystore is the same before and after the migration because keys are copied, not moved. If a key to be copied already exists in the destination keystore, an error occurs and the destination keystore is restored to its premigration state.
To perform a key migration operation, determine which key migration options are needed. Migration options indicate which keyring plugins are involved, and whether to perform an offline or online migration:
To indicate the source and destination keyring plugins, specify these options:
--keyring-migration-source: The source keyring plugin that manages the keys to be migrated.--keyring-migration-destination: The destination keyring plugin to which the migrated keys are to be copied.
These options tell the server to run in key migration mode. Both options are mandatory for all key migration operations. The source and destination plugins must differ, and the migration server must support both plugins.
For an offline migration, no additional key migration options are needed.
WarningDo not perform offline migration involving a keystore that is in use by a running server.
For an online migration, some running server currently is using the source or destination keystore. Specify the key migration options that indicate how to connect to the running server. This is necessary so that the migration server can connect to the running server and tell it to pause keyring use during the migration operation.
Use of any of the following options signifies an online migration:
--keyring-migration-host: The host where the running server is located. This is always the local host.--keyring-migration-user,--keyring-migration-password: The user name and password for the account to use to connect to the running server.--keyring-migration-port: For TCP/IP connections, the port number to connect to on the running server.--keyring-migration-socket: For Unix socket file or Windows named pipe connections, the socket file or named pipe to connect to on the running server.
For additional details about the key migration options, see Section 6.5.4.10, “Keyring Command Options”.
Start the migration server with the key migration options determined as just described, possibly with other options. Keep the following considerations in mind:
Other server options might be required, such as other configuration parameters for the two keyring plugins. For example, if
keyring_fileis one of the plugins, you must set thekeyring_file_datasystem variable if the keyring data file location is not the default location. Other non-keyring options may be required as well. One way to specify these options is by using--defaults-fileto name an option file that contains the required options.If you invoke the migration server from a system account different from that normally used to run MySQL, it might create keyring directories or files that are inaccessible to the server during normal operation. Suppose that mysqld normally runs as the
mysqlsystem user, but you invoke the migration server while logged in asisabel. Any new directories or files created by the migration server will be owned byisabel. Subsequent startup will fail when a server run as themysqlsystem user attempts to access file system objects owned byisabel.To avoid this problem, start the migration server as the
rootsystem user and provide a--user=option, whereuser_nameuser_nameis the system account normally used to run MySQL.The migration server expects path name option values to be full paths. Relative path names may not be resolved as you expect.
Example command line for offline key migration:
mysqld --defaults-file=/usr/local/mysql/etc/my.cnf
--key-migration-source=keyring_file.so
--key-migration-destination=keyring_encrypted_file.so
--keyring_encrypted_file_password=password
Example command line for online key migration:
mysqld --defaults-file=/usr/local/mysql/etc/my.cnf --key-migration-source=keyring_file.so --key-migration-destination=keyring_encrypted_file.so --keyring_encrypted_file_password=password--key-migration-host=localhost --key-migration-user=root --key-migration-password=root_password
The key migration server performs the migration operation as follows:
(Online migration only) Connect to the running server using the connection options. The account used to connect must have the
SUPERprivilege required to modify the globalkeyring_operationssystem variable.(Online migration only) Disable
keyring_operationson the running server. (The running server must supportkeyring_operations, which means it must be from MySQL 5.7.21 or higher.)Load the source and destination keyring plugins.
Copy keys from the source keyring to the destination keyring.
Unload the keyring plugins.
(Online migration only) Enable
keyring_operationson the running server.(Online migration only) Disconnect from the running server.
Exit.
If an error occurs during key migration, any keys that were copied to the destination plugin are removed, leaving the destination keystore unchanged.
For an online migration operation, the migration server takes
care of enabling and disabling
keyring_operations on the
running server. However, if the migration server exits
abnormally (for example, if someone forcibly terminates it),
it is possible that
keyring_operations will not
have been re-enabled on the running server, leaving it unable
to perform keyring operations. In this case, it may be
necessary to connect to the running server and enable
keyring_operations manually.
After a successful online key migration operation, the running server might need to be restarted:
If the running server was using the source keystore, it need not be restarted after the migration.
If the running server was using the source keystore before the migration but should use the destination keystore after the migration, it must be reconfigured to use the destination keyring plugin and restarted.
If the running server was using the destination keystore and will continue to use it, it should be restarted after the migration to load all keys migrated into the destination keystore.
MySQL server key migration mode supports pausing a single running server. To perform a key migration if multiple key servers are using the keystores involved, use this procedure:
Connect to each running server manually and set
keyring_operations=OFF.Use the migration server to perform an offline key migration.
Connect to each running server manually and set
keyring_operations=ON.
All running servers must support the
keyring_operations=ON system
variable.
MySQL Keyring supports generating keys of different types (encryption algorithms) and lengths. The available key types depend on which keyring plugin is installed. A given plugin may also impose constraints on key lengths per key type.
Table 6.22, “Keyring Plugin Key Types” summarizes the permitted key types per keyring plugin. Lengths are in bytes. For a key generated using one of the keyring user-defined functions (UDFs) described in Section 6.5.4.8, “General-Purpose Keyring Key-Management Functions”, the length can be no more than 2,048 bytes, due to limitations of the UDF interface.
Table 6.22 Keyring Plugin Key Types
| Plugin Name | Permitted Key Type | Permitted Key Lengths for Key Type |
|---|---|---|
keyring_encrypted_file |
|
No special restrictions No special restrictions No special restrictions |
keyring_file |
|
No special restrictions No special restrictions No special restrictions |
keyring_okv |
AES |
16, 24, 32 |
keyring_aws |
AES |
16, 24, 32 |
MySQL Server supports a keyring service that enables internal server components and plugins to securely store sensitive information for later retrieval.
As of MySQL 5.7.13, MySQL Server includes an SQL interface for
keyring key management, implemented as a set of general-purpose
user-defined functions (UDFs) that access the functions provided
by the internal keyring service. The keyring UDFs are contained
in a plugin library file, which also contains a
keyring_udf plugin that must be enabled prior
to UDF invocation. For these UDFs to be used, a keyring plugin
such as keyring_file or
keyring_okv must be enabled.
The UDFs described here are general purpose and intended for use with any keyring plugin. A given keyring plugin might have UDFs of its own that are intended for use only with that plugin; see Section 6.5.4.9, “Plugin-Specific Keyring Key-Management Functions”.
The following sections provide installation instructions for the keyring UDFs and demonstrate how to use them. For information about the keyring service functions invoked by the UDFs, see Section 28.3.2, “The Keyring Service”. For general keyring information, see Section 6.5.4, “The MySQL Keyring”.
This section describes how to install or uninstall the keyring
user-defined functions (UDFs), which are implemented in a
plugin library file that also contains a
keyring_udf plugin. For general information
about installing or uninstalling plugins and UDFs, see
Section 5.5.1, “Installing and Uninstalling Plugins”, and
Section 28.4.2.5, “UDF Compiling and Installing”.
The keyring UDFs enable keyring key management operations, but
the keyring_udf plugin must also be
installed because the UDFs will not work correctly without it.
Attempts to use the UDFs without the
keyring_udf plugin result in an error.
To be usable by the server, the plugin library file must be
located in the MySQL plugin directory (the directory named by
the plugin_dir system
variable). If necessary, set the value of
plugin_dir at server startup
to tell the server the plugin directory location.
The plugin library file base name is
keyring_udf. The file name suffix differs
per platform (for example, .so for Unix
and Unix-like systems, .dll for Windows).
To install the keyring_udf plugin and the
UDFs, use the INSTALL PLUGIN
and CREATE FUNCTION statements
(adjust the .so suffix for your platform
as necessary):
INSTALL PLUGIN keyring_udf SONAME 'keyring_udf.so'; CREATE FUNCTION keyring_key_generate RETURNS INTEGER SONAME 'keyring_udf.so'; CREATE FUNCTION keyring_key_fetch RETURNS STRING SONAME 'keyring_udf.so'; CREATE FUNCTION keyring_key_length_fetch RETURNS INTEGER SONAME 'keyring_udf.so'; CREATE FUNCTION keyring_key_type_fetch RETURNS STRING SONAME 'keyring_udf.so'; CREATE FUNCTION keyring_key_store RETURNS INTEGER SONAME 'keyring_udf.so'; CREATE FUNCTION keyring_key_remove RETURNS INTEGER SONAME 'keyring_udf.so';
If the plugin and the UDFs are used on a master replication server, install them on all slave servers as well to avoid replication problems.
Once installed as just described, the
keyring_udf plugin and the UDFs remain
installed until uninstalled. To remove them, use the
UNINSTALL PLUGIN and
DROP FUNCTION statements:
UNINSTALL PLUGIN keyring_udf; DROP FUNCTION keyring_key_generate; DROP FUNCTION keyring_key_fetch; DROP FUNCTION keyring_key_length_fetch; DROP FUNCTION keyring_key_type_fetch; DROP FUNCTION keyring_key_store; DROP FUNCTION keyring_key_remove;
Before using the keyring user-defined functions (UDFs), install them according to the instructions provided in Section 6.5.4.8.1, “Installing or Uninstalling General-Purpose Keyring Functions”.
The keyring UDFs are subject to these constraints:
To use any keyring UDF, the
keyring_udfplugin must be enabled. Otherwise, an error occurs:ERROR 1123 (HY000): Can't initialize function 'keyring_key_generate'; This function requires keyring_udf plugin which is not installed. Please install
To install the
keyring_udfplugin, see Section 6.5.4.8.1, “Installing or Uninstalling General-Purpose Keyring Functions”.The keyring UDFs invoke keyring service functions (see Section 28.3.2, “The Keyring Service”). The service functions in turn use whatever keyring plugin is installed (for example,
keyring_fileorkeyring_okv). Therefore, to use any keyring UDF, some underlying keyring plugin must be enabled. Otherwise, an error occurs:ERROR 3188 (HY000): Function 'keyring_key_generate' failed because underlying keyring service returned an error. Please check if a keyring plugin is installed and that provided arguments are valid for the keyring you are using.
To install a keyring plugin, see Section 6.5.4.1, “Keyring Plugin Installation”.
To use any keyring UDF, a user must possess the global
EXECUTEprivilege. Otherwise, an error occurs:ERROR 1123 (HY000): Can't initialize function 'keyring_key_generate'; The user is not privileged to execute this function. User needs to have EXECUTE
To grant the global
EXECUTEprivilege to a user, use this statement:GRANT EXECUTE ON *.* TO
user;Alternatively, should you prefer to avoid granting the global
EXECUTEprivilege while still permitting users to access specific key-management operations, “wrapper” stored programs can be defined (a technique described later in this section).A key stored in the keyring by a given user can be manipulated later only by the same user. That is, the value of the
CURRENT_USER()function at the time of key manipulation must have the same value as when the key was stored in the keyring. (This constraint rules out the use of the keyring UDFs for manipulation of instance-wide keys, such as those created byInnoDBto support tablespace encryption.)To enable multiple users to perform operations on the same key, “wrapper” stored programs can be defined (a technique described later in this section).
Keyring UDFs support the key types and lengths supported by the underlying keyring plugin, with the additional constraint that keys cannot be longer than 2,048 bytes (16,384 bits), due to limitations of the UDF interface. See Section 6.5.4.7, “Supported Keyring Key Types”.
To create a new random key and store it in the keyring, call
keyring_key_generate(), passing to it an ID
for the key, along with the key type (encryption method) and
its length in bytes. The following call creates a 2,048-bit
DSA-encrypted key named MyKey:
mysql> SELECT keyring_key_generate('MyKey', 'DSA', 256);
+-------------------------------------------+
| keyring_key_generate('MyKey', 'DSA', 256) |
+-------------------------------------------+
| 1 |
+-------------------------------------------+
A return value of 1 indicates success. If the key cannot be
created, the return value is NULL and an
error occurs. One reason this might be is that the underlying
keyring plugin does not support the specified combination of
key type and key length; see
Section 6.5.4.7, “Supported Keyring Key Types”.
To be able to check the return type regardless of whether an
error occurs, use SELECT ... INTO
@ and test the
variable value:
var_name
mysql>SELECT keyring_key_generate('', '', -1) INTO @x;ERROR 3188 (HY000): Function 'keyring_key_generate' failed because underlying keyring service returned an error. Please check if a keyring plugin is installed and that provided arguments are valid for the keyring you are using. mysql>SELECT @x;+------+ | @x | +------+ | NULL | +------+ mysql>SELECT keyring_key_generate('x', 'AES', 16) INTO @x;mysql>SELECT @x;+------+ | @x | +------+ | 1 | +------+
This technique also applies to other keyring UDFs that for failure return a value and an error.
The ID passed to keyring_key_generate()
provides a means by which to refer to the key in subsequent
UDF calls. For example, use the key ID to retrieve its type as
a string or its length in bytes as an integer:
mysql>SELECT keyring_key_type_fetch('MyKey');+---------------------------------+ | keyring_key_type_fetch('MyKey') | +---------------------------------+ | DSA | +---------------------------------+ mysql>SELECT keyring_key_length_fetch('MyKey');+-----------------------------------+ | keyring_key_length_fetch('MyKey') | +-----------------------------------+ | 256 | +-----------------------------------+
To retrieve a key value, pass the key ID to
keyring_key_fetch(). The following example
uses HEX() to display the key
value because it may contain nonprintable characters. The
example also uses a short key for brevity, but be aware that
longer keys provide better security:
mysql>SELECT keyring_key_generate('MyShortKey', 'DSA', 8);+----------------------------------------------+ | keyring_key_generate('MyShortKey', 'DSA', 8) | +----------------------------------------------+ | 1 | +----------------------------------------------+ mysql>SELECT HEX(keyring_key_fetch('MyShortKey'));+--------------------------------------+ | HEX(keyring_key_fetch('MyShortKey')) | +--------------------------------------+ | 1DB3B0FC3328A24C | +--------------------------------------+
Keyring UDFs treat key IDs, types, and values as binary
strings, so comparisons are case-sensitive. For example, IDs
of MyKey and mykey refer
to different keys.
To remove a key, pass the key ID to
keyring_key_remove():
mysql> SELECT keyring_key_remove('MyKey');
+-----------------------------+
| keyring_key_remove('MyKey') |
+-----------------------------+
| 1 |
+-----------------------------+
To obfuscate and store a key that you provide, pass the key
ID, type, and value to keyring_key_store():
mysql> SELECT keyring_key_store('AES_key', 'AES', 'Secret string');
+------------------------------------------------------+
| keyring_key_store('AES_key', 'AES', 'Secret string') |
+------------------------------------------------------+
| 1 |
+------------------------------------------------------+
As indicated previously, a user must have the global
EXECUTE privilege to call
keyring UDFs, and the user who stores a key in the keyring
initially must be the same user who performs subsequent
operations on the key later, as determined from the
CURRENT_USER() value in effect
for each UDF call. To permit key operations to users who do
not have the global EXECUTE
privilege or who may not be the key “owner,” use
this technique:
Define “wrapper” stored programs that encapsulate the required key operations and have a
DEFINERvalue equal to the key owner.Grant the
EXECUTEprivilege for specific stored programs to the individual users who should be able to invoke them.If the operations implemented by the wrapper stored programs do not include key creation, create any necessary keys in advance, using the account named as the
DEFINERin the stored program definitions.
This technique enables keys to be shared among users and provides to DBAs more fine-grained control over who can do what with keys, without having to grant global privileges.
The following example shows how to set up a shared key named
SharedKey that is owned by the DBA, and a
get_shared_key() stored function that
provides access to the current key value. The value can be
retrieved by any user with the
EXECUTE privilege for that
function, which is created in the
key_schema schema.
From a MySQL administrative account
('root'@'localhost' in this example),
create the administrative schema and the stored function to
access the key:
mysql>CREATE SCHEMA key_schema;mysql>CREATE DEFINER = 'root'@'localhost'FUNCTION key_schema.get_shared_key()RETURNS BLOB READS SQL DATARETURN keyring_key_fetch('SharedKey');
From the administrative account, ensure that the shared key exists:
mysql> SELECT keyring_key_generate('SharedKey', 'DSA', 8);
+---------------------------------------------+
| keyring_key_generate('SharedKey', 'DSA', 8) |
+---------------------------------------------+
| 1 |
+---------------------------------------------+
From the administrative account, create an ordinary user account to which key access is to be granted:
mysql>CREATE USER 'key_user'@'localhost'IDENTIFIED BY 'key_user_pwd';
From the key_user account, verify that,
without the proper EXECUTE
privilege, the new account cannot access the shared key:
mysql> SELECT HEX(key_schema.get_shared_key());
ERROR 1370 (42000): execute command denied to user 'key_user'@'localhost'
for routine 'key_schema.get_shared_key'
From the administrative account, grant
EXECUTE to
key_user for the stored function:
mysql>GRANT EXECUTE ON FUNCTION key_schema.get_shared_keyTO 'key_user'@'localhost';
From the key_user account, verify that the
key is now accessible:
mysql> SELECT HEX(key_schema.get_shared_key());
+----------------------------------+
| HEX(key_schema.get_shared_key()) |
+----------------------------------+
| 9BAFB9E75CEEB013 |
+----------------------------------+
For each general-purpose keyring user-defined function (UDF), this section describes its purpose, calling sequence, and return value. For information about the conditions under which these UDFs can be invoked, see Section 6.5.4.8.2, “Using General-Purpose Keyring Functions”.
keyring_key_fetch()Given a key ID, deobfuscates and returns the key value.
Syntax:
STRING keyring_key_fetch(STRING key_id)
Arguments:
key_id: The key ID as a string.
Return values:
Returns the key value for success,
NULLif the key does not exist, orNULLand an error for failure.NoteKeyring values retrieved using
keyring_key_fetch()are limited to 2,048 bytes, due to limitations of the UDF interface. A keyring value longer than that length can be stored using a keyring service function (see Section 28.3.2, “The Keyring Service”), but if retrieved usingkeyring_key_fetch(), is truncated to 2,048 bytes.Example:
mysql>
SELECT keyring_key_generate('RSA_key', 'RSA', 16);+--------------------------------------------+ | keyring_key_generate('RSA_key', 'RSA', 16) | +--------------------------------------------+ | 1 | +--------------------------------------------+ mysql>SELECT HEX(keyring_key_fetch('RSA_key'));+-----------------------------------+ | HEX(keyring_key_fetch('RSA_key')) | +-----------------------------------+ | 91C2253B696064D3556984B6630F891A | +-----------------------------------+ mysql>SELECT keyring_key_type_fetch('RSA_key');+-----------------------------------+ | keyring_key_type_fetch('RSA_key') | +-----------------------------------+ | RSA | +-----------------------------------+ mysql>SELECT keyring_key_length_fetch('RSA_key');+-------------------------------------+ | keyring_key_length_fetch('RSA_key') | +-------------------------------------+ | 16 | +-------------------------------------+The example uses
HEX()to display the key value because it may contain nonprintable characters. The example also uses a short key for brevity, but be aware that longer keys provide better security.keyring_key_generate()Generates a new random key with a given ID, type, and length, and stores it in the keyring. The type and length values must be consistent with the values supported by the underlying keyring plugin, with the additional constraint that keys cannot be longer than 2,048 bytes (16,384 bits), due to limitations of the UDF interface. For the permitted types per plugin, see Section 28.3.2, “The Keyring Service”.
Syntax:
STRING keyring_key_generate(STRING key_id, STRING key_type, INTEGER key_length)
Arguments:
key_id: The key ID as a string.key_type: The key type as a string.key_length: The key length in bytes as an integer. The maximum length is 2,048.
Return values:
Returns 1 for success, or
NULLand an error for failure.Example:
mysql>
SELECT keyring_key_generate('RSA_key', 'RSA', 384);+---------------------------------------------+ | keyring_key_generate('RSA_key', 'RSA', 384) | +---------------------------------------------+ | 1 | +---------------------------------------------+keyring_key_length_fetch()Given a key ID, returns the key length.
Syntax:
INTEGER keyring_key_length_fetch(STRING key_id)
Arguments:
key_id: The key ID as a string.
Return values:
Returns the key length in bytes as an integer for success,
NULLif the key does not exist, orNULLand an error for failure.Example:
See the description of
keyring_key_fetch().keyring_key_remove()Removes the key with a given ID from the keyring.
Syntax:
INTEGER keyring_key_remove(STRING key_id)
Arguments:
key_id: The key ID as a string.
Return values:
Returns 1 for success, or
NULLfor failure.Example:
mysql>
SELECT keyring_key_remove('AES_key');+-------------------------------+ | keyring_key_remove('AES_key') | +-------------------------------+ | 1 | +-------------------------------+keyring_key_store()Obfuscates and stores a key in the keyring.
Syntax:
INTEGER keyring_key_store(STRING key_id, STRING key_type, STRING key)
Arguments:
key_id: The key ID as a string.key_type: The key type as a string.key: The key value as a string.
Return values:
Returns 1 for success, or
NULLand an error for failure.Example:
mysql>
SELECT keyring_key_store('new key', 'DSA', 'My key value');+-----------------------------------------------------+ | keyring_key_store('new key', 'DSA', 'My key value') | +-----------------------------------------------------+ | 1 | +-----------------------------------------------------+keyring_key_type_fetch()Given a key ID, returns the key type.
Syntax:
STRING keyring_key_type_fetch(STRING key_id)
Arguments:
key_id: The key ID as a string.
Return values:
Returns the key type as a string for success,
NULLif the key does not exist, orNULLand an error for failure.Example:
See the description of
keyring_key_fetch().
For each keyring plugin-specific user-defined function (UDF), this section describes its purpose, calling sequence, and return value. For information about general-purpose keyring UDFs, see Section 6.5.4.8, “General-Purpose Keyring Key-Management Functions”.
keyring_aws_rotate_cmk()This UDF is associated with the
keyring_awsplugin. Its use requires theSUPERprivilege.keyring_aws_rotate_cmk()rotates the customer master key (CMK). Rotation changes only the key that AWS KMS uses for subsequent data key-encryption operations. AWS KMS maintains previous CMK versions, so keys generated using previous CMKs remain decryptable after rotation.Rotation changes the CMK value used inside AWS KMS but does not change the ID used to refer to it, so there is no need to change the
keyring_aws_cmk_idsystem variable after callingkeyring_aws_rotate_cmk().Syntax:
INTEGER keyring_aws_rotate_cmk()
Arguments:
None.
Return values:
Returns 1 for success, or
NULLand an error for failure.keyring_aws_rotate_keys()This UDF is associated with the
keyring_awsplugin. Its use requires theSUPERprivilege.keyring_aws_rotate_keys()rotates keys stored in thekeyring_awsstorage file named by thekeyring_aws_data_filesystem variable. Rotation sends each key stored in the file to AWS KMS for re-encryption using the value of thekeyring_aws_cmk_idsystem variable as the CMK value, and stores the new encrypted keys in the file.keyring_aws_rotate_keys()is useful for key re-encryption under these circumstances:After rotating the CMK; that is, after invoking the
keyring_aws_rotate_cmk()UDFAfter changing the
keyring_aws_cmk_idsystem variable to a different key value
Syntax:
INTEGER keyring_aws_rotate_keys()
Arguments:
None.
Return values:
Returns 1 for success, or
NULLand an error for failure.
MySQL supports the following keyring-related command-line options:
--keyring-migration-destination=pluginProperty Value Command-Line Format --keyring-migration-destination=plugin_nameIntroduced 5.7.21 Type string The destination keyring plugin for key migration. See Section 6.5.4.6, “Migrating Keys Between Keyring Keystores”. The format and interpretation of the option value is the same as described for the
--keyring-migration-sourceoption.Note--keyring-migration-sourceand--keyring-migration-destinationare mandatory for all keyring migration operations. The source and destination plugins must differ, and the migration server must support both plugins.--keyring-migration-host=host_nameProperty Value Command-Line Format --keyring-migration-host=host_nameIntroduced 5.7.21 Type string Default localhostThe host location of the running server that is currently using one of the key migration keystores. See Section 6.5.4.6, “Migrating Keys Between Keyring Keystores”. Migration always occurs on the local host, so the option always specifies a value for connecting to a local server, such as
localhost,127.0.0.1,::1, or the local host IP address or host name.--keyring-migration-password[=password]Property Value Command-Line Format --keyring-migration-password[=password]Introduced 5.7.21 Type string The password for connecting to the running server that is currently using one of the key migration keystores. See Section 6.5.4.6, “Migrating Keys Between Keyring Keystores”. If you omit the
passwordvalue following the option name on the command line, the server prompts for one.Specifying a password on the command line should be considered insecure. See Section 6.1.2.1, “End-User Guidelines for Password Security”. You can use an option file to avoid giving the password on the command line. In this case, the file should have a restrictive mode and be accessible only to the account used to run the migration server.
--keyring-migration-port=port_numProperty Value Command-Line Format --keyring-migration-port=port_numIntroduced 5.7.21 Type numeric Default 3306For TCP/IP connections, the port number for connecting to the running server that is currently using one of the key migration keystores. See Section 6.5.4.6, “Migrating Keys Between Keyring Keystores”.
--keyring-migration-socket=pathProperty Value Command-Line Format --keyring-migration-socket={file_name|pipe_name}Introduced 5.7.21 Type string For Unix socket file or Windows named pipe connections, the socket file or named pipe for connecting to the running server that is currently using one of the key migration keystores. See Section 6.5.4.6, “Migrating Keys Between Keyring Keystores”.
--keyring-migration-source=pluginProperty Value Command-Line Format --keyring-migration-source=plugin_nameIntroduced 5.7.21 Type string The source keyring plugin for key migration. See Section 6.5.4.6, “Migrating Keys Between Keyring Keystores”.
The option value is similar to that for
--plugin-load, except that only one plugin library can be specified. The value is given asname=plugin_libraryorplugin_library. Thenameis the name of a plugin to load, andplugin_libraryis the name of the library file that contains the plugin code. If the plugin library is named without any preceding plugin name, the server loads all plugins in the library. The server looks for plugin library files in the directory named by theplugin_dirsystem variable.Note--keyring-migration-sourceand--keyring-migration-destinationare mandatory for all keyring migration operations. The source and destination plugins must differ, and the migration server must support both plugins.--keyring-migration-user=user_nameProperty Value Command-Line Format --keyring-migration-user=user_nameIntroduced 5.7.21 Type string The user name for connecting to the running server that is currently using one of the key migration keystores. See Section 6.5.4.6, “Migrating Keys Between Keyring Keystores”.
MySQL Keyring plugins support the following system variables. Use them to configure keyring plugin operation. These variables are unavailable unless the appropriate keyring plugin is installed (see Section 6.5.4.1, “Keyring Plugin Installation”).
-
Property Value Command-Line Format --keyring-aws-cmk-idIntroduced 5.7.19 System Variable keyring_aws_cmk_idScope Global Dynamic Yes Type string The customer master key (CMK) ID obtained from the AWS KMS server and used by the
keyring_awsplugin. This variable is unavailable unless that plugin is installed, but if it is installed, a value for this variable is mandatory. -
Property Value Command-Line Format --keyring-aws-conf-fileIntroduced 5.7.19 System Variable keyring_aws_conf_fileScope Global Dynamic No Type file name Default platform specificThe location of the configuration file for the
keyring_awskeyring plugin. This variable is unavailable unless that plugin is installed.At plugin startup,
keyring_awsreads the AWS secret access key ID and key from the configuration file. For thekeyring_awsplugin to start successfully, the configuration file must exist and contain valid secret access key information, initialized as described in Section 6.5.4.5, “Using the keyring_aws Amazon Web Services Keyring Plugin”.The default file name is
keyring_aws_conf, located in the default keyring file directory. The location of this default directory is the same as for thekeyring_file_datasystem variable. See the description of that variable for details, as well as for considerations to take into account if you create the directory manually. -
Property Value Command-Line Format --keyring-aws-data-fileIntroduced 5.7.19 System Variable keyring_aws_data_fileScope Global Dynamic No Type file name Default platform specificThe location of the storage file for the
keyring_awskeyring plugin. This variable is unavailable unless that plugin is installed.At plugin startup, if the value assigned to
keyring_aws_data_filespecifies a file that does not exist, thekeyring_awsplugin attempts to create it (as well as its parent directory, if necessary). If the file does exist,keyring_awsreads any encrypted keys contained in the file into its in-memory cache.keyring_awsdoes not cache unencrypted keys in memory.The default file name is
keyring_aws_data, located in the default keyring file directory. The location of this default directory is the same as for thekeyring_file_datasystem variable. See the description of that variable for details, as well as for considerations to take into account if you create the directory manually. -
Property Value Command-Line Format --keyring-aws-regionIntroduced 5.7.19 System Variable keyring_aws_regionScope Global Dynamic Yes Type enumeration Default us-east-1Valid Values ap-northheast-1ap-northheast-2ap-south-1ap-southeast-1ap-southeast-2eu-central-1eu-west-1sa-east-1us-east-1us-west-1us-west-2The AWS region.
-
Property Value Command-Line Format --keyring-encrypted-file-data=file_nameIntroduced 5.7.21 System Variable keyring_encrypted_file_dataScope Global Dynamic Yes Type file name Default platform specificThe path name of the data file used for secure data storage by the
keyring_encrypted_fileplugin. This variable is unavailable unless that plugin is installed. The file location should be in a directory considered for use only by keyring plugins. For example, do not locate the file under the data directory.Keyring operations are transactional: The
keyring_encrypted_fileplugin uses a backup file during write operations to ensure that it can roll back to the original file if an operation fails. The backup file has the same name as the value of thekeyring_encrypted_file_datasystem variable with a suffix of.backup.Do not use the same
keyring_encrypted_filedata file for multiple MySQL instances. Each instance should have its own unique data file.The default file name is
keyring_encrypted, located in a directory that is platform specific and depends on the value of theINSTALL_LAYOUTCMake option, as shown in the following table. To specify the default directory for the file explicitly if you are building from source, use theINSTALL_MYSQLKEYRINGDIRCMake option.INSTALL_LAYOUTValueDefault keyring_encrypted_file_dataValueDEB,RPM,SLES,SVR4/var/lib/mysql-keyring/keyring_encryptedOtherwise keyring/keyring_encryptedunder theCMAKE_INSTALL_PREFIXvalueAt plugin startup, if the value assigned to
keyring_encrypted_file_dataspecifies a file that does not exist, thekeyring_encrypted_fileplugin attempts to create it (as well as its parent directory, if necessary).If you create the directory manually, it should have a restrictive mode and be accessible only to the account used to run the MySQL server. For example, on Unix and Unix-like systems, to use the
/usr/local/mysql/mysql-keyringdirectory, the following commands (executed asroot) create the directory and set its mode and ownership:cd /usr/local/mysql mkdir mysql-keyring chmod 750 mysql-keyring chown mysql mysql-keyring chgrp mysql mysql-keyring
If the
keyring_encrypted_fileplugin cannot create or access its data file, it writes an error message to the error log. If an attempted runtime assignment tokeyring_encrypted_file_dataresults in an error, the variable value remains unchanged.ImportantOnce the
keyring_encrypted_fileplugin has created its data file and started to use it, it is important not to remove the file. Loss of the file will cause data encrypted using its keys to become inaccessible. (It is permissible to rename or move the file, as long as you change the value ofkeyring_encrypted_file_datato match.) keyring_encrypted_file_passwordProperty Value Command-Line Format --keyring-encrypted-file-password=passwordIntroduced 5.7.21 System Variable keyring_encrypted_file_passwordScope Global Dynamic Yes The password used by the
keyring_encrypted_fileplugin. This variable is unavailable unless that plugin is installed. The password is mandatory for plugin operation; if not specified at server startup,keyring_encrypted_fileinitialization fails.If this variable is specified in an option file, the file should have a restrictive mode and be accessible only to the account used to run the MySQL server.
The password value cannot be displayed at runtime with
SHOW VARIABLESor the Performance Schenaglobal_variablestable because the display value is obfuscated.-
Property Value Command-Line Format --keyring-file-data=file_nameIntroduced 5.7.11 System Variable keyring_file_dataScope Global Dynamic Yes Type file name Default platform specificThe path name of the data file used for secure data storage by the
keyring_fileplugin. This variable is unavailable unless that plugin is installed. The file location should be in a directory considered for use only by keyring plugins. For example, do not locate the file under the data directory.Keyring operations are transactional: The
keyring_fileplugin uses a backup file during write operations to ensure that it can roll back to the original file if an operation fails. The backup file has the same name as the value of thekeyring_file_datasystem variable with a suffix of.backup.Do not use the same
keyring_filedata file for multiple MySQL instances. Each instance should have its own unique data file.The default file name is
keyring, located in a directory that is platform specific and depends on the value of theINSTALL_LAYOUTCMake option, as shown in the following table. To specify the default directory for the file explicitly if you are building from source, use theINSTALL_MYSQLKEYRINGDIRCMake option.INSTALL_LAYOUTValueDefault keyring_file_dataValueDEB,RPM,SLES,SVR4/var/lib/mysql-keyring/keyringOtherwise keyring/keyringunder theCMAKE_INSTALL_PREFIXvalueAt plugin startup, if the value assigned to
keyring_file_dataspecifies a file that does not exist, thekeyring_fileplugin attempts to create it (as well as its parent directory, if necessary).If you create the directory manually, it should have a restrictive mode and be accessible only to the account used to run the MySQL server. For example, on Unix and Unix-like systems, to use the
/usr/local/mysql/mysql-keyringdirectory, the following commands (executed asroot) create the directory and set its mode and ownership:cd /usr/local/mysql mkdir mysql-keyring chmod 750 mysql-keyring chown mysql mysql-keyring chgrp mysql mysql-keyring
If the
keyring_fileplugin cannot create or access its data file, it writes an error message to the error log. If an attempted runtime assignment tokeyring_file_dataresults in an error, the variable value remains unchanged.ImportantOnce the
keyring_fileplugin has created its data file and started to use it, it is important not to remove the file. For example,InnoDBuses the file to store the master key used to decrypt the data in tables that use tablespace encryption; see Section 14.7.10, “InnoDB Tablespace Encryption”. Loss of the file will cause data in such tables to become inaccessible. (It is permissible to rename or move the file, as long as you change the value ofkeyring_file_datato match.) It is recommended that you create a separate backup of the keyring data file immediately after you create the first encrypted table and before and after master key rotation. -
Property Value Command-Line Format --keyring-okv-conf-dir=dir_nameIntroduced 5.7.12 System Variable keyring_okv_conf_dirScope Global Dynamic Yes Type directory name Default empty stringThe path name of the directory that stores configuration information used by the
keyring_okvplugin. This variable is unavailable unless that plugin is installed. The location should be a directory considered for use only by thekeyring_okvplugin. For example, do not locate the directory under the data directory.The default
keyring_okv_conf_dirvalue is empty. For thekeyring_okvplugin to be able to access Oracle Key Vault, the value must be set to a directory that contains Oracle Key Vault configuration and SSL materials. For instructions on setting up this directory, see Section 6.5.4.4, “Using the keyring_okv KMIP Plugin”.The directory should have a restrictive mode and be accessible only to the account used to run the MySQL server. For example, on Unix and Unix-like systems, to use the
/usr/local/mysql/mysql-keyring-okvdirectory, the following commands (executed asroot) create the directory and set its mode and ownership:cd /usr/local/mysql mkdir mysql-keyring-okv chmod 750 mysql-keyring-okv chown mysql mysql-keyring-okv chgrp mysql mysql-keyring-okv
If the value assigned to
keyring_okv_conf_dirspecifies a directory that does not exist, or that does not contain configuration information that enables a connection to Oracle Key Vault to be established,keyring_okvwrites an error message to the error log. If an attempted runtime assignment tokeyring_okv_conf_dirresults in an error, the variable value and keyring operation remain unchanged. -
Property Value Introduced 5.7.21 System Variable keyring_operationsScope Global Dynamic Yes Type boolean Default ONWhether keyring operations are enabled. This variable is used during key migration operations. See Section 6.5.4.6, “Migrating Keys Between Keyring Keystores”.
- 6.5.5.1 Audit Log Components
- 6.5.5.2 Installing or Uninstalling MySQL Enterprise Audit
- 6.5.5.3 MySQL Enterprise Audit Security Considerations
- 6.5.5.4 Audit Log File Formats
- 6.5.5.5 Audit Log Logging Control
- 6.5.5.6 Audit Log Filtering
- 6.5.5.7 Legacy Mode Audit Log Filtering
- 6.5.5.8 Audit Log Reference
- 6.5.5.9 Audit Log Restrictions
MySQL Enterprise Audit is an extension included in MySQL Enterprise Edition, a commercial product. To learn more about commercial products, see http://www.mysql.com/products/.
MySQL Enterprise Edition includes MySQL Enterprise Audit, implemented using a server plugin named
audit_log. MySQL Enterprise Audit uses the open MySQL Audit
API to enable standard, policy-based monitoring, logging, and
blocking of connection and query activity executed on specific
MySQL servers. Designed to meet the Oracle audit specification,
MySQL Enterprise Audit provides an out of box, easy to use auditing and
compliance solution for applications that are governed by both
internal and external regulatory guidelines.
When installed, the audit plugin enables MySQL Server to produce a log file containing an audit record of server activity. The log contents include when clients connect and disconnect, and what actions they perform while connected, such as which databases and tables they access.
After you install the audit plugin (see
Section 6.5.5.2, “Installing or Uninstalling MySQL Enterprise Audit”), it writes an audit log
file. By default, the file is named audit.log
in the server data directory. To change the name of the file, set
the audit_log_file system
variable at server startup.
By default, audit log file contents are written in new-style XML
format, without compression or encryption. To select the file
format, set the audit_log_format
system variable at server startup. For details on file format and
contents, see Section 6.5.5.4, “Audit Log File Formats”.
For more information about controlling how logging occurs, including audit log file naming and format selection, see Section 6.5.5.5, “Audit Log Logging Control”. To perform filtering of audited events, see Section 6.5.5.6, “Audit Log Filtering”. For descriptions of the parameters used to configure the audit log plugin, see Section 6.5.5.8.4, “Audit Log Options and Variables”.
If the audit log plugin is enabled, the Performance Schema (see Chapter 25, MySQL Performance Schema) has instrumentation for it. To identify the relevant instruments, use this query:
SELECT NAME FROM performance_schema.setup_instruments WHERE NAME LIKE '%/alog/%';
MySQL Enterprise Audit is based on the audit log plugin and related components:
A server-side plugin named
audit_logexamines auditable events and determines whether to write them to the audit log.User-defined functions enable manipulation of filtering definitions that control logging behavior, the encryption password, and log file reading.
Tables in the
mysqlsystem database provide persistent storage of filter and user account data.System variables enable audit log configuration and status variables provide runtime operational information.
Prior to MySQL 5.7.13, MySQL Enterprise Audit consists only of the
audit_log plugin and operates in legacy
mode. See Section 6.5.5.7, “Legacy Mode Audit Log Filtering”.
This section describes how to install or uninstall MySQL Enterprise Audit, which is implemented using the audit log plugin and related components described in Section 6.5.5.1, “Audit Log Components”. For general information about installing plugins, see Section 5.5.1, “Installing and Uninstalling Plugins”.
If installed, the audit_log plugin involves
some minimal overhead even when disabled. To avoid this
overhead, do not install MySQL Enterprise Audit unless you plan to use it.
To be usable by the server, the plugin library file must be
located in the MySQL plugin directory (the directory named by
the plugin_dir system
variable). If necessary, set the value of
plugin_dir at server startup to
tell the server the plugin directory location.
The instructions here apply for MySQL 5.7.13 or higher. For MySQL versions prior to 5.7.13, see Installing MySQL Enterprise Audit in MySQL 5.6 Reference Manual.
Also, prior to MySQL 5.7.13, MySQL Enterprise Audit consists only of the
audit_log plugin and includes none of the
other components described in
Section 6.5.5.1, “Audit Log Components”. As of MySQL 5.7.13, if
the audit_log plugin is already installed
from a version of MySQL prior to 5.7.13, uninstall it using
the following statement and restart the server before
installing the current version:
UNINSTALL PLUGIN audit_log;
To install MySQL Enterprise Audit, look in the share
directory of your MySQL installation and choose the script that
is appropriate for your platform. The available scripts differ
in the suffix used to refer to the plugin library file:
audit_log_filter_win_install.sql: Choose this script for Windows systems that use.dllas the file name suffix.audit_log_filter_linux_install.sql: Choose this script for Linux and similar systems that use.soas the file name suffix.
Run the script as follows. The example here uses the Linux installation script. Make the appropriate substitution for your system.
shell>mysql -u root -p < audit_log_filter_linux_install.sqlEnter password:(enter root password here)
As of MySQL 5.7.21, for a new installation of MySQL Enterprise Audit,
InnoDB is used instead of
MyISAM for the audit log tables. For
upgrades to an installation for which MySQL Enterprise Audit is already
installed, it is recommended that you alter the audit log
tables to use InnoDB:
ALTER TABLE mysql.audit_log_user ENGINE=InnoDB; ALTER TABLE mysql.audit_log_filter ENGINE=InnoDB;
To verify plugin installation, examine the
INFORMATION_SCHEMA.PLUGINS table or
use the SHOW PLUGINS statement
(see Section 5.5.2, “Obtaining Server Plugin Information”). For
example:
mysql>SELECT PLUGIN_NAME, PLUGIN_STATUSFROM INFORMATION_SCHEMA.PLUGINSWHERE PLUGIN_NAME LIKE 'audit%';+-------------+---------------+ | PLUGIN_NAME | PLUGIN_STATUS | +-------------+---------------+ | audit_log | ACTIVE | +-------------+---------------+
If the plugin fails to initialize, check the server error log for diagnostic messages.
After MySQL Enterprise Audit is installed, you can use the
--audit-log option for subsequent server
startups to control audit_log plugin
activation. For example, to prevent the plugin from being
removed at runtime, use this option:
[mysqld] audit-log=FORCE_PLUS_PERMANENT
If it is desired to prevent the server from running without the
audit plugin, use --audit-log
with a value of FORCE or
FORCE_PLUS_PERMANENT to force server startup
to fail if the plugin does not initialize successfully.
By default, rule-based audit log filtering logs no auditable events for any users. This differs from legacy audit log behavior (prior to MySQL 5.7.13), which logs all auditable events for all users. Should you wish to produce log-everything behavior with rule-based filtering, create a simple filter to enable logging and assign it to the default account:
SELECT audit_log_filter_set_filter('log_all', '{ "filter": { "log": true } }');
SELECT audit_log_filter_set_user('%', 'log_all');
The filter assigned to % is used for
connections from any account that has no explicitly assigned
filter (which initially is true for all accounts).
Once installed as just described, MySQL Enterprise Audit remains installed until uninstalled. To remove it, execute the following statements:
DROP TABLE IF EXISTS mysql.audit_log_filter; DROP TABLE IF EXISTS mysql.audit_log_user; UNINSTALL PLUGIN audit_log; DROP FUNCTION audit_log_filter_set_filter; DROP FUNCTION audit_log_filter_remove_filter; DROP FUNCTION audit_log_filter_set_user; DROP FUNCTION audit_log_filter_remove_user; DROP FUNCTION audit_log_filter_flush; DROP FUNCTION audit_log_encryption_password_get; DROP FUNCTION audit_log_encryption_password_set; DROP FUNCTION audit_log_read; DROP FUNCTION audit_log_read_bookmark;
By default, contents of audit log files produced by the audit
log plugin are not encrypted and may contain sensitive
information, such as the text of SQL statements. For security
reasons, audit log files should be written to a directory
accessible only to the MySQL server and to users with a
legitimate reason to view the log. The default file name is
audit.log in the data directory. This can
be changed by setting the
audit_log_file system variable
at server startup. Other audit log files may exist due to log
rotation.
For additional security, enable audit log file encryption. See Audit Log File Encryption.
The MySQL server calls the audit log plugin to write an audit
record to its log file whenever an auditable event occurs.
Typically the first audit record written after plugin startup
contains the server description and startup options. Elements
following that one represent events such as client connect and
disconnect events, executed SQL statements, and so forth. Only
top-level statements are logged, not statements within stored
programs such as triggers or stored procedures. Contents of
files referenced by statements such as
LOAD
      DATA
INFILE are not logged.
To select the logging format that the audit log plugin uses to
write its log file, set the
audit_log_format system
variable at server startup. These formats are available:
Old-style XML format (
audit_log_format=OLD): The original audit logging format used by default in older MySQL series.New-style XML format (
audit_log_format=NEW): An XML format that has better compatibility with Oracle Audit Vault than old-style XML format. MySQL 5.7 uses new-style XML format by default.JSON format (
audit_log_format=JSON)
By default, audit log file contents are written in new-style XML format, without compression or encryption.
For information about issues to consider when changing the log format, see Audit Log File Format.
The following sections describe the available audit logging formats:
Here is a sample log file in old-style XML format
(audit_log_format=OLD),
reformatted slightly for readability:
<?xml version="1.0" encoding="utf-8"?>
<AUDIT>
<AUDIT_RECORD
TIMESTAMP="2017-10-16T14:25:00 UTC"
RECORD_ID="1_2017-10-16T14:25:00"
NAME="Audit"
SERVER_ID="1"
VERSION="1"
STARTUP_OPTIONS="--port=3306"
OS_VERSION="i686-Linux"
MYSQL_VERSION="5.7.21-log"/>
<AUDIT_RECORD
TIMESTAMP="2017-10-16T14:25:24 UTC"
RECORD_ID="2_2017-10-16T14:25:00"
NAME="Connect"
CONNECTION_ID="4"
STATUS="0"
STATUS_CODE="0"
USER="root"
OS_LOGIN=""
HOST="localhost"
IP="127.0.0.1"
COMMAND_CLASS="connect"
CONNECTION_TYPE="SSL/TLS"
PRIV_USER="root"
PROXY_USER=""
DB="test"/>
...
<AUDIT_RECORD
TIMESTAMP="2017-10-16T14:25:24 UTC"
RECORD_ID="6_2017-10-16T14:25:00"
NAME="Query"
CONNECTION_ID="4"
STATUS="0"
STATUS_CODE="0"
USER="root[root] @ localhost [127.0.0.1]"
OS_LOGIN=""
HOST="localhost"
IP="127.0.0.1"
COMMAND_CLASS="drop_table"
SQLTEXT="DROP TABLE IF EXISTS t"/>
...
<AUDIT_RECORD
TIMESTAMP="2017-10-16T14:25:24 UTC"
RECORD_ID="8_2017-10-16T14:25:00"
NAME="Quit"
CONNECTION_ID="4"
STATUS="0"
STATUS_CODE="0"
USER="root"
OS_LOGIN=""
HOST="localhost"
IP="127.0.0.1"
COMMAND_CLASS="connect"
CONNECTION_TYPE="SSL/TLS"/>
<AUDIT_RECORD
TIMESTAMP="2017-10-16T14:25:32 UTC"
RECORD_ID="12_2017-10-16T14:25:00"
NAME="NoAudit"
SERVER_ID="1"/>
</AUDIT>
The audit log file is written as XML, using UTF-8 (up to 4
bytes per character). The root element is
<AUDIT>. The root element contains
<AUDIT_RECORD> elements, each of
which provides information about an audited event. When the
audit log plugin begins writing a new log file, it writes the
XML declaration and opening <AUDIT>
root element tag. When the plugin closes a log file, it writes
the closing </AUDIT> root element
tag. The closing tag is not present while the file is open.
Attributes of <AUDIT_RECORD> elements
have these characteristics:
Some attributes appear in every
<AUDIT_RECORD>element. Others are optional and may appear depending on the audit record type.Order of attributes within an
<AUDIT_RECORD>element is not guaranteed.Attribute values are not fixed length. Long values may be truncated as indicated in the attribute descriptions given later.
The
<,>,", and&characters are encoded as<,>,", and&, respectively. NUL bytes (U+00) are encoded as the?character.Characters not valid as XML characters are encoded using numeric character references. Valid XML characters are:
#x9 | #xA | #xD | [#x20-#xD7FF] | [#xE000-#xFFFD] | [#x10000-#x10FFFF]
The following attributes are mandatory in every
<AUDIT_RECORD> element:
NAMEA string representing the type of instruction that generated the audit event, such as a command that the server received from a client.
Example:
NAME="Query"Some common
NAMEvalues:Audit When auditing starts, which may be server startup time Connect When a client connects, also known as logging in Query An SQL statement (executed directly) Prepare Preparation of an SQL statement; usually followed by Execute Execute Execution of an SQL statement; usually follows Prepare Shutdown Server shutdown Quit When a client disconnects NoAudit Auditing has been turned off
The possible values are
Audit,Binlog Dump,Change user,Close stmt,Connect Out,Connect,Create DB,Daemon,Debug,Delayed insert,Drop DB,Execute,Fetch,Field List,Init DB,Kill,Long Data,NoAudit,Ping,Prepare,Processlist,Query,Quit,Refresh,Register Slave,Reset stmt,Set option,Shutdown,Sleep,Statistics,Table Dump,Time.With the exception of
"Audit"and"NoAudit", these values correspond to theCOM_command values listed in thexxxmy_command.hheader file. For example,"Create DB"and"Change user"correspond toCOM_CREATE_DBandCOM_CHANGE_USER, respectively.RECORD_IDA unique identifier for the audit record. The value is composed from a sequence number and timestamp, in the format
SEQ_TIMESTAMPYYYY-MM-DDThh:mm:ssExample:
RECORD_ID="12_2017-10-16T14:25:00"TIMESTAMPA string representing a UTC value in
YYYY-MM-DDThh:mm:ssUTCTIMESTAMPvalue occurring after the statement finishes, not when it was received.Example:
TIMESTAMP="2017-10-16T14:25:32 UTC"
The following attributes are optional in
<AUDIT_RECORD> elements. Many of them
occur only for elements with specific values of the
NAME attribute.
COMMAND_CLASSA string that indicates the type of action performed.
Example:
COMMAND_CLASS="drop_table"The values correspond to the
statement/sql/command counters; for example,xxxxxxisdrop_tableandselectforDROP TABLEandSELECTstatements, respectively. The following statement displays the possible names:SELECT REPLACE(EVENT_NAME, 'statement/sql/', '') AS name FROM performance_schema.events_statements_summary_global_by_event_name WHERE EVENT_NAME LIKE 'statement/sql/%' ORDER BY name;
CONNECTION_IDAn unsigned integer representing the client connection identifier. This is the same as the value returned by the
CONNECTION_ID()function within the session.Example:
CONNECTION_ID="127"CONNECTION_TYPEThe security state of the connection to the server. Permitted values are
TCP/IP(TCP/IP connection established without encryption),SSL/TLS(TCP/IP connection established with encryption),Socket(Unix socket file connection),Named Pipe(Windows named pipe connection), andShared Memory(Windows shared memory connection).Example:
CONNECTION_TYPE="SSL/TLS"DBA string representing the default database name.
Example:
DB="test"HOSTA string representing the client host name.
Example:
HOST="localhost"IPA string representing the client IP address.
Example:
IP="127.0.0.1"MYSQL_VERSIONA string representing the MySQL server version. This is the same as the value of the
VERSION()function orversionsystem variable.Example:
MYSQL_VERSION="5.7.21-log"OS_LOGINA string representing the external user name used during the authentication process, as set by the plugin used to authenticate the client. With native (built-in) MySQL authentication, or if the plugin does not set the value, this attribute is empty. The value is the same as that of the
external_usersystem variable (see Section 6.3.10, “Proxy Users”).Example:
OS_LOGIN="jeffrey"OS_VERSIONA string representing the operating system on which the server was built or is running.
Example:
OS_VERSION="x86_64-Linux"PRIV_USERA string representing the user that the server authenticated the client as. This is the user name that the server uses for privilege checking, and it may differ from the
USERvalue.Example:
PRIV_USER="jeffrey"PROXY_USERA string representing the proxy user (see Section 6.3.10, “Proxy Users”). The value is empty if user proxying is not in effect.
Example:
PROXY_USER="developer"SERVER_IDAn unsigned integer representing the server ID. This is the same as the value of the
server_idsystem variable.Example:
SERVER_ID="1"SQLTEXTA string representing the text of an SQL statement. The value can be empty. Long values may be truncated. The string, like the audit log file itself, is written using UTF-8 (up to 4 bytes per character), so the value may be the result of conversion. For example, the original statement might have been received from the client as an SJIS string.
Example:
SQLTEXT="DELETE FROM t1"STARTUP_OPTIONSA string representing the options that were given on the command line or in option files when the MySQL server was started.
Example:
STARTUP_OPTIONS="--port=3306 --log-output=FILE"STATUSAn unsigned integer representing the command status: 0 for success, nonzero if an error occurred. This is the same as the value of the
mysql_errno()C API function. See the description forSTATUS_CODEfor information about how it differs fromSTATUS.The audit log does not contain the SQLSTATE value or error message. To see the associations between error codes, SQLSTATE values, and messages, see Section B.3, “Server Error Codes and Messages”.
Warnings are not logged.
Example:
STATUS="1051"STATUS_CODEAn unsigned integer representing the command status: 0 for success, 1 if an error occurred.
The
STATUS_CODEvalue differs from theSTATUSvalue:STATUS_CODEis 0 for success and 1 for error, which is compatible with the EZ_collector consumer for Audit Vault.STATUSis the value of themysql_errno()C API function. This is 0 for success and nonzero for error, and thus is not necessarily 1 for error.Example:
STATUS_CODE="0"USERA string representing the user name sent by the client. This may differ from the
PRIV_USERvalue.VERSIONAn unsigned integer representing the version of the audit log file format.
Example:
VERSION="1"
Here is a sample log file in new-style XML format
(audit_log_format=NEW),
reformatted slightly for readability:
<?xml version="1.0" encoding="utf-8"?>
<AUDIT>
<AUDIT_RECORD>
<TIMESTAMP>2017-10-16T14:06:33 UTC</TIMESTAMP>
<RECORD_ID>1_2017-10-16T14:06:33</RECORD_ID>
<NAME>Audit</NAME>
<SERVER_ID>1</SERVER_ID>
<VERSION>1</VERSION>
<STARTUP_OPTIONS>/usr/local/mysql/bin/mysqld
--socket=/usr/local/mysql/mysql.sock
--port=3306</STARTUP_OPTIONS>
<OS_VERSION>i686-Linux</OS_VERSION>
<MYSQL_VERSION>5.7.21-log</MYSQL_VERSION>
</AUDIT_RECORD>
<AUDIT_RECORD>
<TIMESTAMP>2017-10-16T14:09:38 UTC</TIMESTAMP>
<RECORD_ID>2_2017-10-16T14:06:33</RECORD_ID>
<NAME>Connect</NAME>
<CONNECTION_ID>5</CONNECTION_ID>
<STATUS>0</STATUS>
<STATUS_CODE>0</STATUS_CODE>
<USER>root</USER>
<OS_LOGIN/>
<HOST>localhost</HOST>
<IP>127.0.0.1</IP>
<COMMAND_CLASS>connect</COMMAND_CLASS>
<CONNECTION_TYPE>SSL/TLS</CONNECTION_TYPE>
<PRIV_USER>root</PRIV_USER>
<PROXY_USER/>
<DB>test</DB>
</AUDIT_RECORD>
...
<AUDIT_RECORD>
<TIMESTAMP>2017-10-16T14:09:38 UTC</TIMESTAMP>
<RECORD_ID>6_2017-10-16T14:06:33</RECORD_ID>
<NAME>Query</NAME>
<CONNECTION_ID>5</CONNECTION_ID>
<STATUS>0</STATUS>
<STATUS_CODE>0</STATUS_CODE>
<USER>root[root] @ localhost [127.0.0.1]</USER>
<OS_LOGIN/>
<HOST>localhost</HOST>
<IP>127.0.0.1</IP>
<COMMAND_CLASS>drop_table</COMMAND_CLASS>
<SQLTEXT>DROP TABLE IF EXISTS t</SQLTEXT>
</AUDIT_RECORD>
...
<AUDIT_RECORD>
<TIMESTAMP>2017-10-16T14:09:39 UTC</TIMESTAMP>
<RECORD_ID>8_2017-10-16T14:06:33</RECORD_ID>
<NAME>Quit</NAME>
<CONNECTION_ID>5</CONNECTION_ID>
<STATUS>0</STATUS>
<STATUS_CODE>0</STATUS_CODE>
<USER>root</USER>
<OS_LOGIN/>
<HOST>localhost</HOST>
<IP>127.0.0.1</IP>
<COMMAND_CLASS>connect</COMMAND_CLASS>
<CONNECTION_TYPE>SSL/TLS</CONNECTION_TYPE>
</AUDIT_RECORD>
...
<AUDIT_RECORD>
<TIMESTAMP>2017-10-16T14:09:43 UTC</TIMESTAMP>
<RECORD_ID>11_2017-10-16T14:06:33</RECORD_ID>
<NAME>Quit</NAME>
<CONNECTION_ID>6</CONNECTION_ID>
<STATUS>0</STATUS>
<STATUS_CODE>0</STATUS_CODE>
<USER>root</USER>
<OS_LOGIN/>
<HOST>localhost</HOST>
<IP>127.0.0.1</IP>
<COMMAND_CLASS>connect</COMMAND_CLASS>
<CONNECTION_TYPE>SSL/TLS</CONNECTION_TYPE>
</AUDIT_RECORD>
<AUDIT_RECORD>
<TIMESTAMP>2017-10-16T14:09:45 UTC</TIMESTAMP>
<RECORD_ID>12_2017-10-16T14:06:33</RECORD_ID>
<NAME>NoAudit</NAME>
<SERVER_ID>1</SERVER_ID>
</AUDIT_RECORD>
</AUDIT>
The audit log file is written as XML, using UTF-8 (up to 4
bytes per character). The root element is
<AUDIT>. The root element contains
<AUDIT_RECORD> elements, each of
which provides information about an audited event. When the
audit log plugin begins writing a new log file, it writes the
XML declaration and opening <AUDIT>
root element tag. When the plugin closes a log file, it writes
the closing </AUDIT> root element
tag. The closing tag is not present while the file is open.
Elements within <AUDIT_RECORD>
elements have these characteristics:
Some elements appear in every
<AUDIT_RECORD>element. Others are optional and may appear depending on the audit record type.Order of elements within an
<AUDIT_RECORD>element is not guaranteed.Element values are not fixed length. Long values may be truncated as indicated in the element descriptions given later.
The
<,>,", and&characters are encoded as<,>,", and&, respectively. NUL bytes (U+00) are encoded as the?character.Characters not valid as XML characters are encoded using numeric character references. Valid XML characters are:
#x9 | #xA | #xD | [#x20-#xD7FF] | [#xE000-#xFFFD] | [#x10000-#x10FFFF]
The following elements are mandatory in every
<AUDIT_RECORD> element:
<NAME>A string representing the type of instruction that generated the audit event, such as a command that the server received from a client.
Example:
<NAME>Query</NAME>
Some common
<NAME>values:Audit When auditing starts, which may be server startup time Connect When a client connects, also known as logging in Query An SQL statement (executed directly) Prepare Preparation of an SQL statement; usually followed by Execute Execute Execution of an SQL statement; usually follows Prepare Shutdown Server shutdown Quit When a client disconnects NoAudit Auditing has been turned off
The possible values are
Audit,Binlog Dump,Change user,Close stmt,Connect Out,Connect,Create DB,Daemon,Debug,Delayed insert,Drop DB,Execute,Fetch,Field List,Init DB,Kill,Long Data,NoAudit,Ping,Prepare,Processlist,Query,Quit,Refresh,Register Slave,Reset stmt,Set option,Shutdown,Sleep,Statistics,Table Dump,Time.With the exception of
AuditandNoAudit, these values correspond to theCOM_command values listed in thexxxmy_command.hheader file. For example,Create DBandChange usercorrespond toCOM_CREATE_DBandCOM_CHANGE_USER, respectively.<RECORD_ID>A unique identifier for the audit record. The value is composed from a sequence number and timestamp, in the format
SEQ_TIMESTAMPYYYY-MM-DDThh:mm:ssExample:
<RECORD_ID>12_2017-10-16T14:06:33</RECORD_ID>
<TIMESTAMP>A string representing a UTC value in
YYYY-MM-DDThh:mm:ssUTC<TIMESTAMP>value occurring after the statement finishes, not when it was received.Example:
<TIMESTAMP>2017-10-16T14:09:45 UTC</TIMESTAMP>
The following elements are optional in
<AUDIT_RECORD> elements. Many of them
occur only with specific <NAME>
element values.
<COMMAND_CLASS>A string that indicates the type of action performed.
Example:
<COMMAND_CLASS>drop_table</COMMAND_CLASS>
The values correspond to the
statement/sql/command counters; for example,xxxxxxisdrop_tableandselectforDROP TABLEandSELECTstatements, respectively. The following statement displays the possible names:SELECT REPLACE(EVENT_NAME, 'statement/sql/', '') AS name FROM performance_schema.events_statements_summary_global_by_event_name WHERE EVENT_NAME LIKE 'statement/sql/%' ORDER BY name;
<CONNECTION_ID>An unsigned integer representing the client connection identifier. This is the same as the value returned by the
CONNECTION_ID()function within the session.Example:
<CONNECTION_ID>127</CONNECTION_ID>
<CONNECTION_TYPE>The security state of the connection to the server. Permitted values are
TCP/IP(TCP/IP connection established without encryption),SSL/TLS(TCP/IP connection established with encryption),Socket(Unix socket file connection),Named Pipe(Windows named pipe connection), andShared Memory(Windows shared memory connection).Example:
<CONNECTION_TYPE>SSL/TLS</CONNECTION_TYPE>
<DB>A string representing the default database name.
Example:
<DB>test</DB>
<HOST>A string representing the client host name.
Example:
<HOST>localhost</HOST>
<IP>A string representing the client IP address.
Example:
<IP>127.0.0.1</IP>
<MYSQL_VERSION>A string representing the MySQL server version. This is the same as the value of the
VERSION()function orversionsystem variable.Example:
<MYSQL_VERSION>5.7.21-log</MYSQL_VERSION>
<OS_LOGIN>A string representing the external user name used during the authentication process, as set by the plugin used to authenticate the client. With native (built-in) MySQL authentication, or if the plugin does not set the value, this element is empty. The value is the same as that of the
external_usersystem variable (see Section 6.3.10, “Proxy Users”).Example:
<OS_LOGIN>jeffrey</OS_LOGIN>
<OS_VERSION>A string representing the operating system on which the server was built or is running.
Example:
<OS_VERSION>x86_64-Linux</OS_VERSION>
<PRIV_USER>A string representing the user that the server authenticated the client as. This is the user name that the server uses for privilege checking, and may differ from the
<USER>value.Example:
<PRIV_USER>jeffrey</PRIV_USER>
<PROXY_USER>A string representing the proxy user (see Section 6.3.10, “Proxy Users”). The value is empty if user proxying is not in effect.
Example:
<PROXY_USER>developer</PROXY_USER>
<SERVER_ID>An unsigned integer representing the server ID. This is the same as the value of the
server_idsystem variable.Example:
<SERVER_ID>1</SERVER_ID>
<SQLTEXT>A string representing the text of an SQL statement. The value can be empty. Long values may be truncated. The string, like the audit log file itself, is written using UTF-8 (up to 4 bytes per character), so the value may be the result of conversion. For example, the original statement might have been received from the client as an SJIS string.
Example:
<SQLTEXT>DELETE FROM t1</SQLTEXT>
<STARTUP_OPTIONS>A string representing the options that were given on the command line or in option files when the MySQL server was started. The first option is the path to the server executable.
Example:
<STARTUP_OPTIONS>/usr/local/mysql/bin/mysqld --port=3306 --log-output=FILE</STARTUP_OPTIONS>
<STATUS>An unsigned integer representing the command status: 0 for success, nonzero if an error occurred. This is the same as the value of the
mysql_errno()C API function. See the description for<STATUS_CODE>for information about how it differs from<STATUS>.The audit log does not contain the SQLSTATE value or error message. To see the associations between error codes, SQLSTATE values, and messages, see Section B.3, “Server Error Codes and Messages”.
Warnings are not logged.
Example:
<STATUS>1051</STATUS>
<STATUS_CODE>An unsigned integer representing the command status: 0 for success, 1 if an error occurred.
The
STATUS_CODEvalue differs from theSTATUSvalue:STATUS_CODEis 0 for success and 1 for error, which is compatible with the EZ_collector consumer for Audit Vault.STATUSis the value of themysql_errno()C API function. This is 0 for success and nonzero for error, and thus is not necessarily 1 for error.Example:
<STATUS_CODE>0</STATUS_CODE>
<USER>A string representing the user name sent by the client. This may differ from the
<PRIV_USER>value.Example:
<USER>root[root] @ localhost [127.0.0.1]</USER>
<VERSION>An unsigned integer representing the version of the audit log file format.
Example:
<VERSION>1</VERSION>
For JSON-format audit logging
(audit_log_format=JSON), the
log file contents form a JSON
array with each array element representing an audited event as
a JSON hash of key/value pairs.
Examples of complete event records appear later in this
section. The following is an excerpt of partial events:
[
{
"timestamp": "2018-01-15 13:50:01",
"id": 0,
"class": "audit",
"event": "startup",
...
},
{
"timestamp": "2018-01-15 15:02:32",
"id": 0,
"class": "connection",
"event": "connect",
...
},
...
{
"timestamp": "2018-01-15 17:37:26",
"id": 0,
"class": "table_access",
"event": "insert",
...
}
...
]
The audit log file is written using UTF-8 (up to 4 bytes per
character). When the audit log plugin begins writing a new log
file, it writes the opening [ array marker.
When the plugin closes a log file, it writes the closing
] array marker. The closing marker is not
present while the file is open.
Items within audit records have these characteristics:
Some items appear in every audit record. Others are optional and may appear depending on the audit record type.
Order of items within an audit record is not guaranteed.
Item values are not fixed length. Long values may be truncated as indicated in the item descriptions given later.
The
"and\characters are encoded as\"and\\, respectively.
The following examples show the JSON object formats for
different event types (as indicated by the
class and event items),
reformatted slightly for readability:
Auditing startup event:
{ "timestamp": "2018-01-15 14:21:56",
"id": 0,
"class": "audit",
"event": "startup",
"connection_id": 0,
"startup_data": { "server_id": 1,
"os_version": "i686-Linux",
"mysql_version": "5.7.21-log",
"args": ["/usr/local/mysql/bin/mysqld",
"--loose-audit-log-format=JSON",
"--log-error=log.err",
"--pid-file=mysqld.pid",
"--port=3306" ] } }
When the audit log plugin starts as a result of server startup
(as opposed to being enabled at runtime),
connection_id is set to 0, and
account and login are
not present.
Auditing shutdown event:
{ "timestamp": "2018-01-15 14:28:20",
"id": 3,
"class": "audit",
"event": "shutdown",
"connection_id": 0,
"shutdown_data": { "server_id": 1 } }
When the audit log plugin is uninstalled as a result of server
shutdown (as opposed to being disabled at runtime),
connection_id is set to 0, and
account and login are
not present.
Connect or change-user event:
{ "timestamp": "2018-01-15 14:23:18",
"id": 1,
"class": "connection",
"event": "connect",
"connection_id": 5,
"account": { "user": "root", "host": "localhost" },
"login": { "user": "root", "os": "", "ip": "::1", "proxy": "" },
"connection_data": { "connection_type": "ssl",
"status": 0,
"db": "test" } }
Disconnect event:
{ "timestamp": "2018-01-15 14:24:45",
"id": 3,
"class": "connection",
"event": "disconnect",
"connection_id": 5,
"account": { "user": "root", "host": "localhost" },
"login": { "user": "root", "os": "", "ip": "::1", "proxy": "" },
"connection_data": { "connection_type": "ssl" } }
Query event:
{ "timestamp": "2018-01-15 14:23:35",
"id": 2,
"class": "general",
"event": "status",
"connection_id": 5,
"account": { "user": "root", "host": "localhost" },
"login": { "user": "root", "os": "", "ip": "::1", "proxy": "" },
"general_data": { "command": "Query",
"sql_command": "show_variables",
"query": "SHOW VARIABLES",
"status": 0 } }
Table access event (read, delete, insert, update):
{ "timestamp": "2018-01-15 14:23:41",
"id": 0,
"class": "table_access",
"event": "insert",
"connection_id": 5,
"account": { "user": "root", "host": "localhost" },
"login": { "user": "root", "os": "", "ip": "127.0.0.1", "proxy": "" },
"table_access_data": { "db": "test",
"table": "t1",
"query": "INSERT INTO t1 (i) VALUES(1),(2),(3)",
"sql_command": "insert" } }
The items in the following list appear at the top level of
JSON-format audit records: Each item value is either a scalar
or a JSON hash. For items that
have a hash value, the description lists only the item names
within that hash. For more complete descriptions of
second-level hash items, see later in this section.
accountThe MySQL account associated with the event. The value is a hash containing these items equivalent to the value of the
CURRENT_USER()function within the section:user,host.Example:
"account": { "user": "root", "host": "localhost" }classA string representing the event class. The class defines the type of event, when taken together with the
eventitem that specifies the event subclass.Example:
"class": "connection"
The following table shows the possible combinations of
classandeventvalues.Table 6.23 Audit Log Class and Event Combinations
Class Value Permitted Event Values auditstartup,shutdownconnectionconnect,change_user,disconnectgeneralstatustable_access_dataread,delete,insert,updateconnection_dataInformation about a client connection. The value is a hash containing these items:
connection_type,status,db. This item occurs only for audit records with aclassvalue ofconnection.Example:
"connection_data": { "connection_type": "ssl", "status": 0, "db": "test" }connection_idAn unsigned integer representing the client connection identifier. This is the same as the value returned by the
CONNECTION_ID()function within the session.Example:
"connection_id": 5
eventA string representing the subclass of the event class. The subclass defines the type of event, when taken together with the
classitem that specifies the event class. For more information, see theclassitem description.Example:
"event": "connect"
general_dataInformation about an executed statement or command. The value is a hash containing these items:
command,sql_command,query,status. This item occurs only for audit records with aclassvalue ofgeneral.Example:
"general_data": { "command": "Query", "sql_command": "show_variables", "query": "SHOW VARIABLES", "status": 0 }idAn unsigned integer representing an event ID.
Example:
"id": 2
For audit records that have the same
timestampvalue, theiridvalues distinguish them and form a sequence. Within the audit log,timestamp/idpairs are unique. These pairs are bookmarks that identify event locations within the log.loginInformation indicating how a client connected to the server. The value is a hash containing these items:
user,os,ip,proxy.Example:
"login": { "user": "root", "os": "", "ip": "::1", "proxy": "" }shutdown_dataInformation pertaining to audit log plugin termination. The value is a hash containing these items:
server_idThis item occurs only for audit records withclassandeventvalues ofauditandshutdown, respectively.Example:
"shutdown_data": { "server_id": 1 }startup_dataInformation pertaining to audit log plugin initialization. The value is a hash containing these items:
server_id,os_version,mysql_version,args. This item occurs only for audit records withclassandeventvalues ofauditandstartup, respectively.Example:
"startup_data": { "server_id": 1, "os_version": "i686-Linux", "mysql_version": "5.7.21-log", "args": ["/usr/local/mysql/bin/mysqld", "--loose-audit-log-format=JSON", "--log-error=log.err", "--pid-file=mysqld.pid", "--port=3306" ] }table_access_dataInformation about an access to a table. The value is a hash containing these items:
db,table,query,sql_command, This item occurs only for audit records with aclassvalue oftable_access.Example:
"table_access_data": { "db": "test", "table": "t1", "query": "INSERT INTO t1 (i) VALUES(1),(2),(3)", "sql_command": "insert" }timestampA string representing a UTC value in
YYYY-MM-DD hh:mm:ssformat indicating the date and time when the audit event was generated. For example, the event corresponding to execution of an SQL statement received from a client has atimestampvalue occurring after the statement finishes, not when it was received.Example:
"timestamp": "2018-01-15 13:50:01"
For audit records that have the same
timestampvalue, theiridvalues distinguish them and form a sequence. Within the audit log,timestamp/idpairs are unique. These pairs are bookmarks that identify event locations within the log.
These items appear within hash values associated with top-level items of JSON-format audit records:
argsAn array of options that were given on the command line or in option files when the MySQL server was started. The first option is the path to the server executable.
Example:
"args": ["/usr/local/mysql/bin/mysqld", "--loose-audit-log-format=JSON", "--log-error=log.err", "--pid-file=mysqld.pid", "--port=3306" ]commandA string representing the type of instruction that generated the audit event, such as a command that the server received from a client.
Example:
"command": "Query"
connection_typeThe security state of the connection to the server. Permitted values are
tcp/ip(TCP/IP connection established without encryption),ssl(TCP/IP connection established with encryption),socket(Unix socket file connection),named_pipe(Windows named pipe connection), andshared_memory(Windows shared memory connection).Example:
"connection_type": "tcp/tcp"
dbA string representing a database name. For
connection_data, it is the default database. Fortable_access_data, it is the table database.Example:
"db": "test"
hostA string representing the client host name.
Example:
"host": "localhost"
ipA string representing the client IP address.
Example:
"ip": "::1"
mysql_versionA string representing the MySQL server version. This is the same as the value of the
VERSION()function orversionsystem variable.Example:
"mysql_version": "5.7.21-log"
osA string representing the external user name used during the authentication process, as set by the plugin used to authenticate the client. With native (built-in) MySQL authentication, or if the plugin does not set the value, this attribute is empty. The value is the same as that of the
external_usersystem variable. See Section 6.3.10, “Proxy Users”.Example:
"os": "jeffrey"
os_versionA string representing the operating system on which the server was built or is running.
Example:
"os_version": "i686-Linux"
proxyA string representing the proxy user (see Section 6.3.10, “Proxy Users”). The value is empty if user proxying is not in effect.
Example:
"proxy": "developer"
queryA string representing the text of an SQL statement. The value can be empty. Long values may be truncated. The string, like the audit log file itself, is written using UTF-8 (up to 4 bytes per character), so the value may be the result of conversion. For example, the original statement might have been received from the client as an SJIS string.
Example:
"query": "DELETE FROM t1"
server_idAn unsigned integer representing the server ID. This is the same as the value of the
server_idsystem variable.Example:
"server_id": 1
sql_commandA string that indicates the SQL statement type.
Example:
"sql_command": "insert"
The values correspond to the
statement/sql/command counters; for example,xxxxxxisdrop_tableandselectforDROP TABLEandSELECTstatements, respectively. The following statement displays the possible names:SELECT REPLACE(EVENT_NAME, 'statement/sql/', '') AS name FROM performance_schema.events_statements_summary_global_by_event_name WHERE EVENT_NAME LIKE 'statement/sql/%' ORDER BY name;
statusAn unsigned integer representing the command status: 0 for success, nonzero if an error occurred. This is the same as the value of the
mysql_errno()C API function.The audit log does not contain the SQLSTATE value or error message. To see the associations between error codes, SQLSTATE values, and messages, see Section B.3, “Server Error Codes and Messages”.
Warnings are not logged.
Example:
"status": 1051
tableA string representing a table name.
Example:
"table": "t1"
userA string representing a user name. The meaning differs depending on the item within which
useroccurs:Within
accountitems,useris a string representing the user that the server authenticated the client as. This is the user name that the server uses for privilege checking.Within
loginitems,useris a string representing the user name sent by the client.
Example:
"user": "root"
This section describes how to control general characteristics of audit logging, such as the file to which the audit log plugin writes events, the format of written events, and whether compression and encryption are enabled.
For additional information about the user-defined functions and system variables that affect audit logging, see Section 6.5.5.8.2, “Audit Log Functions”, and Section 6.5.5.8.4, “Audit Log Options and Variables”.
The audit log plugin can also control which audited events are written to the audit log file, based on the account from which events originate or event content. See Section 6.5.5.6, “Audit Log Filtering”.
To control the audit log file name, set the
audit_log_file system
variable at server startup. By default, the name is
audit.log in the server data directory.
For security reasons, the audit log file should be written to
a directory accessible only to the MySQL server and to users
with a legitimate reason to view the log.
As of MySQL 5.7.21, the plugin interprets the
audit_log_file value as
composed of a base name and an optional suffix. If compression
or encryption are enabled, the effective file name (the name
actually used to create the log file) differs from the
configured file name because it has additional suffixes:
If compression is enabled, the plugin adds a suffix of
.gz.If encryption is enabled, the plugin adds a suffix of
.enc.
The effective audit log file name is the resulting name after
adding possible compression and encryption suffixes to the
configured file name. For example, if the configured
audit_log_file value is
audit.log, the effective file name is one
of these values:
audit.log Not compressed or encrypted audit.log.gz Compressed audit.log.enc Encrypted audit.log.gz.enc Compressed and encrypted
Prior to MySQL 5.7.21, the configured and effective log file
names are the same. For example, if the configured
audit_log_file value is
audit.log, the audit log plugin writes to
audit.log.
The audit log plugin performs certain actions at initialization and termination time based on the audit log file name:
As of MySQL 5.7.21:
During initialization, the plugin checks whether a file with the audit log file name already exists and renames it if so. (In this case, the plugin assumes that the previous server invocation exited unexpectedly with the audit log plugin running.) The plugin then writes to a new empty audit log file.
At termination, the plugin renames the audit log file.
When renaming occurs (whether at plugin initialization or termination), the renamed file has a timestamp inserted after its base name and before its suffix. For example, if the file name is
audit.log, the plugin renames it to a value such asaudit.20180115T140633.log. The timestamp is a UTC value inYYYYMMDDThhmmss
Prior to MySQL 5.7.21, only the XML log formats are available and the plugin performs rudimentary integrity checking:
During initialization, the plugin checks whether the file ends with an
</AUDIT>tag and truncates the tag before writing any<AUDIT_RECORD>elements. If the log file exists but does not end with</AUDIT>or the</AUDIT>tag cannot be truncated, the plugin considers the file malformed and renames it. (Such renaming can occur if the server exits unexpectedly with the audit log plugin running.) The plugin then writes to a new empty audit log file.At termination, no file renaming occurs.
When renaming occurs at plugin initialization, the renamed file has
.corrupted, a timestamp, and.xmladded to the end. For example, if the file name isaudit.log, the plugin renames it to a value such asaudit.log.corrupted.15081807937726520.xml. The timestamp value is similar to a Unix timestamp, with the last 7 digits representing the fractional second part. For information about interpreting the timestamp, see Audit Log File Space Management and Name Rotation.
To control the audit log file format, set the
audit_log_format system
variable at server startup. By default, the format is
NEW (new-style XML format). For details
about each format, see
Section 6.5.5.4, “Audit Log File Formats”.
If you change
audit_log_format, it is
recommended that you also change
audit_log_file. Otherwise,
there will be two sets of log files with the same base name
but different formats.
Prior to MySQL 5.7.21, changing the value of
audit_log_format can result
in writing log entries in one format to an existing log file
that contains entries in a different format. To avoid this
issue, use the following procedure:
Stop the server.
Either change the value of the
audit_log_filesystem variable so the plugin writes to a different file, or rename the current audit log file manually.Restart the server with the new value of
audit_log_format. The audit log plugin creates a new log file and writes entries to it in the selected format.
Audit log file compression is available as of MySQL 5.7.21. Compression can be enabled for any logging format.
To control whether audit log file compression is enabled, set
the audit_log_compression
system variable at server startup. Permitted values are
NONE (no compression; the default) and
GZIP (GNU Zip compression).
If both compression and encryption are enabled, compression occurs before encryption. To recover the original file manually, first decrypt it, then uncompress it. See Audit Log File Manual Uncompression and Decryption.
Audit log file encryption is available as of MySQL 5.7.21. Encryption can be enabled for any logging format. Encryption is based on a user-defined password. To use this feature, the MySQL keyring must be enabled because audit logging uses it for password storage. Any keyring plugin can be used; for instructions, see Section 6.5.4, “The MySQL Keyring”.
To control whether audit log file encryption is enabled, set
the audit_log_encryption
system variable at server startup. Permitted values are
NONE (no encryption; the default) and
AES (AES-256-CBC cipher encryption).
To set or get the encryption password, use these user-defined functions (UDFs):
To set the encryption password, invoke
audit_log_encryption_password_set(), which stores the password in the keyring, renames the current log file, and begins a new log file encrypted with the new password. The renamed file has a timestamp inserted after its base name and before its suffix. For example, if the file name isaudit.log.enc, the plugin renames it to a value such asaudit.20180115T140633.log.enc. The timestamp is a UTC value inYYYYMMDDThhmmssPreviously written audit log files are not re-encrypted with the new password. Remember the previous password should you need to decrypt those files.
To get the current encryption password, invoke
audit_log_encryption_password_get(), which retrieves the password from the keyring.
For the first server startup after audit log encryption is
enabled, the audit log plugin automatically generates the
initial encryption password and stores it in the keyring. To
discover this password, invoke
audit_log_encryption_password_get().
For additional information about audit log encryption functions, see Section 6.5.5.8.2, “Audit Log Functions”.
If both compression and encryption are enabled, compression occurs before encryption. To recover the original file manually, first decrypt it, then uncompress it. See Audit Log File Manual Uncompression and Decryption.
Audit log files can be uncompressed and decrypted using standard tools. This should be done only for log files that have been closed and are no longer in use, not for the log file that the audit log plugin is currently writing. You can recognize closed log files because they will have been renamed by the audit log plugin to include a timestamp in the file name.
For this discussion, assume that
audit_log_file is set to
audit.log. In that case, a closed audit
log file has one of these names:
audit.timestamp.log Not compressed or encrypted audit.timestamp.log.gz Compressed audit.timestamp.log.enc Encrypted audit.timestamp.log.gz.enc Compressed and encrypted
To uncompress a compressed log file manually, use gunzip, gzip -d, or equivalent command. For example:
gunzip -c audit.timestamp.log.gz > audit.timestamp.log
To decrypt an encrypted log file manually, use the openssl command. For example:
openssl enc -d -aes-256-cbc -pass pass:password-md sha256 -in audit.timestamp.log.enc -out audit.timestamp.log
If both compression and encryption are enabled for audit
logging, compression occurs before encryption. In this case,
the file name has .gz and
.enc suffixes added, corresponding to the
order in which those operations occur. To recover the original
file manually, perform the operations in reverse. That is,
first decrypt the file, then uncompress it:
openssl enc -d -aes-256-cbc -pass pass:password-md sha256 -in audit.timestamp.log.gz.enc -out audit.timestamp.log.gz gunzip -c audit.timestamp.log.gz > audit.timestamp.log
The audit log plugin can use any of several strategies for log writes. Regardless of strategy, logging occurs on a best-effort basis, with no guarantee of consistency.
To specify a write strategy, set the
audit_log_strategy system
variable at server startup. By default, the strategy value is
ASYNCHRONOUS and the plugin logs
asynchronously to a buffer, waiting if the buffer is full.
It's possible to tell the plugin not to wait
(PERFORMANCE) or to log synchronously,
either using file system caching
(SEMISYNCHRONOUS) or forcing output with a
sync() call after each write request
(SYNCHRONOUS).
For asynchronous write strategy, the
audit_log_buffer_size system
variable is the buffer size in bytes. Set this variable at
server startup to change the buffer size. The plugin uses a
single buffer, which it allocates when it initializes and
removes when it terminates. The plugin does not allocate this
buffer for nonasynchronous write strategies.
Asynchronous logging strategy has these characteristics:
Minimal impact on server performance and scalability.
Blocking of threads that generate audit events for the shortest possible time; that is, time to allocate the buffer plus time to copy the event to the buffer.
Output goes to the buffer. A separate thread handles writes from the buffer to the log file.
With asynchronous logging, the integrity of the log file may
be compromised if a problem occurs during a write to the file
or if the plugin does not shut down cleanly (for example, in
the event that the server host exits unexpectedly). To reduce
this risk, set
audit_log_strategy to use
synchronous logging.
A disadvantage of PERFORMANCE strategy is
that it drops events when the buffer is full. For a heavily
loaded server, the audit log may have events missing.
The audit log file has the potential to grow very large and
consume a lot of disk space. To enable management of the space
used by its log files, the audit log plugin provides the
audit_log_rotate_on_size and
audit_log_flush system
variables, which control audit log file rotation and flushing.
Rotation can be done manually, or automatically based on file
size.
Manual audit log file rotation.
By default,
audit_log_rotate_on_size=0
and there is no log rotation except that which you perform
manually. In this case, the audit log plugin closes and
reopens the log file when the
audit_log_flush value
changes from disabled to enabled. Log file renaming must be
done externally to the server. Suppose that the log file
name is audit.log and you want to
maintain the three most recent log files, cycling through
the names audit.log.1.xml through
audit.log.3.xml. On Unix, perform
rotation manually like this:
From the command line, rename the current log files:
mv audit.log.2.xml audit.log.3.xml mv audit.log.1.xml audit.log.2.xml mv audit.log audit.log.1.xml
At this point, the plugin is still writing to the current log file, which has been renamed to
audit.log.1.xml.Connect to the server and flush the log file so the plugin closes it and reopens a new
audit.logfile:SET GLOBAL audit_log_flush = ON;
For JSON-format logging, renaming audit log files manually
makes them unavailable to the log-reading functions because
the audit log plugin no longer can determine that they are
part of the log file sequence (see
Audit Log File Reading). Consider setting
audit_log_rotate_on_size
greater than 0 to use size-based rotation instead.
Automatic size-based audit log file rotation.
If audit_log_rotate_on_size
is greater than 0, setting
audit_log_flush has no
effect. Instead, whenever a write to the log file causes its
size to exceed the
audit_log_rotate_on_size
value, the audit log plugin closes the file, renames it, and
opens a new log file.
The plugin renames the original file as follows:
As of MySQL 5.7.21, the renamed file has a timestamp inserted after its base name and before its suffix. For example, if the file name is
audit.log, the plugin renames it to a value such asaudit.20180115T140633.log. The timestamp is a UTC value inYYYYMMDDThhmmssPrior to MySQL 5.7.21, the renamed file has a timestamp and
.xmladded to the end. For example, if the file name isaudit.log, the plugin renames it to a value such asaudit.log.15159344437726520.xml. The timestamp value is similar to a Unix timestamp, with the last 7 digits representing the fractional second part. By inserting a decimal point, the value can be interpreted using theFROM_UNIXTIME()function:mysql>
SELECT FROM_UNIXTIME(1515934443.7726520);+-----------------------------------+ | FROM_UNIXTIME(1515934443.7726520) | +-----------------------------------+ | 2018-01-14 06:54:03.772652 | +-----------------------------------+
With size-based log file rotation, renamed log files do not rotate off the end of the name sequence. Instead, they have unique names and accumulate indefinitely. To avoid excessive space use, remove old files periodically, backing them up first as necessary.
The audit log plugin enables bookmarking and reading of JSON-format audit log files. (These capabilities do not apply to files written in other log formats.)
When the audit log plugin initializes and is configured for
JSON logging, it uses the directory containing the audit log
file (determined from the
audit_log_file value) as the
location to search for readable audit log files. To do this,
it uses the value of
audit_log_file to determine
the file base name and suffix values, then looks for files
with names that match the following pattern, where
[...] indicates optional file name parts:
basename[.timestamp].suffix[.gz][.enc]
The plugin opens each matching file, checks that it really contains JSON audit records, and sorts them using the timestamps from the first record of each file to construct a list of log files that are subject to use with the log-reading functions.
The plugin cannot include in the sequence files that were renamed manually and do not match the preceding pattern, or that were encrypted with a password different from the current password.
To read events from the audit log, use these user-defined functions (UDFs):
audit_log_read_bookmark()returns aJSONstring representing a bookmark for the most recently written audit log event. This bookmark is suitable for passing toaudit_log_read()to indicate to that function where to begin reading. Example bookmark:{ "timestamp": "2018-01-15 21:03:44", "id": 0 }audit_log_read()reads events from the audit log and returns aJSONstring containing an array of audit events.
Example audit_log_read() invocation using
the current bookmark:
mysql> SELECT audit_log_read(audit_log_read_bookmark());
+-----------------------------------------------------------------------+
| audit_log_read(audit_log_read_bookmark()) |
+-----------------------------------------------------------------------+
| [ {"timestamp":"2018-01-15 22:41:24","id":0,"class":"connection", ... |
+-----------------------------------------------------------------------+
Each event in the audit_log_read() return
value is a JSON hash, except
that the last array element may be a
JSON null
value to indicate no following events are available to read.
For example:
[
{ "timestamp": "2018-01-15 22:08:08", "id": 10,
"class": "general", "event": "status",
...
},
{
"timestamp": "2018-01-15 22:08:08", "id": 11,
"class": "connection", "event": "disconnect",
...
},
{
"timestamp": "2018-01-15 13:39:33", "id": 0,
"class": "connection", "event": "connect",
...
},
{
"timestamp": "2018-01-15 13:39:33", "id": 1,
"class": "general", "event": "status",
...
},
{
"timestamp": "2018-01-15 13:39:33", "id": 2,
"class": "connection", "event": "disconnect",
...
},
null
]
Use audit_log_read() like this:
For the first call to
audit_log_read()within a session, pass a bookmark indicating where to begin reading.If the final value of the returned array is not a
JSONnullvalue, there are more events following those just read andaudit_log_read()can be called without or with a bookmark argument. Without an argument, reading continues with the next unread event. With a bookmark argument, reading continues from the bookmark.If the final value of the returned array is a
JSONnullvalue, there are no more events left to be read and the next call toaudit_log_read()must include a bookmark argument.
A bookmark is a JSON hash that
indicates where and how much to read. The following items are
significant in the bookmark value (other items are ignored):
timestamp,id: The location within the audit log of the first event to read. Both items must be present to completely specify a position.max_array_length: The maximum number of events to read from the log. If omitted, the default is to read to the end of the log or until the read buffer is full, whichever comes first.
The result returned from either log-reading function is a
binary string. To use the string with functions that require a
nonbinary string (such as the functions that manipulate
JSON values), convert it to
utf8mb4. Suppose that a bookmark has this
value:
mysql> SELECT @mark := audit_log_read_bookmark() AS mark;
+-------------------------------------------------+
| mark |
+-------------------------------------------------+
| { "timestamp": "2018-01-15 16:10:28", "id": 2 } |
+-------------------------------------------------+
Calling audit_log_read() with that bookmark
can return multiple events. To set a limit on the number of
events read by audit_log_read(), convert
the bookmark to utf8mb4, then add to it a
max_array_length item with a value of 1.
For example, using the preceding bookmark, convert and modify
it as follows:
mysql>SET @mark = CONVERT(@mark USING utf8mb4);mysql>SET @mark := JSON_SET(@mark, '$.max_array_length', 1);mysql>SELECT @mark;+----------------------------------------------------------------------+ | @mark | +----------------------------------------------------------------------+ | {"id": 2, "timestamp": "2018-01-15 16:10:28", "max_array_length": 1} | +----------------------------------------------------------------------+
The modified bookmark, when passed to
audit_log_read(), produces a result of a
single audit record.
To set a limit on the number of bytes that
audit_log_read() reads, set the
audit_log_read_buffer_size
system variable at server startup.
For additional information about audit log-reading functions, see Section 6.5.5.8.2, “Audit Log Functions”.
This section describes how audit log filtering works as of MySQL 5.7.13 if the audit log plugin and the accompanying audit tables and UDFs are installed. If the plugin is installed but not the accompanying audit tables and UDFs, the plugin operates in legacy filtering mode, described in Section 6.5.5.7, “Legacy Mode Audit Log Filtering”. Legacy mode is filtering behavior as it was prior to MySQL 5.7.13; that is, before the introduction of rule-based filtering.
Prior to MySQL 5.7.13, the audit log plugin had the capability of controlling logging of audited events by filtering them based on the account from which events originate or event status. As of MySQL 5.7.13, filtering capabilities are extended:
Audited events can be filtered using these characteristics:
User account
Audit event class
Audit event subclass
Value of event fields such as those that indicate operation status or SQL statement executed
Audit filtering is rule based:
A filter definition creates a set of auditing rules. Definitions can be configured to include or exclude events for logging based on the characteristics just described.
As of MySQL 5.7.20, filter rules have the capability of blocking (aborting) execution of qualifying events, in addition to existing capabilities for event logging.
Multiple filters can be defined, and any given filter can be assigned to any number of user accounts.
It is possible to define a default filter to use with any user account that has no explicitly assigned filter.
Audit filters can be defined, displayed, and modified using an SQL interface based on user-defined functions (UDFs).
Audit filter definitions are stored in the tables in the
mysqlsystem database.Within a given session, the value of the read-only
audit_log_filter_idsystem variable indicates whether a filter has been assigned to the session.
By default, rule-based audit log filtering logs no auditable events for any users. To log all auditable events for all users, use the following statements, which create a simple filter to enable logging and assign it to the default account:
SELECT audit_log_filter_set_filter('log_all', '{ "filter": { "log": true } }');
SELECT audit_log_filter_set_user('%', 'log_all');
The filter assigned to % is used for
connections from any account that has no explicitly assigned
filter (which initially is true for all accounts).
The following list briefly summarizes the UDFs that implement the SQL interface for audit filtering control:
audit_log_filter_set_filter(): Define a filteraudit_log_filter_remove_filter(): Remove a filteraudit_log_filter_set_user(): Start filtering a user accountaudit_log_filter_remove_user(): Stop filtering a user accountaudit_log_filter_flush(): Flush manual changes to the filter tables to affect ongoing filtering
For usage examples and complete details about the filtering functions, see Section 6.5.5.6.1, “Using Audit Log Filtering Functions”, and Section 6.5.5.8.2, “Audit Log Functions”.
Audit log filtering functions are subject to these constraints:
To use any filtering function, the
audit_logplugin must be enabled. Otherwise, an error occurs:mysql> SELECT audit_log_filter_flush(); +----------------------------------------------------------------------------+ | audit_log_filter_flush() | +----------------------------------------------------------------------------+ | ERROR: audit_log plugin has not been installed with INSTALL PLUGIN syntax. | +----------------------------------------------------------------------------+
The audit tables must also exist or an error occurs:
mysql> SELECT audit_log_filter_flush(); +--------------------------------------------------+ | audit_log_filter_flush() | +--------------------------------------------------+ | ERROR: Could not reinitialize audit log filters. | +--------------------------------------------------+
To install the
audit_logplugin, see Section 6.5.5.2, “Installing or Uninstalling MySQL Enterprise Audit”.To use any filtering function, a user must possess the
SUPERprivilege. Otherwise, an error occurs:mysql>
SELECT audit_log_filter_flush()\G*************************** 1. row *************************** audit_log_filter_flush(): ERROR: Request ignored for 'user1'@'localhost'. SUPER_ACL needed to perform operationTo grant the
SUPERprivilege to a user account, use this statement:GRANT SUPER ON *.* TO
user;Alternatively, should you prefer to avoid granting the
SUPERprivilege while still permitting users to access specific filtering functions, “wrapper” stored programs can be defined. This technique is described in the context of keyring UDFs in Section 6.5.4.8.2, “Using General-Purpose Keyring Functions”; it can be adapted for use with filtering UDFs.The
audit_logplugin operates in legacy mode if it is installed but the accompanying audit tables and functions are not created. The plugin writes these messages to the error log at server startup:[Warning] Plugin audit_log reported: 'Failed to open the audit log filter tables.' [Warning] Plugin audit_log reported: 'Audit Log plugin supports a filtering, which has not been installed yet. Audit Log plugin will run in the legacy mode, which will be disabled in the next release.'
In legacy mode, filtering can be done based only on event account or status. For details, see Section 6.5.5.7, “Legacy Mode Audit Log Filtering”.
Before using the audit log user-defined functions (UDFs),
install them according to the instructions provided in
Section 6.5.5.2, “Installing or Uninstalling MySQL Enterprise Audit”. The
SUPER privilege is required to
use any of these functions.
The audit log filtering functions enable filtering control by providing an interface to create, modify, and remove filter definitions and assign filters to user accounts.
Filter definitions are JSON
values. For information about using
JSON data in MySQL, see
Section 11.6, “The JSON Data Type”. This section shows some simple filter
definitions. For more information about filter definitions,
see Section 6.5.5.6.2, “Writing Audit Log Filter Definitions”.
When a connection arrives, the audit log plugin determines which filter to use for the new session by searching for the user account name in the current filter assignments:
If a filter is assigned to the user, the audit log uses that filter.
Otherwise, if no user-specific filter assignment exists, but there is a filter assigned to the default account (
%), the audit log uses the default filter.Otherwise, the audit log selects no audit events from the session for processing.
If a change-user operation occurs during a session (see Section 27.8.7.3, “mysql_change_user()”), filter assignment for the session is updated using the same rules but for the new user.
By default, no accounts have a filter assigned, so no processing of auditable events occurs for any account.
Suppose that instead you want the default to be to log only
connection-related activity (for example, to see connect,
change-user, and disconnect events, but not the SQL statements
users execute while connected). To achieve this, define a
filter (shown here named log_conn_events)
that enables logging only of events in the
connection class, and assign that filter to
the default account, represented by the %
account name:
SET @f = '{ "filter": { "class": { "name": "connection" } } }';
SELECT audit_log_filter_set_filter('log_conn_events', @f);
SELECT audit_log_filter_set_user('%', 'log_conn_events');
Now the audit log uses this default account filter for connections from any account that has no explicitly defined filter.
To assign a filter explicitly to a particular user account or accounts, define the filter, then assign it to the relevant accounts:
SELECT audit_log_filter_set_filter('log_all', '{ "filter": { "log": true } }');
SELECT audit_log_filter_set_user('user1@localhost', 'log_all');
SELECT audit_log_filter_set_user('user2@localhost', 'log_all');
Now full logging is enabled for
user1@localhost and
user2@localhost. Connections from other
accounts continue to be filtered using the default account
filter.
To disassociate a user account from its current filter, either unassign the filter or assign a different filter:
Unassign the filter from the user account:
SELECT audit_log_filter_remove_user('user1@localhost');Filtering of current sessions for the account remains unaffected. Subsequent connections from the account are filtered using the default account filter if there is one, and are not logged otherwise.
Assign a different filter to the user account:
SELECT audit_log_filter_set_filter('log_nothing', '{ "filter": { "log": false } }'); SELECT audit_log_filter_set_user('user1@localhost', 'log_nothing');Filtering of current sessions for the account remains unaffected. Subsequent connections from the account are filtered using the new filter. For the filter shown here, that means no logging for new connections from
user1@localhost.
For audit log filtering, user name and host name comparisons are case-sensitive. This differs from comparisons for privilege checking, for which host name comparisons are not case-sensitive.
To remove a filter, do this:
SELECT audit_log_filter_remove_filter('log_nothing');
Removing a filter also unassigns it from any users to whom it has been assigned, including any current sessions for those users.
The filtering UDFs just described affect audit filtering
immediately and update the audit log tables in the
mysql system database that store filters
and user accounts (see Section 6.5.5.8.1, “Audit Log Tables”). It
is also possible to modify the audit log tables directly using
statements such as INSERT,
UPDATE, and
DELETE, but such changes do not
affect filtering immediately. To flush your changes and make
them operational, call
audit_log_filter_flush():
SELECT audit_log_filter_flush();
To determine whether a filter has been assigned to the current
session, check the session value of the read-only
audit_log_filter_id system
variable. If the value is 0, no filter is assigned. A nonzero
value indicates the internally maintained ID of the assigned
filter:
mysql> SELECT @@audit_log_filter_id;
+-----------------------+
| @@audit_log_filter_id |
+-----------------------+
| 2 |
+-----------------------+
Filter definitions are JSON
values. For information about using
JSON data in MySQL, see
Section 11.6, “The JSON Data Type”.
Filter definitions have this form, where
actions indicates how filtering
takes place:
{ "filter": actions }
The following discussion describes permitted constructs in filter definitions.
To explicitly enable or disable logging of all events, use a
log element in the filter:
{
"filter": { "log": true }
}
The log value can be either
true or false.
The preceding filter enables logging of all events. It is equivalent to:
{
"filter": { }
}
Logging behavior depends on the log value
and whether class or
event items are specified:
With
logspecified, its given value is used.Without
logspecified, logging istrueif noclassoreventitem is specified, andfalseotherwise (in which case,classoreventcan include their ownlogitem).
To log events of a specific class, use a
class element in the filter, with its
name field denoting the name of the class
to log:
{
"filter": {
"class": { "name": "connection" }
}
}
The name value can be
connection, general,
or table_access to log connection,
general, or table-access events, respectively.
The preceding filter enables logging of events in the
connection class. It is equivalent to the
following filter with log items made
explicit:
{
"filter": {
"log": false,
"class": { "log": true,
"name": "connection" }
}
}
To enable logging of multiple classes, define the
class value as a
JSON array element that names
the classes:
{
"filter": {
"class": [
{ "name": "connection" },
{ "name": "general" },
{ "name": "table_access" }
]
}
}
When multiple instances of a given item appear at the same level within a filter definition, the item values can be combined into a single instance of that item within an array value. The preceding definition can be written like this:
{
"filter": {
"class": [
{ "name": [ "connection", "general", "table_access" ] }
]
}
}
To select specific event subclasses, use an
event item containing a
name item that names the subclasses. The
default action for events selected by an
event item is to log them. For example,
this filter enables logging for the named event subclasses:
{
"filter": {
"class": [
{
"name": "connection",
"event": [
{ "name": "connect" },
{ "name": "disconnect" }
]
},
{ "name": "general" },
{
"name": "table_access",
"event": [
{ "name": "insert" },
{ "name": "delete" },
{ "name": "update" }
]
}
]
}
}
The event item can also contain explicit
log items to indicate whether to log
qualifying events. This event item
selects multiple events and explicitly indicates logging
behavior for them:
"event": [
{ "name": "select", "log": false },
{ "name": "insert", "log": true },
{ "name": "delete", "log": true },
{ "name": "update", "log": true }
]
As of MySQL 5.7.20, the event item can
also indicate whether to block qualifying events, if it
contains an abort item. For details, see
Blocking Execution of Specific Events.
Table 6.24, “Event Class and Subclass Combinations” describes the permitted subclass values for each event class.
Table 6.24 Event Class and Subclass Combinations
| Event Class | Event Subclass | Description |
|---|---|---|
connection |
connect |
Connection initiation (successful or unsuccessful) |
connection |
change_user |
User re-authentication with different user/password during session |
connection |
disconnect |
Connection termination |
general |
status |
General operation information |
table_access |
read |
Table read statements, such as SELECT or
INSERT
INTO ... SELECT |
table_access |
delete |
Table delete statements, such as DELETE
or TRUNCATE TABLE |
table_access |
insert |
Table insert statements, such as INSERT
or REPLACE |
table_access |
update |
Table update statements, such as UPDATE |
Table 6.25, “Log and Abort Characteristics Per Event Class and Subclass Combination” describes for each event subclass whether it can be logged or aborted.
Table 6.25 Log and Abort Characteristics Per Event Class and Subclass Combination
| Event Class | Event Subclass | Can be Logged | Can be Aborted |
|---|---|---|---|
connection |
connect |
Yes | No |
connection |
change_user |
Yes | No |
connection |
disconnect |
Yes | No |
general |
status |
Yes | No |
table_access |
read |
Yes | Yes |
table_access |
delete |
Yes | Yes |
table_access |
insert |
Yes | Yes |
table_access |
update |
Yes | Yes |
A filter can be defined in inclusive or exclusive mode:
Inclusive mode logs only explicitly specified items.
Exclusive mode logs everything but explicitly specified items.
To perform inclusive logging, disable logging globally and
enable logging for specific classes. This filter logs
connect and disconnect
events in the connection class, and
events in the general class:
{
"filter": {
"log": false,
"class": [
{
"name": "connection",
"event": [
{ "name": "connect", "log": true },
{ "name": "disconnect", "log": true }
]
},
{ "name": "general", "log": true }
]
}
}
To perform exclusive logging, enable logging globally and
disable logging for specific classes. This filter logs
everything except events in the general
class:
{
"filter": {
"log": true,
"class":
{ "name": "general", "log": false }
}
}
This filter logs change_user events in
the connection class, and
table_access events:
{
"filter": {
"log": true,
"class": [
{
"name": "connection",
"event": [
{ "name": "connect", "log": false },
{ "name": "disconnect", "log": false }
]
},
{ "name": "general", "log": false }
]
}
}
To enable logging based on specific event field values,
specify a field item within the
log item that indicates the field name
and its expected value:
{
"filter": {
"class": {
"name": "general",
"event": {
"name": "status",
"log": {
"field": { "name": "general_command.str", "value": "Query" }
}
}
}
}
}
Each event contains event class-specific fields that can be accessed from within a filter to perform custom filtering.
A connection event indicates when a connection-related activity occurs during a session, such as a user connecting to or disconnecting from the server. Table 6.26, “Connection Event Fields” indicates the permitted fields for connection events.
Table 6.26 Connection Event Fields
| Field Name | Field Type | Description |
|---|---|---|
status |
integer | Event status: 0: OK Otherwise: Failed |
connection_id |
unsigned integer | Connection ID |
user.str |
string | User name specified during authentication |
user.length |
unsigned integer | User name length |
priv_user.str |
string | Authenticated user name (account user name) |
priv_user.length |
unsigned integer | Authenticated user name length |
external_user.str |
string | External user name (provided by third-party authentication plugin) |
external_user.length |
unsigned integer | External user name length |
proxy_user.str |
string | Proxy user name |
proxy_user.length |
unsigned integer | Proxy user name length |
host.str |
string | Connected user host |
host.length |
unsigned integer | Connected user host length |
ip.str |
string | Connected user IP address |
ip.length |
unsigned integer | Connected user IP address length |
database.str |
string | Database name specified at connect time |
database.length |
unsigned integer | Database name length |
connection_type |
integer | Connection type:
or
or
or
or
or
or |
The "::
values are symbolic pseudo-constants that may be given
instead of the literal numeric values. They must be quoted
as strings and are case-sensitive.
xxx"
A general event indicates the status code of an operation and its details. Table 6.27, “General Event Fields” indicates the permitted fields for general events.
Table 6.27 General Event Fields
| Field Name | Field Type | Description |
|---|---|---|
general_error_code |
integer | Event status: 0: OK Otherwise: Failed |
general_thread_id |
unsigned integer | Connection/thread ID |
general_user.str |
string | User name specified during authentication |
general_user.length |
unsigned integer | User name length |
general_command.str |
string | Command name |
general_command.length |
unsigned integer | Command name length |
general_query.str |
string | SQL statement text |
general_query.length |
unsigned integer | SQL statement text length |
general_host.str |
string | Host name |
general_host.length |
unsigned integer | Host name length |
general_sql_command.str |
string | SQL command type name |
general_sql_command.length |
unsigned integer | SQL command type name length |
general_external_user.str |
string | External user name (provided by third-party authentication plugin) |
general_external_user.length |
unsigned integer | External user name length |
general_ip.str |
string | Connected user IP address |
general_ip.length |
unsigned integer | Connection user IP address length |
general_command.str indicates a command
name: Query, Execute,
Quit, or Change user.
A general event with the
general_command.str field set to
Query or Execute
contains general_sql_command.str set to a
value that specifies the type of SQL command:
alter_db,
alter_db_upgrade,
admin_commands, and so forth. These
values can be seen as the last components of the Performance
Schema instruments displayed by this statement:
mysql>SELECT NAME FROM performance_schema.setup_instrumentsWHERE NAME LIKE 'statement/sql/%' ORDER BY NAME;+---------------------------------------+ | NAME | +---------------------------------------+ | statement/sql/alter_db | | statement/sql/alter_db_upgrade | | statement/sql/alter_event | | statement/sql/alter_function | | statement/sql/alter_instance | | statement/sql/alter_procedure | | statement/sql/alter_server | ...
A table-access event provides information about specific table accesses. Table 6.28, “Table-Access Event Fields” indicates the permitted fields for table-access events.
Table 6.28 Table-Access Event Fields
| Field Name | Field Type | Description |
|---|---|---|
connection_id |
unsigned integer | Event connection ID |
sql_command_id |
integer | SQL command ID |
query.str |
string | SQL statement text |
query.length |
unsigned integer | SQL statement text length |
table_database.str |
string | Database name associated with event |
table_database.length |
unsigned integer | Database name length |
table_name.str |
string | Table name associated with event |
table_name.length |
unsigned integer | Table name length |
The following list shows which statements produce which table-access events:
readevent:SELECTINSERT ... SELECT(for tables referenced inSELECTclause)REPLACE ... SELECT(for tables referenced inSELECTclause)UPDATE ... WHERE(for tables referenced inWHEREclause)HANDLER ... READ
deleteevent:DELETETRUNCATE TABLE
insertevent:INSERTINSERT ... SELECT(for table referenced inINSERTclause)REPLACEREPLACE ... SELECT(for table referenced inREPLACEclauseLOAD DATA INFILELOAD XML INFILE
updateevent:UPDATEUPDATE ... WHERE(for tables referenced inUPDATEclause)
As of MySQL 5.7.20, event items can
include an abort item that indicates
whether to prevent qualifying events from executing. For
example, abort enables rules to be
written that block execution of specific SQL statements.
The abort item must appear within an
event item. For example:
"event": {
"name": qualifying event subclass names
"abort": condition
}
For event subclasses selected by the name
item, the abort action is true or false,
depending on condition
evaluation. If the condition evaluates to true, the event is
blocked. Otherwise, the event continues executing.
The condition specification can
be as simple as true or
false, or it can be more complex such
that evaluation depends on event characteristics.
This filter blocks INSERT,
UPDATE, and
DELETE statements:
{
"filter": {
"class": {
"name": "table_access",
"event": {
"name": [ "insert", "update", "delete" ],
"abort": true
}
}
}
}
This more complex filter blocks the same statements, but
only for a specific table
(finances.bank_account):
{
"filter": {
"class": {
"name": "table_access",
"event": {
"name": [ "insert", "update", "delete" ],
"abort": {
"and": [
{ "field": { "name": "table_database.str", "value": "finances" } },
{ "field": { "name": "table_name.str", "value": "bank_account" } }
]
}
}
}
}
}
Statements matched and blocked by the filter return an error to the client:
ERROR 1045 (28000): Statement was aborted by an audit log filter
Not all events can be blocked (see Table 6.25, “Log and Abort Characteristics Per Event Class and Subclass Combination”). For an event that cannot, the audit log writes a warning to the error log rather than blocking it.
For attempts to define a filter in which the
abort item appears elsewhere than in an
event item, an error occurs.
Logical operators (and,
or, not) can be used
in log items. This permits construction
of more advanced filtering configurations:
{
"filter": {
"class": {
"name": "general",
"event": {
"name": "status",
"log": {
"or": [
{
"and": [
{ "field": { "name": "general_command.str", "value": "Query" } },
{ "field": { "name": "general_command.length", "value": 5 } }
]
},
{
"and": [
{ "field": { "name": "general_command.str", "value": "Execute" } },
{ "field": { "name": "general_command.length", "value": 7 } }
]
}
]
}
}
}
}
}
To refer to a predefined variable in a
log condition, use a
variable item, which tests equality
against a given value:
{
"filter": {
"class": {
"name": "general",
"event": {
"name": "status",
"log": {
"variable": {
"name": "audit_log_connection_policy_value", "value": "::none"
}
}
}
}
}
}
Each predefined variable corresponds to a system variable.
By writing a filter that tests a predefined variable, you
can modify filter operation by setting the corresponding
system variable, without having to redefine the filter. For
example, by writing a filter that tests the value of the
audit_log_connection_policy_value
predefined variable, you can modify filter operation by
changing the value of the
audit_log_connection_policy
system variable.
The
audit_log_
system variables are used for the legacy mode audit log (see
Section 6.5.5.7, “Legacy Mode Audit Log Filtering”). With
rule-based audit log filtering, those variables remain
visible (for example, using xxx_policySHOW
VARIABLES), but changes to them have no effect
unless you write filters containing constructs that refer to
them.
The following list describes the permitted predefined
variables for variable items:
audit_log_connection_policy_valueThis variable corresponds to the value of the
audit_log_connection_policysystem variable. The value is an unsigned integer. Table 6.29, “audit_log_connection_policy_value Values” shows the permitted values and the correspondingaudit_log_connection_policyvalues.Table 6.29 audit_log_connection_policy_value Values
Value Corresponding audit_log_connection_policy Value 0or"::none"NONE1or"::errors"ERRORS2or"::all"ALLThe
"::values are symbolic pseudo-constants that may be given instead of the literal numeric values. They must be quoted as strings and are case-sensitive.xxx"audit_log_policy_valueThis variable corresponds to the value of the
audit_log_policysystem variable. The value is an unsigned integer. Table 6.30, “audit_log_policy_value Values” shows the permitted values and the correspondingaudit_log_policyvalues.Table 6.30 audit_log_policy_value Values
Value Corresponding audit_log_policy Value 0or"::none"NONE1or"::logins"LOGINS2or"::all"ALL3or"::queries"QUERIESThe
"::values are symbolic pseudo-constants that may be given instead of the literal numeric values. They must be quoted as strings and are case-sensitive.xxx"audit_log_statement_policy_valueThis variable corresponds to the value of the
audit_log_statement_policysystem variable. The value is an unsigned integer. Table 6.31, “audit_log_statement_policy_value Values” shows the permitted values and the correspondingaudit_log_statement_policyvalues.Table 6.31 audit_log_statement_policy_value Values
Value Corresponding audit_log_statement_policy Value 0or"::none"NONE1or"::errors"ERRORS2or"::all"ALLThe
"::values are symbolic pseudo-constants that may be given instead of the literal numeric values. They must be quoted as strings and are case-sensitive.xxx"
To refer to a predefined function in a
log condition, use a
function item, which takes
name and args values
to specify the function name and its arguments,
respectively:
{
"filter": {
"class": {
"name": "general",
"event": {
"name": "status",
"log": {
"function": {
"name": "find_in_include_list",
"args": [ { "string": [ { "field": "user.str" },
{ "string": "@"},
{ "field": "host.str" } ] } ]
}
}
}
}
}
}
The function as specified in the name
item should be the function name only, without parentheses
or the argument list. Arguments in the
args item, if there is one, must be given
in the order listed in the function description. Arguments
can refer to predefined variables, event fields, or string
or numeric constants.
The preceding filter determines whether to log
general class status
events depending on whether the current user is found in the
audit_log_include_accounts
system variable. That user is constructed using fields in
the event.
The following list describes the permitted predefined
functions for function items:
audit_log_exclude_accounts_is_null()Checks whether the
audit_log_exclude_accountssystem variable isNULL. This function can be helpful when defining filters that correspond to the legacy audit log implementation.Arguments:
None.
audit_log_include_accounts_is_null()Checks whether the
audit_log_include_accountssystem variable isNULL. This function can be helpful when defining filters that correspond to the legacy audit log implementation.Arguments:
None.
debug_sleep(millisec)Sleeps for the given number of milliseconds. This function is used during performance measurement.
debug_sleep()is available for debug builds only.Arguments:
millisec: The number of milliseconds to sleep as an unsigned integer.
find_in_exclude_list(account)Checks whether an account string exists in the audit log exclude list (the value of the
audit_log_exclude_accountssystem variable).Arguments:
account: The user account name as a string.
find_in_include_list(account)Checks whether an account string exists in the audit log include list (the value of the
audit_log_include_accountssystem variable).Arguments:
account: The user account name as a string.
string_find(text, substr)Checks whether the
substrvalue is contained in thetextvalue. This search is case-sensitive.Arguments:
text: The text string to search.substr: The substring to search for intext.
In some cases, the filter definition can be changed
dynamically. To do this, define a filter
configuration within an existing filter.
For example:
{
"filter": {
"id": "main",
"class": {
"name": "table_access",
"event": {
"name": [ "update", "delete" ],
"log": false,
"filter": {
"class": {
"name": "general",
"event" : { "name": "status",
"filter": { "ref": "main" } }
},
"activate": {
"or": [
{ "field": { "name": "table_name.str", "value": "temp_1" } },
{ "field": { "name": "table_name.str", "value": "temp_2" } }
]
}
}
}
}
}
}
A new filter is activated when the
activate element within a subfilter
evaluates to true. Using
activate in a top-level
filter is not permitted.
A new filter can be replaced with the original one by using
a ref item inside the subfilter to refer
to the original filter id.
The filter shown operates like this:
The
mainfilter waits fortable_accessevents, eitherupdateordelete.If the
updateordeletetable_accessevent occurs on thetemp_1ortemp_2table, the filter is replaced with the internal one (without anid, since there is no need to refer to it explicitly).If the end of the command is signalled (
general/statusevent), an entry is written to the audit log file and the filter is replaced with themainfilter.
The filter is useful to log statements that update or delete
anything from the temp_1 or
temp_2 tables, such as this one:
UPDATE temp_1, temp_3 SET temp_1.a=21, temp_3.a=23;
The statement generates multiple
table_access events, but the audit log
file will contain only general /
status entries.
Any id values used in the definition
are evaluated with respect only to that definition. They
have nothing to do with the value of the
audit_log_filter_id
system variable.
This section describes legacy audit log filtering, which applies under either of these circumstances:
Before MySQL 5.7.13, that is, prior to the introduction of rule-based audit log filtering described in Section 6.5.5.6, “Audit Log Filtering”.
As of MySQL 5.7.13, if the
audit_logplugin is installed but not the accompanying audit tables and UDFs needed for rule-based filtering.
The audit log plugin can filter audited events. This enables you to control whether audited events are written to the audit log file based on the account from which events originate or event status. Status filtering occurs separately for connection events and statement events.
To filter audited events based on the originating account, set one of these system variables at server startup or runtime:
audit_log_include_accounts: The accounts to include in audit logging. If this variable is set, only these accounts are audited.audit_log_exclude_accounts: The accounts to exclude from audit logging. If this variable is set, all but these accounts are audited.
The value for either variable can be NULL
or a string containing one or more comma-separated account
names, each in
user_name@host_nameNULL, in which case, no account filtering
is done and auditing occurs for all accounts.
Modifications to
audit_log_include_accounts or
audit_log_exclude_accounts
affect only connections created subsequent to the
modification, not existing connections.
Example: To enable audit logging only for the
user1 and user2 local
host account accounts, set the
audit_log_include_accounts
system variable like this:
SET GLOBAL audit_log_include_accounts = 'user1@localhost,user2@localhost';
Only one of
audit_log_include_accounts or
audit_log_exclude_accounts
can be non-NULL at a time:
If you set
audit_log_include_accounts, the server setsaudit_log_exclude_accountstoNULL.If you attempt to set
audit_log_exclude_accounts, an error occurs unlessaudit_log_include_accountsisNULL. In this case, you must first clearaudit_log_include_accountsby setting it toNULL.
-- This sets audit_log_exclude_accounts to NULL SET GLOBAL audit_log_include_accounts =value; -- This fails because audit_log_include_accounts is not NULL SET GLOBAL audit_log_exclude_accounts =value; -- To set audit_log_exclude_accounts, first set -- audit_log_include_accounts to NULL SET GLOBAL audit_log_include_accounts = NULL; SET GLOBAL audit_log_exclude_accounts =value;
If you inspect the value of either variable, be aware that
SHOW VARIABLES displays
NULL as an empty string. To avoid this, use
SELECT instead:
mysql>SHOW VARIABLES LIKE 'audit_log_include_accounts';+----------------------------+-------+ | Variable_name | Value | +----------------------------+-------+ | audit_log_include_accounts | | +----------------------------+-------+ mysql>SELECT @@audit_log_include_accounts;+------------------------------+ | @@audit_log_include_accounts | +------------------------------+ | NULL | +------------------------------+
If a user name or host name requires quoting because it
contains a comma, space, or other special character, quote it
using single quotes. If the variable value itself is quoted
with single quotes, double each inner single quote or escape
it with a backslash. The following statements each enable
audit logging for the local root account
and are equivalent, even though the quoting styles differ:
SET GLOBAL audit_log_include_accounts = 'root@localhost'; SET GLOBAL audit_log_include_accounts = '''root''@''localhost'''; SET GLOBAL audit_log_include_accounts = '\'root\'@\'localhost\''; SET GLOBAL audit_log_include_accounts = "'root'@'localhost'";
The last statement will not work if the
ANSI_QUOTES SQL mode is enabled because in
that mode double quotes signify identifier quoting, not string
quoting.
To filter audited events based on status, set the following system variables at server startup or runtime. These variables apply only for legacy audit log filtering. For JSON audit log filtering, different status variables apply; see Section 6.5.5.8.4, “Audit Log Options and Variables”.
audit_log_connection_policy: Logging policy for connection eventsaudit_log_statement_policy: Logging policy for statement events
Each variable takes a value of ALL (log all
associated events; this is the default),
ERRORS (log only failed events), or
NONE (do not log events). For example, to
log all statement events but only failed connection events,
use these settings:
SET GLOBAL audit_log_statement_policy = ALL; SET GLOBAL audit_log_connection_policy = ERRORS;
Another policy system variable,
audit_log_policy, is
available but does not afford as much control as
audit_log_connection_policy
and
audit_log_statement_policy.
It can be set only at server startup. At runtime, it is a
read-only variable. It takes a value of ALL
(log all events; this is the default),
LOGINS (log connection events),
QUERIES (log statement events), or
NONE (do not log events). For any of those
values, the audit log plugin logs all selected events without
distinction as to success or failure. Use of
audit_log_policy at startup
works as follows:
If you do not set
audit_log_policyor set it to its default ofALL, any explicit settings foraudit_log_connection_policyoraudit_log_statement_policyapply as specified. If not specified, they default toALL.If you set
audit_log_policyto a non-ALLvalue, that value takes precedence over and is used to setaudit_log_connection_policyandaudit_log_statement_policy, as indicated in the following table. If you also set either of those variables to a value other than their default ofALL, the server writes a message to the error log to indicate that their values are being overridden.Startup audit_log_policy Value Resulting audit_log_connection_policy Value Resulting audit_log_statement_policy Value LOGINSALLNONEQUERIESNONEALLNONENONENONE
The following discussion serves as a reference to MySQL Enterprise Audit components:
To install the audit log tables and functions, use the
instructions provided in
Section 6.5.5.2, “Installing or Uninstalling MySQL Enterprise Audit”. Unless those
components are installed, the audit_log
plugin operates in legacy mode. See
Section 6.5.5.7, “Legacy Mode Audit Log Filtering”.
MySQL Enterprise Audit uses tables in the mysql system
database for persistent storage of filter and user account
data. The tables can be accessed only by users with privileges
for that database. The tables use the
InnoDB storage engine
(MyISAM prior to MySQL 5.7.21).
If these tables are missing, the audit_log
plugin operates in legacy mode. See
Section 6.5.5.7, “Legacy Mode Audit Log Filtering”.
The audit_log_filter table stores filter
definitions. The table has these columns:
NAMEThe filter name.
FILTERThe filter definition associated with the filter name. Definitions are stored as
JSONvalues.
The audit_log_user table stores user
account information. The table has these columns:
USERThe user name part of an account. For an account
user1@localhost, theUSERpart isuser1.HOSTThe host name part of an account. For an account
user1@localhost, theHOSTpart islocalhost.FILTERNAMEThe name of the filter assigned to the account. The filter name associates the account with a filter defined in the
audit_log_filtertable.
This section describes, for each audit log user-defined function (UDF), its purpose, calling sequence, and return value. For information about the conditions under which these UDFs can be invoked, see Section 6.5.5.6, “Audit Log Filtering”.
Each audit log UDF returns OK for success,
ERROR:
for failure.
message
These audit log UDFs are available:
audit_log_encryption_password_get()Retrieves the current audit log encryption password as a binary string. The password is fetched from the MySQL keyring, which must be enabled or an error occurs. Any keyring plugin can be used; for instructions, see Section 6.5.4, “The MySQL Keyring”.
For additional information about audit log encryption, see Audit Log File Encryption.
Syntax:
STRING audit_log_encryption_password_get()
Arguments:
None.
Return values:
Password string for success (up to 766 bytes), or
NULLand an error for failure.Example:
mysql>
SELECT audit_log_encryption_password_get();+-------------------------------------+ | audit_log_encryption_password_get() | +-------------------------------------+ | secret | +-------------------------------------+audit_log_encryption_password_set()Sets the audit log encryption password and stores it in the MySQL keyring, which must be enabled or an error occurs. Any keyring plugin can be used; for instructions, see Section 6.5.4, “The MySQL Keyring”.
For additional information about audit log encryption, see Audit Log File Encryption.
Syntax:
INTEGER audit_log_encryption_password_set()
Arguments:
The password string. The maximum permitted length is 766 bytes.
Return values:
1 for success, 0 for failure.
Example:
mysql>
SELECT audit_log_encryption_password_set(+---------------------------------------------+ | audit_log_encryption_password_set(password);password) | +---------------------------------------------+ | 1 | +---------------------------------------------+audit_log_filter_flush()Calling any of the other filtering UDFs affects operational audit log filtering immediately and updates the audit log tables. If instead you modify the contents of those tables directly using statements such as
INSERT,UPDATE, andDELETE, the changes do not affect filtering immediately. To flush your changes and make them operational, callaudit_log_filter_flush().audit_log_filter_flush()affects all current sessions and detaches them from their previous filters. Current sessions are no longer logged unless they disconnect and reconnect, or execute a change-user operation.If this function fails, an error message is returned and the audit log is disabled until the next successful call to
audit_log_filter_flush().Syntax:
STRING audit_log_filter_flush()
Arguments:
None.
Return values:
OKfor success,ERROR:for failure.messageExample:
mysql>
SELECT audit_log_filter_flush();+--------------------------+ | audit_log_filter_flush() | +--------------------------+ | OK | +--------------------------+audit_log_filter_remove_filter()Given a filter name, removes the filter from the current set of filters. It is not an error for the filter not to exist.
If a removed filter is assigned to any user accounts, those users stop being filtered (they are removed from the
audit_log_usertable). Termination of filtering includes any current sessions for those users: They are detached from the filter and no longer logged.Syntax:
STRING audit_log_filter_remove_filter(STRING filter_name)
Arguments:
filter_name: The filter name as a string.
Return values:
OKfor success,ERROR:for failure.messageExample:
mysql>
SELECT audit_log_filter_remove_filter('SomeFilter');+----------------------------------------------+ | audit_log_filter_remove_filter('SomeFilter') | +----------------------------------------------+ | OK | +----------------------------------------------+audit_log_filter_remove_user()Given a user account name, cause the user to be no longer assigned to a filter. It is not an error if the user has no filter assigned. Filtering of current sessions for the user remains unaffected. New connections for the user are filtered using the default account filter if there is one, and are not logged otherwise.
If the name is
%, the function removes the default account filter that is used for any user account that has no explicitly assigned filter.Syntax:
STRING audit_log_filter_remove_user(STRING user_name)
Arguments:
user_name: The user account name as a string inuser_name@host_name%to represent the default account.
Return values:
OKfor success,ERROR:for failure.messageExample:
mysql>
SELECT audit_log_filter_remove_user('user1@localhost');+-------------------------------------------------+ | audit_log_filter_remove_user('user1@localhost') | +-------------------------------------------------+ | OK | +-------------------------------------------------+audit_log_filter_set_filter()Given a filter name and definition, adds the filter to the current set of filters. If the filter already exists and is used by any current sessions, those sessions are detached from the filter and are no longer logged. This occurs because the new filter definition has a new filter ID that differs from its previous ID.
Syntax:
STRING audit_log_filter_set_filter(STRING filter_name, STRING definition)
Arguments:
filter_name: The filter name as a string.definition: The filter definition as aJSONvalue.
Return values:
OKfor success,ERROR:for failure.messageExample:
mysql>
SET @f = '{ "filter": { "log": false } }';mysql>SELECT audit_log_filter_set_filter('SomeFilter', @f);+-----------------------------------------------+ | audit_log_filter_set_filter('SomeFilter', @f) | +-----------------------------------------------+ | OK | +-----------------------------------------------+audit_log_filter_set_user()Given a user account name and a filter name, assigns the filter to the user. A user can be assigned only one filter, so if the user was already assigned a filter, the assignment is replaced. Filtering of current sessions for the user remains unaffected. New connections are filtered using the new filter.
As a special case, the name
%represents the default account. The filter is used for connections from any user account that has no explicitly assigned filter.Syntax:
STRING audit_log_filter_set_user(STRING user_name, STRING filter_name)
Arguments:
user_name: The user account name as a string inuser_name@host_name%to represent the default account.filter_name: The filter name as a string.
Return values:
OKfor success,ERROR:for failure.messageExample:
mysql>
SELECT audit_log_filter_set_user('user1@localhost', 'SomeFilter');+------------------------------------------------------------+ | audit_log_filter_set_user('user1@localhost', 'SomeFilter') | +------------------------------------------------------------+ | OK | +------------------------------------------------------------+audit_log_read()Reads events from the audit log and returns a binary
JSONstring containing an array of audit events. If the audit log format is notJSON, an error occurs.Each event in the return value is a
JSONhash, except that the last array element may be aJSONnullvalue to indicate no following events are available to read.For the first call to
audit_log_read()within a session, pass a bookmark indicating where to begin reading. If the final value of the returned array is not aJSONnullvalue, there are more events following those just read andaudit_log_read()can be called without or with a bookmark argument. Without an argument, reading continues with the next unread event. With a bookmark argument, reading continues from the bookmark.If the final value of the returned array is a
JSONnullvalue, there are no more events left to be read and the next call toaudit_log_read()must include a bookmark argument.To obtain a bookmark for the most recently written event, call
audit_log_read_bookmark().For additional information about audit log-reading functions, see Audit Log File Reading.
Syntax:
STRING audit_log_read([STRING arg])
Arguments:
arg: An optional bookmark, represented as a string containing aJSONhash that indicates where and how much to read. The following items are significant in theargvalue (other items are ignored):timestamp,id: The location within the audit log of the first event to read. Both items must be present to completely specify a position.max_array_length: The maximum number of events to read from the log. If omitted, the default is to read to the end of the log or until the read buffer is full, whichever comes first.
Return values:
A binary
JSONstring containing an array of audit events for success, orNULLand an error for failure.Example:
mysql>
SELECT audit_log_read(audit_log_read_bookmark());+-----------------------------------------------------------------------+ | audit_log_read(audit_log_read_bookmark()) | +-----------------------------------------------------------------------+ | [ {"timestamp":"2018-01-15 22:41:24","id":0,"class":"connection", ... | +-----------------------------------------------------------------------+audit_log_read_bookmark()Returns a binary
JSONstring representing a bookmark for the most recently written audit log event. If the audit log format is notJSON, an error occurs.The bookmark is a
JSONhash withtimestampandiditems indicating the event position within the audit log. It is suitable for passing toaudit_log_read()to indicate to that function where to begin reading.For additional information about audit log-reading functions, see Audit Log File Reading.
Syntax:
STRING audit_log_read_bookmark()
Arguments:
None.
Return values:
A binary
JSONstring containing a bookmark for success, orNULLand an error for failure.Example:
mysql>
SELECT audit_log_read_bookmark();+-------------------------------------------------+ | audit_log_read_bookmark() | +-------------------------------------------------+ | { "timestamp": "2018-01-15 21:03:44", "id": 0 } | +-------------------------------------------------+
Table 6.32 Audit Log Option and Variable Reference
| Name | Cmd-Line | Option File | System Var | Status Var | Var Scope | Dynamic |
|---|---|---|---|---|---|---|
| audit-log | Yes | Yes | ||||
| audit_log_buffer_size | Yes | Yes | Yes | Global | No | |
| audit_log_connection_policy | Yes | Yes | Yes | Global | Yes | |
| audit_log_current_session | Yes | Both | No | |||
| Audit_log_current_size | Yes | Global | No | |||
| Audit_log_event_max_drop_size | Yes | Global | No | |||
| Audit_log_events | Yes | Global | No | |||
| Audit_log_events_filtered | Yes | Global | No | |||
| Audit_log_events_lost | Yes | Global | No | |||
| Audit_log_events_written | Yes | Global | No | |||
| audit_log_exclude_accounts | Yes | Yes | Yes | Global | Yes | |
| audit_log_file | Yes | Yes | Yes | Global | No | |
| audit_log_flush | Yes | Global | Yes | |||
| audit_log_format | Yes | Yes | Yes | Global | No | |
| audit_log_include_accounts | Yes | Yes | Yes | Global | Yes | |
| audit_log_policy | Yes | Yes | Yes | Global | No | |
| audit_log_rotate_on_size | Yes | Yes | Yes | Global | Yes | |
| audit_log_statement_policy | Yes | Yes | Yes | Global | Yes | |
| audit_log_strategy | Yes | Yes | Yes | Global | No | |
| Audit_log_total_size | Yes | Global | No | |||
| Audit_log_write_waits | Yes | Global | No |
This section describes the command options and system
variables that control operation of MySQL Enterprise Audit. If values
specified at startup time are incorrect, the
audit_log plugin may fail to initialize
properly and the server does not load it. In this case, the
server may also produce error messages for other audit log
settings because it will not recognize them.
To control the activation of the audit log plugin, use this option:
-
Property Value Command-Line Format --audit-log[=value]Introduced 5.7.9 Type enumeration Default ONValid Values ONOFFFORCEFORCE_PLUS_PERMANENTThis option controls how the server loads the
audit_logplugin at startup. It is available only if the plugin has been previously registered withINSTALL PLUGINor is loaded with--plugin-loador--plugin-load-add. See Section 6.5.5.2, “Installing or Uninstalling MySQL Enterprise Audit”.The option value should be one of those available for plugin-loading options, as described in Section 5.5.1, “Installing and Uninstalling Plugins”. For example,
--audit-log=FORCE_PLUS_PERMANENTtells the server to load the plugin and prevent it from being removed while the server is running.
If the audit log plugin is enabled, it exposes several system variables that permit control over logging:
mysql> SHOW VARIABLES LIKE 'audit_log%';
+-----------------------------+--------------+
| Variable_name | Value |
+-----------------------------+--------------+
| audit_log_buffer_size | 1048576 |
| audit_log_connection_policy | ALL |
| audit_log_current_session | OFF |
| audit_log_exclude_accounts | |
| audit_log_file | audit.log |
| audit_log_filter_id | 0 |
| audit_log_flush | OFF |
| audit_log_format | NEW |
| audit_log_include_accounts | |
| audit_log_policy | ALL |
| audit_log_rotate_on_size | 0 |
| audit_log_statement_policy | ALL |
| audit_log_strategy | ASYNCHRONOUS |
+-----------------------------+--------------+
You can set any of these variables at server startup, and some of them at runtime. Those that are available only for legacy mode audit log filtering are so noted.
-
Property Value Command-Line Format --audit-log-buffer-size=valueIntroduced 5.7.9 System Variable audit_log_buffer_sizeScope Global Dynamic No Type (64-bit platforms) integer Type (32-bit platforms) integer Default (64-bit platforms) 1048576Default (32-bit platforms) 1048576Minimum (64-bit platforms) 4096Minimum (32-bit platforms) 4096Maximum (64-bit platforms) 18446744073709547520Maximum (32-bit platforms) 4294967295When the audit log plugin writes events to the log asynchronously, it uses a buffer to store event contents prior to writing them. This variable controls the size of that buffer, in bytes. The server adjusts the value to a multiple of 4096. The plugin uses a single buffer, which it allocates when it initializes and removes when it terminates. The plugin allocates this buffer only if logging is asynchronous.
-
Property Value Command-Line Format --audit-log-compression=valueIntroduced 5.7.21 System Variable audit_log_compressionScope Global Dynamic No Type enumeration Default NONEValid Values NONEGZIPThe type of compression for the audit log file. Permitted values are
NONE(no compression; the default) andGZIP(GNU Zip compression). For more information, see Audit Log File Compression. -
Property Value Command-Line Format --audit-log-connection-policy=valueIntroduced 5.7.9 System Variable audit_log_connection_policyScope Global Dynamic Yes Type enumeration Default ALLValid Values ALLERRORSNONENoteThis variable applies only to legacy mode audit log filtering (see Section 6.5.5.7, “Legacy Mode Audit Log Filtering”).
The policy controlling how the audit log plugin writes connection events to its log file. The following table shows the permitted values.
Value Description ALLLog all connection events ERRORSLog only failed connection events NONEDo not log connection events NoteAt server startup, any explicit value given for
audit_log_connection_policymay be overridden ifaudit_log_policyis also specified, as described in Section 6.5.5.5, “Audit Log Logging Control”. -
Property Value Introduced 5.7.9 System Variable audit_log_current_sessionScope Global, Session Dynamic No Type boolean Default depends on filtering policyWhether audit logging is enabled for the current session. The session value of this variable is read only. It is set when the session begins based on the values of the
audit_log_include_accountsandaudit_log_exclude_accountssystem variables. The audit log plugin uses the session value to determine whether to audit events for the session. (There is a global value, but the plugin does not use it.) -
Property Value Command-Line Format --audit-log-encryption=valueIntroduced 5.7.21 System Variable audit_log_encryptionScope Global Dynamic No Type enumeration Default NONEValid Values NONEAESThe type of encryption for the audit log file. Permitted values are
NONE(no encryption; the default) andAES(AES-256-CBC cipher encryption). For more information, see Audit Log File Encryption. -
Property Value Command-Line Format --audit-log-exclude-accounts=valueIntroduced 5.7.9 System Variable audit_log_exclude_accountsScope Global Dynamic Yes Type string Default NULLNoteThis variable applies only to legacy mode audit log filtering (see Section 6.5.5.7, “Legacy Mode Audit Log Filtering”).
The accounts for which events should not be logged. The value should be
NULLor a string containing a list of one or more comma-separated account names. For more information, see Section 6.5.5.6, “Audit Log Filtering”.Modifications to
audit_log_exclude_accountsaffect only connections created subsequent to the modification, not existing connections. -
Property Value Command-Line Format --audit-log-file=file_nameIntroduced 5.7.9 System Variable audit_log_fileScope Global Dynamic No Type file name Default audit.logThe base name and suffix of the file to which the audit log plugin writes events. The default value is
audit.log, regardless of logging format. To have the name suffix correspond to the format, set the name explicitly, choosing a different suffix (for example,audit.xmlfor XML format,audit.jsonfor JSON format).If the value of
audit_log_fileis a relative path name, the plugin interprets it relative to the data directory. If the value is a full path name, the plugin uses the value as is. A full path name may be useful if it is desirable to locate audit files on a separate file system or directory. For security reasons, the audit log file should be written to a directory accessible only to the MySQL server and to users with a legitimate reason to view the log.For details about how the audit log plugin interprets the
audit_log_filevalue and the rules for file renaming that occurs at plugin initialization and termination, see Audit Log File Name.As of MySQL 5.7.21, the audit log plugin uses the directory containing the audit log file (determined from the
audit_log_filevalue) as the location to search for readable audit log files. From these log files and the current file, the plugin constructs a list of the ones that are subject to use with the audit log bookmarking and reading functions. See Audit Log File Reading. -
Property Value Introduced 5.7.13 System Variable audit_log_filter_idScope Global, Session Dynamic No Type integer The session value of this variable indicates the internally maintained ID of the audit filter for the current session. A value of 0 means that the session has no filter assigned.
-
Property Value Introduced 5.7.9 System Variable audit_log_flushScope Global Dynamic Yes Type boolean Default OFFWhen this variable is set to enabled (1 or
ON), the audit log plugin closes and reopens its log file to flush it. (The value remainsOFFso that you need not disable it explicitly before enabling it again to perform another flush.) Enabling this variable has no effect unlessaudit_log_rotate_on_sizeis 0. For more information, see Section 6.5.5.5, “Audit Log Logging Control”. -
Property Value Command-Line Format --audit-log-format=valueIntroduced 5.7.9 System Variable audit_log_formatScope Global Dynamic No Type (>= 5.7.9) enumeration Default (>= 5.7.9) NEWValid Values (>= 5.7.21) OLDNEWJSONValid Values (>= 5.7.9, <= 5.7.20) OLDNEWThe audit log file format. Permitted values are
OLD(old-style XML),NEW(new-style XML; the default), and (as of MySQL 5.7.21)JSON. For details about each format, see Section 6.5.5.4, “Audit Log File Formats”.NoteFor information about issues to consider when changing the log format, see Audit Log File Format.
-
Property Value Command-Line Format --audit-log-include-accounts=valueIntroduced 5.7.9 System Variable audit_log_include_accountsScope Global Dynamic Yes Type string Default NULLNoteThis variable applies only to legacy mode audit log filtering (see Section 6.5.5.7, “Legacy Mode Audit Log Filtering”).
The accounts for which events should be logged. The value should be
NULLor a string containing a list of one or more comma-separated account names. For more information, see Section 6.5.5.6, “Audit Log Filtering”.Modifications to
audit_log_include_accountsaffect only connections created subsequent to the modification, not existing connections. -
Property Value Command-Line Format --audit-log-policy=valueIntroduced 5.7.9 System Variable audit_log_policyScope Global Dynamic No Type enumeration Default ALLValid Values ALLLOGINSQUERIESNONENoteThis variable applies only to legacy mode audit log filtering (see Section 6.5.5.7, “Legacy Mode Audit Log Filtering”).
The policy controlling how the audit log plugin writes events to its log file. The following table shows the permitted values.
Value Description ALLLog all events LOGINSLog only login events QUERIESLog only query events NONELog nothing (disable the audit stream) audit_log_policycan be set only at server startup. At runtime, it is a read-only variable. Two other system variables,audit_log_connection_policyandaudit_log_statement_policy, provide finer control over logging policy and can be set either at startup or at runtime. If you useaudit_log_policyat startup instead of the other two variables, the server uses its value to set those variables. For more information about the policy variables and their interaction, see Section 6.5.5.5, “Audit Log Logging Control”. -
Property Value Command-Line Format --audit-log-read-buffer-size=#Introduced 5.7.21 System Variable audit_log_read_buffer_sizeScope Global Dynamic No Type (64-bit platforms) integer Type (32-bit platforms) integer Default (64-bit platforms) 1048576Default (32-bit platforms) 1048576Minimum (64-bit platforms) 524288Minimum (32-bit platforms) 524288Maximum (64-bit platforms) 18446744073709547520Maximum (32-bit platforms) 4294967295The buffer size for reading from the audit log file, in bytes. The
audit_log_read()function reads no more than this many bytes. Log file reading is supported only for JSON logging format. For more information, see Audit Log File Reading. -
Property Value Command-Line Format --audit-log-rotate-on-size=NIntroduced 5.7.9 System Variable audit_log_rotate_on_sizeScope Global Dynamic Yes Type integer Default 0If the
audit_log_rotate_on_sizevalue is 0, the audit log plugin does not perform automatic log file rotation. Instead, useaudit_log_flushto close and reopen the log on demand. In this case, manually rename the file externally to the server before flushing it.If the
audit_log_rotate_on_sizevalue is greater than 0, automatic size-based log file rotation occurs. Whenever a write to the log file causes its size to exceed theaudit_log_rotate_on_sizevalue, the audit log plugin closes the current log file, renames it, and opens a new log file.For more information about audit log file rotation, see Audit Log File Space Management and Name Rotation.
If you set this variable to a value that is not a multiple of 4096, it is truncated to the nearest multiple. (Thus, setting it to a value less than 4096 has the effect of setting it to 0 and no rotation occurs, except manually.)
-
Property Value Command-Line Format --audit-log-statement-policy=valueIntroduced 5.7.9 System Variable audit_log_statement_policyScope Global Dynamic Yes Type enumeration Default ALLValid Values ALLERRORSNONENoteThis variable applies only to legacy mode audit log filtering (see Section 6.5.5.7, “Legacy Mode Audit Log Filtering”).
The policy controlling how the audit log plugin writes statement events to its log file. The following table shows the permitted values.
Value Description ALLLog all statement events ERRORSLog only failed statement events NONEDo not log statement events NoteAt server startup, any explicit value given for
audit_log_statement_policymay be overridden ifaudit_log_policyis also specified, as described in Section 6.5.5.5, “Audit Log Logging Control”. -
Property Value Command-Line Format --audit-log-strategy=valueIntroduced 5.7.9 System Variable audit_log_strategyScope Global Dynamic No Type enumeration Default ASYNCHRONOUSValid Values ASYNCHRONOUSPERFORMANCESEMISYNCHRONOUSSYNCHRONOUSThe logging method used by the audit log plugin. These strategy values are permitted:
ASYNCHRONOUS: Log asynchronously. Wait for space in the output buffer.PERFORMANCE: Log asynchronously. Drop requests for which there is insufficient space in the output buffer.SEMISYNCHRONOUS: Log synchronously. Permit caching by the operating system.SYNCHRONOUS: Log synchronously. Callsync()after each request.
If the audit log plugin is enabled, it exposes several status variables that provide operational information. These variables are available for for legacy mode audit filtering and JSON mode audit filtering.
The size of the current audit log file. The value increases when an event is written to the log and is reset to 0 when the log is rotated.
The size of the largest dropped event in performance logging mode. For a description of logging modes, see Section 6.5.5.5, “Audit Log Logging Control”.
The number of events handled by the audit log plugin, whether or not they were written to the log based on filtering policy (see Section 6.5.5.5, “Audit Log Logging Control”).
The number of events handled by the audit log plugin that were filtered (not written to the log) based on filtering policy (see Section 6.5.5.5, “Audit Log Logging Control”).
The number of events lost in performance logging mode because an event was larger than than the available audit log buffer space. This value may be useful for assessing how to set
audit_log_buffer_sizeto size the buffer for performance mode. For a description of logging modes, see Section 6.5.5.5, “Audit Log Logging Control”.The number of events written to the audit log.
The total size of events written to all audit log files. Unlike
Audit_log_current_size, the value ofAudit_log_total_sizeincreases even when the log is rotated.The number of times an event had to wait for space in the audit log buffer in asynchronous logging mode. For a description of logging modes, see Section 6.5.5.5, “Audit Log Logging Control”.
MySQL Enterprise Audit is subject to these general restrictions:
Only SQL statements are logged. Changes made by no-SQL APIs, such as memcached, Node.JS, and the NDB API, are not logged.
Only top-level statements are logged, not statements within stored programs such as triggers or stored procedures.
Contents of files referenced by statements such as
LOAD DATA INFILEare not logged.Prior to MySQL 5.7.21, MySQL Enterprise Audit uses
MyISAMtables in themysqlsystem database. Group Replication does not supportMyISAMtables. Consequently, MySQL Enterprise Audit and Group Replication cannot be used together.
NDB Cluster. It is possible to use MySQL Enterprise Audit with MySQL NDB Cluster, subject to the following conditions:
All changes to be logged must be done using the SQL interface. Changes using no-SQL interfaces, such as those provided by the NDB API, memcached, or ClusterJ, are not logged.
The plugin must be installed on each MySQL server that is used to execute SQL on the cluster.
Audit plugin data must be aggregated amongst all MySQL servers used with the cluster. This aggregation is the responsibility of the application or user.
MySQL Enterprise Firewall is an extension included in MySQL Enterprise Edition, a commercial product. To learn more about commercial products, see http://www.mysql.com/products/.
MySQL Enterprise Edition includes MySQL Enterprise Firewall, an application-level firewall that enables database administrators to permit or deny SQL statement execution based on matching against whitelists of accepted statement patterns. This helps harden MySQL Server against attacks such as SQL injection or attempts to exploit applications by using them outside of their legitimate query workload characteristics.
Each MySQL account registered with the firewall has its own statement whitelist, enabling protection to be tailored per account. For a given account, the firewall can operate in recording, protecting, or detecting mode, for training in the accepted statement patterns, active protection against unacceptable statements, or passive detection of unacceptable statements. The diagram illustrates how the firewall processes incoming statements in each mode.

The following sections describe the components of MySQL Enterprise Firewall, discuss how to install and use it, and provide reference information for its components.
MySQL Enterprise Firewall is based on a plugin library that implements these components:
A server-side plugin named
MYSQL_FIREWALLexamines SQL statements before they execute and, based on its in-memory cache, renders a decision whether to execute or reject each statement.Server-side plugins named
MYSQL_FIREWALL_USERSandMYSQL_FIREWALL_WHITELISTimplementINFORMATION_SCHEMAtables that provide views into the firewall data cache.System tables named
firewall_usersandfirewall_whitelistin themysqldatabase provide persistent storage of firewall data.Stored procedures named
sp_set_firewall_mode()andsp_reload_firewall_rules()perform tasks such as registering MySQL accounts with the firewall, establishing their operational mode, and managing transfer of firewall data between the cache and the underlying system tables.A set of user-defined functions provides an SQL-level API for lower-level tasks such as synchronizing the cache with the underlying system tables.
System variables enable firewall configuration and status variables provide runtime operational information.
MySQL Enterprise Firewall installation is a one-time operation that installs the components described in Section 6.5.6.1, “MySQL Enterprise Firewall Components”. Installation can be performed using a graphical interface or manually:
On Windows, MySQL Installer includes an option to enable MySQL Enterprise Firewall for you.
MySQL Workbench 6.3.4 or higher can install MySQL Enterprise Firewall, enable or disable an installed firewall, or uninstall the firewall.
Manual MySQL Enterprise Firewall installation involves running a script located in the
sharedirectory of your MySQL installation.
If installed, MySQL Enterprise Firewall involves some minimal overhead even when disabled. To avoid this overhead, do not install the firewall unless you plan to use it.
MySQL Enterprise Firewall does not work together with the query cache. If the query cache is enabled, disable it before installing the firewall (see Section 8.10.3.3, “Query Cache Configuration”).
For usage instructions, see Section 6.5.6.3, “Using MySQL Enterprise Firewall”. For reference information, see Section 6.5.6.4, “MySQL Enterprise Firewall Reference”.
If MySQL Enterprise Firewall is already installed from an older version of MySQL, uninstall it using the instructions given later in this section and then restart your server before installing the current version. In this case, it is also necessary to register your configuration again.
On Windows, you can use MySQL Installer to install MySQL Enterprise Firewall, as shown in Figure 6.2, “MySQL Enterprise Firewall Installation on Windows”. Check the Enable Enterprise Firewall checkbox. (Open Firewall port for network access has a different purpose. It refers to Windows Firewall and controls whether Windows blocks the TCP/IP port on which the MySQL server listens for client connections.)
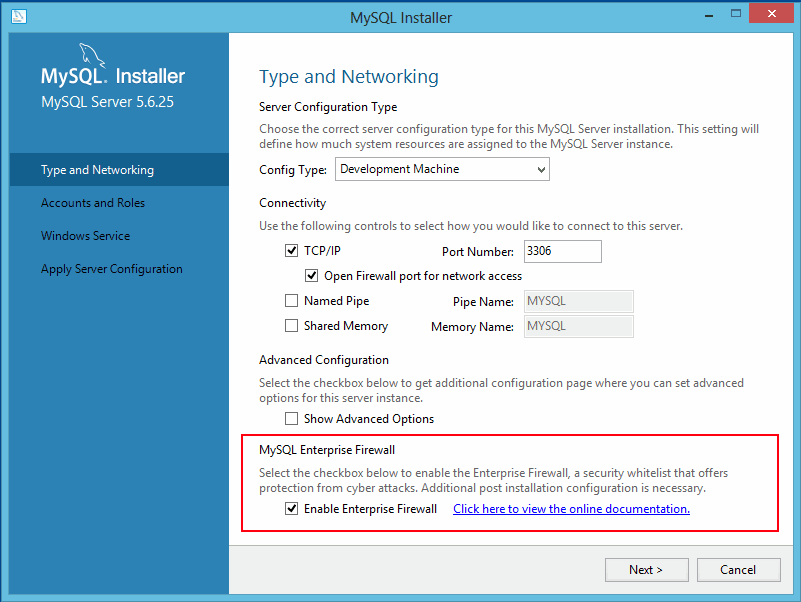
To install MySQL Enterprise Firewall using MySQL Workbench 6.3.4 or higher, see MySQL Enterprise Firewall Interface.
To install MySQL Enterprise Firewall manually, look in the
share directory of your MySQL
installation and choose the script that is appropriate for
your platform. The available scripts differ in the suffix used
to refer to the plugin library file:
win_install_firewall.sql: Choose this script for Windows systems that use.dllas the file name suffix.linux_install_firewall.sql: Choose this script for Linux and similar systems that use.soas the file name suffix.
The installation script creates stored procedures in the
default database, so choose a database to use. Then run the
script as follows, naming the chosen database on the command
line. The example here uses the mysql
database and the Linux installation script. Make the
appropriate substitutions for your system.
shell>mysql -u root -p mysql < linux_install_firewall.sqlEnter password:(enter root password here)
As of MySQL 5.7.21, for a new installation of MySQL Enterprise Firewall,
InnoDB is used instead of
MyISAM for the firewall tables. For
upgrades to an installation for which MySQL Enterprise Firewall is already
installed, it is recommended that you alter the firewall
tables to use InnoDB:
ALTER TABLE mysql.firewall_users ENGINE=InnoDB; ALTER TABLE mysql.firewall_whitelist ENGINE=InnoDB;
Installing MySQL Enterprise Firewall either using a graphical interface or manually should enable the firewall. To verify that, connect to the server and execute this statement:
mysql> SHOW GLOBAL VARIABLES LIKE 'mysql_firewall_mode';
+---------------------+-------+
| Variable_name | Value |
+---------------------+-------+
| mysql_firewall_mode | ON |
+---------------------+-------+
MySQL Enterprise Firewall can be uninstalled using MySQL Workbench or manually.
To uninstall MySQL Enterprise Firewall using MySQL Workbench 6.3.4 or higher, see MySQL Enterprise Firewall Interface.
To uninstall MySQL Enterprise Firewall manually, execute the following
statements. It is assumed that the stored procedures were
created in the mysql database. Adjust the
DROP PROCEDURE statements
appropriately if the procedures were created in a different
database.
DROP TABLE mysql.firewall_whitelist; DROP TABLE mysql.firewall_users; UNINSTALL PLUGIN mysql_firewall; UNINSTALL PLUGIN mysql_firewall_whitelist; UNINSTALL PLUGIN mysql_firewall_users; DROP FUNCTION set_firewall_mode; DROP FUNCTION normalize_statement; DROP FUNCTION read_firewall_whitelist; DROP FUNCTION read_firewall_users; DROP FUNCTION mysql_firewall_flush_status; DROP PROCEDURE mysql.sp_set_firewall_mode; DROP PROCEDURE mysql.sp_reload_firewall_rules;
Before using MySQL Enterprise Firewall, install it according to the instructions provided in Section 6.5.6.2, “Installing or Uninstalling MySQL Enterprise Firewall”. Also, MySQL Enterprise Firewall does not work together with the query cache; disable the query cache if it is enabled (see Section 8.10.3.3, “Query Cache Configuration”).
This section describes how to configure MySQL Enterprise Firewall using SQL statements. Alternatively, MySQL Workbench 6.3.4 or higher provides a graphical interface for firewall control. See MySQL Enterprise Firewall Interface.
To enable or disable the firewall, set the
mysql_firewall_mode system
variable. By default, this variable is enabled when the firewall
is installed. To control the initial firewall state explicitly,
you can set the variable at server startup. For example, to
enable the firewall in an option file, use these lines:
[mysqld] mysql_firewall_mode=ON
It is also possible to disable or enable the firewall at runtime:
mysql>SET GLOBAL mysql_firewall_mode = OFF;mysql>SET GLOBAL mysql_firewall_mode = ON;
In addition to the global on/off firewall mode, each account registered with the firewall has its own operational mode. For an account in recording mode, the firewall learns an application's “fingerprint,” that is, the acceptable statement patterns that, taken together, form a whitelist. After training, switch the firewall to protecting mode to harden MySQL against access by statements that deviate from the fingerprint. For additional training, switch the firewall back to recording mode as necessary to update the whitelist with new statement patterns. An intrusion-detection mode is available that writes suspicious statements to the error log but does not deny access.
The firewall maintains whitelist rules on a per-account basis, enabling implementation of protection strategies such as these:
For an application that has unique protection requirements, configure it to use an account that is not used for any other purpose.
For applications that are related and share protection requirements, configure them as a group to use the same account.
Firewall operation is based on conversion of SQL statements to
normalized digest form. Firewall digests are like the statement
digests used by the Performance Schema (see
Section 25.9, “Performance Schema Statement Digests”).
However, unlike the Performance Schema, the relevant
digest-related system variable is
max_digest_length.
For a connection from a registered account, the firewall converts each incoming statement to normalized form and processes it according to the account mode:
In recording mode, the firewall adds the normalized statement to the account whitelist rules.
In protecting mode, the firewall compares the normalized statement to the account whitelist rules. If there is a match, the statement passes and the server continues to process it. Otherwise, the server rejects the statement and returns an error to the client. The firewall also writes the rejected statement to the error log if the
mysql_firewall_tracesystem variable is enabled.In detecting mode, the firewall matches statements as in protecting mode, but writes nonmatching statements to the error log without denying access.
Accounts that have a mode of OFF or are not
registered with the firewall are ignored by it.
To protect an account using MySQL Enterprise Firewall, follow these steps:
Register the account and put it in recording mode.
Connect to the MySQL server using the registered account and execute statements to be learned. This establishes the account's whitelist of accepted statements.
Switch the registered account to protecting mode.
The following example shows how to register an account with the
firewall, use the firewall to learn acceptable statements for
that account, and protect the account against execution of
unacceptable statements. The example account,
'fwuser'@'localhost', is for use by an
application that accesses tables in the
sakila database. (This database is available
at http://dev.mysql.com/doc/index-other.html.)
The user and host parts of the account name are quoted
separately for statements such as CREATE
USER and GRANT,
whereas to specify an account for use with a firewall
component, name it as a single quoted string
'fwuser@localhost'.
The convention for naming accounts as a single quoted string
for firewall components means that you cannot use accounts
that have embedded @ characters in the user
name.
Perform the steps in the following procedure using an
administrative MySQL account, except those designated for
execution by the account registered with the firewall. The
default database should be sakila for
statements executed using the registered account.
If necessary, create the account to be protected (choose an appropriate password) and grant it privileges for the
sakiladatabase:mysql>
CREATE USER 'fwuser'@'localhost' IDENTIFIED BY 'fWp@3sw0rd';mysql>GRANT ALL ON sakila.* TO 'fwuser'@'localhost';Use the
sp_set_firewall_mode()stored procedure to register the account with the firewall and place it in recording mode (if the procedure is located in a database other thanmysql, adjust the statement accordingly):mysql>
CALL mysql.sp_set_firewall_mode('fwuser@localhost', 'RECORDING');During the course of its execution, the stored procedure invokes firewall user-defined functions, which may produce output of their own.
Using the registered account, connect to the server, then execute some statements that are legitimate for it:
mysql>
SELECT first_name, last_name FROM customer WHERE customer_id = 1;mysql>UPDATE rental SET return_date = NOW() WHERE rental_id = 1;mysql>SELECT get_customer_balance(1, NOW());The firewall converts the statements to digest form and records them in the account whitelist.
NoteUntil the account executes statements in recording mode, its whitelist is empty, which is equivalent to “deny all.” If switched to protecting mode, the account will be effectively prohibited from executing statements.
At this point, the user and whitelist information is cached and can be seen in the firewall
INFORMATION_SCHEMAtables:mysql>
SELECT MODE FROM INFORMATION_SCHEMA.MYSQL_FIREWALL_USERSWHERE USERHOST = 'fwuser@localhost';+-----------+ | MODE | +-----------+ | RECORDING | +-----------+ mysql>SELECT RULE FROM INFORMATION_SCHEMA.MYSQL_FIREWALL_WHITELISTWHERE USERHOST = 'fwuser@localhost';+----------------------------------------------------------------------------+ | RULE | +----------------------------------------------------------------------------+ | SELECT `first_name` , `last_name` FROM `customer` WHERE `customer_id` = ? | | SELECT `get_customer_balance` ( ? , NOW ( ) ) | | UPDATE `rental` SET `return_date` = NOW ( ) WHERE `rental_id` = ? | | SELECT @@`version_comment` LIMIT ? | +----------------------------------------------------------------------------+NoteThe
@@version_commentrule comes from a statement sent automatically by the mysql client when you connect to the server as the registered user.It is important to train the firewall under conditions matching application use. For example, a given MySQL connector might send statements to the server at the beginning of a connection to determine server characteristics and capabilities. If an application normally is used through that connector, train the firewall that way, too. That enables those initial statements to become part of the whitelist for the account associated with the application.
Use the stored procedure to switch the registered user to protecting mode:
mysql>
CALL mysql.sp_set_firewall_mode('fwuser@localhost', 'PROTECTING');ImportantSwitching the account out of
RECORDINGmode synchronizes its firewall cache data to the underlyingmysqlsystem database tables for persistent storage. If you do not switch the mode for a user who is being recorded, the cached whitelist data is not written to the system tables and will be lost when the server is restarted.Using the registered account, execute some acceptable and unacceptable statements. The firewall matches each one against the account whitelist and accepts or rejects it.
This statement is not identical to a training statement but produces the same normalized statement as one of them, so the firewall accepts it:
mysql>
SELECT first_name, last_name FROM customer WHERE customer_id = '48';+------------+-----------+ | first_name | last_name | +------------+-----------+ | ANN | EVANS | +------------+-----------+These statements do not match anything in the whitelist and each results in an error:
mysql>
SELECT first_name, last_name FROM customer WHERE customer_id = 1 OR TRUE;ERROR 1045 (28000): Statement was blocked by Firewall mysql>SHOW TABLES LIKE 'customer%';ERROR 1045 (28000): Statement was blocked by Firewall mysql>TRUNCATE TABLE mysql.slow_log;ERROR 1045 (28000): Statement was blocked by FirewallThe firewall also writes the rejected statements to the error log if the
mysql_firewall_tracesystem variable is enabled. For example:[Note] Plugin MYSQL_FIREWALL reported: 'ACCESS DENIED for fwuser@localhost. Reason: No match in whitelist. Statement: TRUNCATE TABLE `mysql` . `slow_log` '
You can use these log messages in your efforts to identify the source of attacks.
You can log nonmatching statements as suspicious without denying access. To do this, put the account in intrusion-detecting mode:
mysql>
CALL mysql.sp_set_firewall_mode('fwuser@localhost', 'DETECTING');Using the registered account, connect to the server, then execute a statement that does not match the whitelist:
mysql>
SHOW TABLES LIKE 'customer%';+------------------------------+ | Tables_in_sakila (customer%) | +------------------------------+ | customer | | customer_list | +------------------------------+In detecting mode, the firewall permits the nonmatching statement to execute but writes a message to the error log:
[Note] Plugin MYSQL_FIREWALL reported: 'SUSPICIOUS STATEMENT from 'fwuser@localhost'. Reason: No match in whitelist. Statement: SHOW TABLES LIKE ? '
To assess firewall activity, examine its status variables:
mysql>
SHOW GLOBAL STATUS LIKE 'Firewall%';+----------------------------+-------+ | Variable_name | Value | +----------------------------+-------+ | Firewall_access_denied | 3 | | Firewall_access_granted | 4 | | Firewall_access_suspicious | 1 | | Firewall_cached_entries | 4 | +----------------------------+-------+The variables indicate the number of statements rejected, accepted, logged as suspicious, and added to the cache, respectively. The
Firewall_access_grantedcount is 4 because of the@@version_commentstatement sent by the mysql client each of the three time you used it to connect as the registered user, plus theSHOW TABLESstatement that was not blocked inDETECTINGmode.
Should additional training for an account be necessary, switch it to recording mode again, then back to protecting mode after executing statements to be added to the whitelist.
The following discussion serves as a reference to MySQL Enterprise Firewall components:
MySQL Enterprise Firewall maintains account and whitelist information. It uses
INFORMATION_SCHEMA tables to provide views
into cached data, and tables in the mysql
system database to store this data in persistent form. When
enabled, the firewall bases its operational decisions on the
cached data.
The INFORMATION_SCHEMA tables are
accessible by anyone. The mysql tables can
be accessed only by users with privileges for that database.
The INFORMATION_SCHEMA.MYSQL_FIREWALL_USERS
and mysql.firewall_users tables list
registered firewall accounts and their operational modes. The
tables have these columns:
USERHOSTAn account registered with the firewall. Each account has the format
user_name@host_nameMODEThe current firewall operational mode for the account. The permitted mode values are
OFF,DETECTING,PROTECTING,RECORDING, andRESET. For details about their meanings, see the description ofsp_set_firewall_mode()in Section 6.5.6.4.2, “MySQL Enterprise Firewall Procedures and Functions”.
The
INFORMATION_SCHEMA.MYSQL_FIREWALL_WHITELIST
and mysql.firewall_whitelist tables list
registered firewall accounts and their whitelists. The tables
have these columns:
USERHOSTAn account registered with the firewall. The format is the same as for the user account tables.
RULEA normalized statement indicating an acceptable statement pattern for the account. An account whitelist is the union of its rules.
MySQL Enterprise Firewall has stored procedures that perform tasks such as registering MySQL accounts with the firewall, establishing their operational mode, and managing transfer of firewall data between the cache and the underlying system tables. It also has a set of user-defined functions (UDFs) that provides an SQL-level API for lower-level tasks such as synchronizing the cache with the underlying system tables.
Under normal operation, the stored procedures implement the user interface. The UDFs are invoked by the stored procedures, not directly by users.
To invoke a stored procedure when the default database is not the database that contains the procedure, qualify the procedure name with the database name. For example:
CALL mysql.sp_set_firewall_mode(user,mode);
The following list describes each firewall stored procedure and UDF:
sp_reload_firewall_rules(user)This stored procedure uses firewall UDFs to reset a registered account and reload the in-memory rules for it from the rules stored in the
mysql.firewall_whitelisttable. This procedure provides control over firewall operation for individual accounts.The
userargument names the affected account, as a string inuser_name@host_nameExample:
CALL mysql.sp_reload_firewall_rules('fwuser@localhost');WarningThis procedure sets the account mode to
RESET, which clears the account whitelist and sets its mode toOFF. If the account mode was notOFFprior to thesp_reload_firewall_rules()call, usesp_set_firewall_mode()to restore its previous mode after reloading the rules. For example, if the account was inPROTECTINGmode, that is no longer true after callingsp_reload_firewall_rules()and you must set it toPROTECTINGagain explicitly.sp_set_firewall_mode(user,mode)This stored procedure registers a MySQL account with the firewall and establishes its operational mode. The procedure also invokes firewall UDFs as necessary to transfer firewall data between the cache and the underlying system tables. This procedure may be called even if the
mysql_firewall_modesystem variable isOFF, although setting the mode for an account has no operational effect while the firewall is disabled.The
userargument names the affected account, as a string inuser_name@host_nameThe
modeis the operational mode for the user, as a string. These mode values are permitted:OFF: Disable the firewall for the account.DETECTING: Intrusion-detection mode: Write suspicious (nonmatching) statements to the error log but do not deny access.PROTECTING: Protect the account by matching incoming statements against the account whitelist.RECORDING: Training mode: Record acceptable statements for the account. Incoming statements that do not immediately fail with a syntax error are recorded to become part of the account whitelist rules.RESET: Clear the account whitelist and set the account mode toOFF.
Switching the mode for an account to any mode but
RECORDINGsynchronizes the firewall cache data to the underlyingmysqlsystem database tables for persistent storage. Switching the mode fromOFFtoRECORDINGreloads the whitelist from themysql.firewall_whitelisttable into the cache.If an account has an empty whitelist, setting its mode to
PROTECTINGproduces an error message that is returned in a result set, but not an SQL error:mysql>
CALL mysql.sp_set_firewall_mode('a@b','PROTECTING');+----------------------------------------------------------------------+ | set_firewall_mode(arg_userhost, arg_mode) | +----------------------------------------------------------------------+ | ERROR: PROTECTING mode requested for a@b but the whitelist is empty. | +----------------------------------------------------------------------+ 1 row in set (0.02 sec) Query OK, 0 rows affected (0.02 sec)mysql_firewall_flush_status()This UDF resets several firewall status variables to 0:
Firewall_access_denied Firewall_access_granted Firewall_access_suspicious
Example:
SELECT mysql_firewall_flush_status();
normalize_statement(stmt)This UDF normalizes an SQL statement into the digest form used for whitelist rules.
Example:
SELECT normalize_statement('SELECT * FROM t1 WHERE c1 > 2');read_firewall_users(user,mode)This aggregate UDF updates the firewall user cache through a
SELECTstatement on themysql.firewall_userstable.Example:
SELECT read_firewall_users('fwuser@localhost', 'RECORDING') FROM mysql.firewall_users;read_firewall_whitelist(user,rule)This aggregate UDF updates the recorded statement cache through a
SELECTstatement on themysql.firewall_whitelisttable.Example:
SELECT read_firewall_whitelist('fwuser@localhost', 'RECORDING') FROM mysql.firewall_whitelist;set_firewall_mode(user,mode)This UDF manages the user cache and establishes the user operational mode.
Example:
SELECT set_firewall_mode('fwuser@localhost', 'RECORDING');
MySQL Enterprise Firewall supports the following system variables. Use them to configure firewall operation. These variables are unavailable unless the firewall is installed (see Section 6.5.6.2, “Installing or Uninstalling MySQL Enterprise Firewall”).
-
Property Value Command-Line Format --mysql-firewall-mode={OFF|ON}Introduced 5.7.9 System Variable mysql_firewall_modeScope Global Dynamic Yes Type boolean Default ONWhether MySQL Enterprise Firewall is enabled (the default) or disabled.
-
Property Value Command-Line Format --mysql-firewall-trace={OFF|ON}Introduced 5.7.9 System Variable mysql_firewall_traceScope Global Dynamic Yes Type boolean Default OFFWhether the MySQL Enterprise Firewall trace is enabled or disabled (the default). When
mysql_firewall_traceis enabled, forPROTECTINGmode, the firewall writes rejected statements to the error log.
MySQL Enterprise Firewall supports the following status variables. Use them to
obtain information about firewall operational status. These
variables are unavailable unless the firewall is installed
(see Section 6.5.6.2, “Installing or Uninstalling MySQL Enterprise Firewall”). Firewall status
variables are set to 0 whenever the
MYSQL_FIREWALL plugin is installed or the
server is started. Many of them are reset to zero by the
mysql_firewall_flush_status() UDF (see
Section 6.5.6.4.2, “MySQL Enterprise Firewall Procedures and Functions”).
The number of statements rejected by MySQL Enterprise Firewall.
The number of statements accepted by MySQL Enterprise Firewall.
The number of statements logged by MySQL Enterprise Firewall as suspicious for users who are in
DETECTINGmode.The number of statements recorded by MySQL Enterprise Firewall, including duplicates.